Camping is exciting and messy and even a little uncomfortable. But there’s fun in that change of pace from the “real world,” which, of course, is ironic because there’s little in this world more “real” than abandoning the creature comforts of home. When we venture outside, we often discover what we’re made out of—and that’s usually more than we thought.
You can travel far, deep in the deepest woods, or a few feet out your back door. You can go with a group or alone. Sleep in a tent, a car, a cabin or on the dirt. Pack a lot or pack a little. There’s no wrong way to do it.
Not sure where to start? We’ve helped generations of people camp since 1938. We know camping. We’re here for you. Below, check out our editors’ hard-earned tips on planning, setting up, sleeping well, eating better and having fun.
Let’s Plan
Don’t Forget Anything
These key essentials make for a cozy home away from home. For a full, detailed packing list, check out our Expert Advice Camping Checklist.
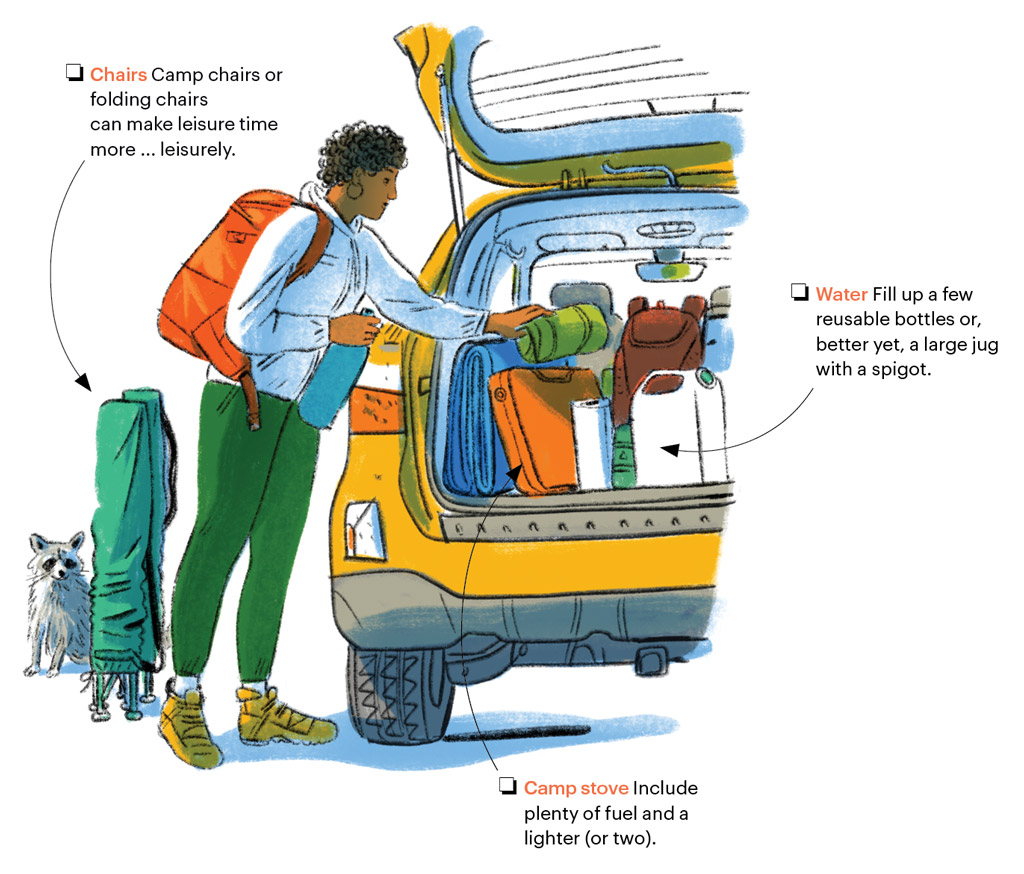

- Make sure you’ve packed your tent with its rainfly, footprint, stakes and a hammer. Practice pitching at home or in the backyard first to make sure you know how and that you’ve got all the pieces.
- Choose a sleeping bag with a temperature rating lower than the lowest temperature you expect. A sheet or liner can add warmth (and time between washes).
- A sleeping pad not only helps soften your sleep but also insulates you from the cold ground, keeping you warmer at night.
- You’ll want to illuminate your campsite (and the route to the bathroom) after dark with a lantern, headlamp or flashlight. Pack extra batteries.
- Your kitchen kit should include cooking pots, knives, a cutting board, utensils, plates, bowls and cups. Easy to forget, hard to do without: can opener, bottle opener, corkscrew.
- Make sure you have a cleanup kit with dish buckets, sponges, biodegradable soap, paper towels or dish towels and trash bags.
- Check the night’s low temperature and day’s high and pack clothes and toiletries for those, preparing for huge swings. Don’t forget a rain shell, hat, gloves and socks.
- Replenish used items in your first-aid kit like bandages and tape. Tweezers are more important than you’d think.
TRY THIS! Pack ice cream in a double-wall insulated bottle. At-Camp You will thank Planner You.
HELP IS HERE! If your ice is melting and getting your food wet, freeze reusable plastic bottles filled with water or juice and place those in your cooler in lieu of loose ice. They’ll take longer to thaw, and you can drink the contents once they do.
Where Should I Go?
Learn the differences among the country’s most prominent land types to help plan your dream trip. Reminder: Check ahead for area and facility closures.
NATIONAL PARKS These federally managed, recreation-oriented crown jewels typically feature developed campgrounds that are often booked well in advance. (Some parks may reserve sites for walk-ins, and others have primitive or dispersed camping.) Usually a great choice for scenery and for families; limited allowance for dogs.
NATIONAL FORESTS AND BUREAU OF LAND MANAGEMENT (BLM) LAND Also managed by the federal government, these two land types allow “multiple use”—think logging, mining and grazing—in addition to recreation. Both feature some reservable designated campgrounds and lots of free dispersed camping, some of which can be incredible.
STATE AND LOCAL PARKS These locally managed areas are usually gorgeous, though they’re rarely as spectacular as a national park. There are more than 8,500 state parks in the U.S., with more than 200,000 campsites, many of which can be booked ahead of time or even the day before.
PRIVATE PROPERTY This includes privately owned campgrounds and RV parks, with many near popular national parks and forests. Hipcamp is a great resource for finding and reserving private lands campsites nationwide (and worldwide).
YOUR BACKYARD Hey, still counts. And there’s no fee.
Pick Your Paradise
So you’ve landed on the right area, but where to set up? Learn how to read a campground map to order up the perfect spot for you.

Campground maps are like blueprints for your outdoor digs. They vary based on land type and locale, but most legends help you make sense of the stuff that matters.
The park entrance is where you’ll enter the campground and register for your site. From there, decide if you want a tent site, RV site or cabin and consider things like hookups and traffic. Think about proximity to water, playgrounds, restrooms and trails, and choose a spot that gives you access to the things you like to do. You’ll also want to note the firewood situation at your campground (assuming fires are allowed; always check beforehand). Some spots provide it for a small fee, while others require you to BYO. Next, find out where you can park and where you can’t. Lastly, make note of where the camp host is based, even if you don’t anticipate needing their assistance. The camp host helps keep things running smoothly and performs light maintenance.
Let’s Set Up
Lay Out the Perfect Site
Set up early, in plenty of daylight, and follow this advice for a sweet night under the stars.
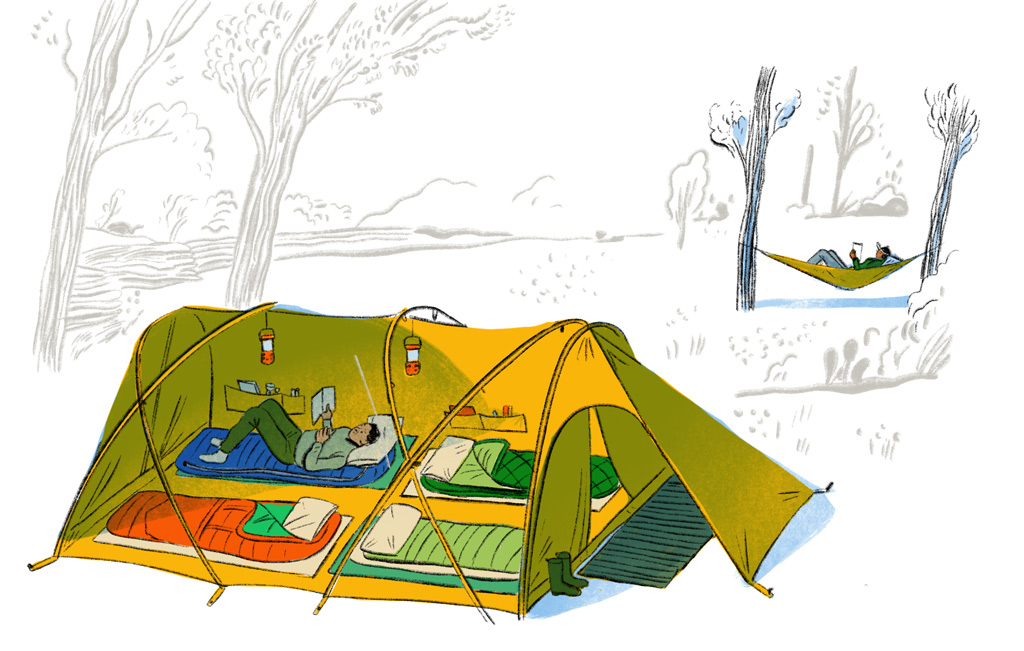
SCOUT YOUR SPOT. Look for trees, a hill or other natural windbreaks to put between you and the prevailing breeze. Camping under healthy trees can also be warmer and reduce condensation. Avoid low points where water may puddle during a storm or cool air might settle.
FOLLOW LEAVE NO TRACE PRINCIPLES WHEN CHOOSING A SITE. Seek out existing campsites if possible, especially in high-traffic areas. If none are available, look for spots where there’s little to no vegetation. If picking your own site, always camp at least 200 feet from lakes and streams.
FIND THE FLATTEST AREA POSSIBLE. Pay attention to the slant of the ground and make sure your head will be uphill of your feet. Don’t hesitate to lie down and try a few angles before staking the tent.
CLEAR BIG DEBRIS AND ROCKS BEFORE PUTTING THE TENT FOOTPRINT DOWN. Avoid camping near dead trees or limbs that could fall during a storm. Be strategic about which way the tent door faces. To prevent rain from blowing in, orient the door away from the wind. If the weather is hot, turn the door toward the wind for a cooling effect. Other factors to consider: ease of entry, the view and privacy.
TRY THIS! Place your headlamp inside an empty Nalgene to create a lantern that disperses ambient light around a larger area. The slightly opaque bottles are the best for creating soft light.
HELP IS HERE! To start a fire in the rain, first always keep a lighter on your person—it will work best when warm and dry. Create a bed of rocks or sticks as a platform to keep tinder off wet ground, then build around it with wood that’s as dry as possible.
Hang a hammock.
Pick two healthy trees (no dead branches) that are at least as thick as your thigh and approximately 15 to 20 feet apart. The suspension straps of your hammock should be wide and flat against the tree and should hang at an angle of around 30 degrees.
Bring your best friend.
But give her room to roam (while still abiding by leash laws) with this doggy zip-line trick: Tie webbing across two trees. Make sure the cordage is flat, like hammock straps, to protect the trees. Now use a carabiner to attach your dog’s leash. Don’t forget to put her water and bedding within the zip-line’s radius, and don’t leave her unattended while on the leash.
Stake Your Tent Well
To keep it roomy and stable, follow these steps.

(1) Pull the tent corners taut.
(2) Turn the stake hook so it faces away from the tent.
(3) Face the point of the stake toward the tent or guyline at a 45-degree angle to the ground.
(4) Push each stake all the way down to the hook, using a hammer or large rock.
Extra-hard ground? Pour some water on the spot you want to stake, and let it soak in for a few minutes.
Three Ways to Make Fire
Arrange your wood in one of these three common campfire lay patterns for a blazing good time.

CONE Simple and quick. Lean progressively thicker sticks around a pile of tinder to make a pyramid. Leave an opening for lighting.
LEAN-TO Good for wind or rain. Start with a big log, then prop up your kindling against it perpendicularly. Toss some tinder underneath the kindling and light.
LOG CABIN Begin with two parallel pieces of kindling around a tinder pile. Place the next two pieces on top, crossways, to form a square. Continue stacking this way.
Tip: Always use a designated fire ring, and check to ensure fires are permitted before getting started.

Let’s Relax
Master Interior Design
Whatever your style, from basic to glam, take time to arrange your sleeping quarters for optimum comfort.
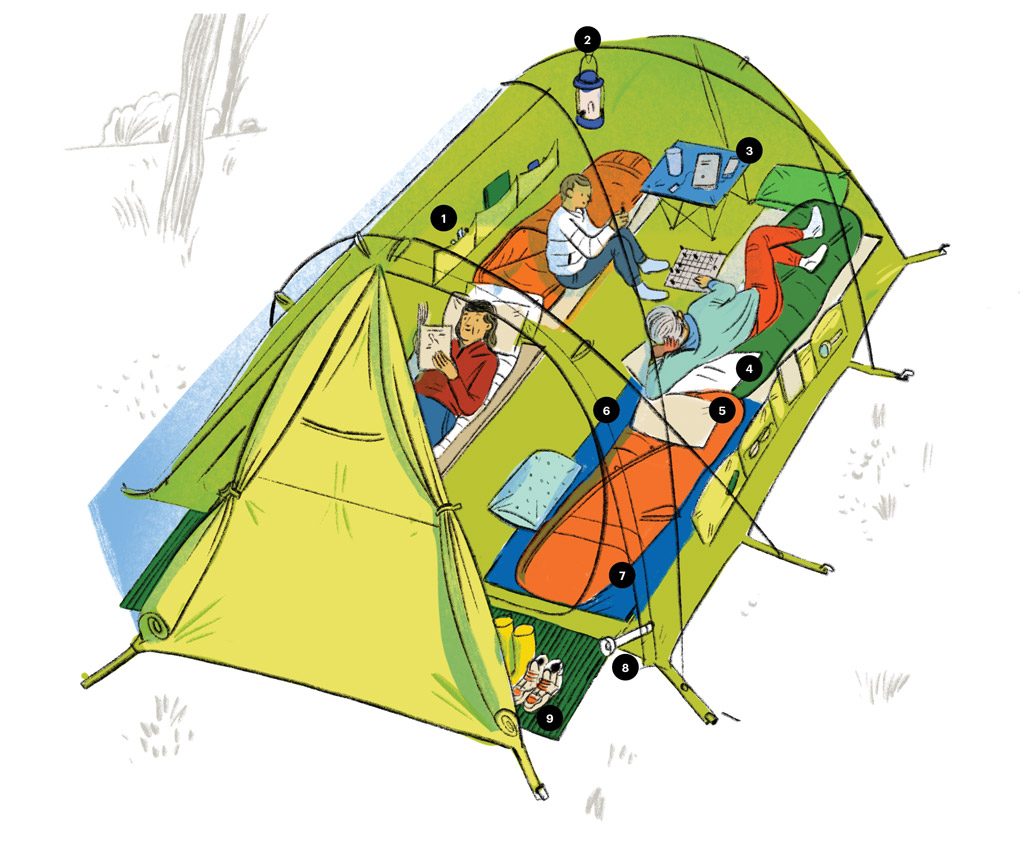
(1) Be strategic about your tent’s pockets. Try to arrange sleeping bags so everyone has storage space within arm’s reach for essentials like lip balm, a phone and glasses.
(2) Create hands-free mood lighting. Battery-powered LED string lights are a nice touch. Or hang a lantern or headlamp from the tent ceiling using a carabiner or rubber band.
(3) Keep gear organized. If you have room, a small folding table helps.
(4) Make it homey. Pillows and throws are a nice luxury.
(5) Keep clothes tidy. Either separate them from the rest of your belongings by folding them neatly or putting them in a stuff sack (which makes for an OK pillow if you forgot one). Put them under the foot of your sleeping bag (or inside your bag) in tight quarters, then move empty backpacks and duffels to the vestibule or your car. You can stash empties (like stuff sacks) under your sleeping pad to get them out of the way.
(6) Cover the floor. A rug, a ground cloth, or foam tiles can provide softness, speed cleanup and add a touch of style. (They can also protect delicate tent floors from dog claws and cushion your knees from whatever detritus lies beneath.)
(7) Properly position your bedding. If possible, arrange sleeping bags so everyone has easy access to a door.
(8) Tuck a light near the main door. You’ll appreciate it during nighttime restroom dashes.
(9) Key rule: No shoes in the tent. Designate a spot for them outside or just inside the door.
Upgrade Your Stargazing
If you can locate the (1) Big Dipper, you can find these other celestial hot spots.

(2) Polaris (the North Star) and the Little Dipper Follow the line between the two “pointer” stars at the front of the Big Dipper (the side away from the handle) up the top of the cup and toward the next relatively bright star in the sky. That’s Polaris—the North Star—which is always due north. Polaris is part of the handle of the Little Dipper (aka Ursa Minor).
(3) Pegasus Keep following that same line from the pointers past Polaris, and you’ll get to a large square of four stars that form the body of Pegasus (the mythical flying horse).
(4) Cassiopeia This is the large W-shaped constellation past the Big Dipper. Find it by tracing a line from the last star in the Big Dipper’s handle through and past Polaris.
How to Stay Warm at Night
So your sleep system isn’t cutting it. What can you do?
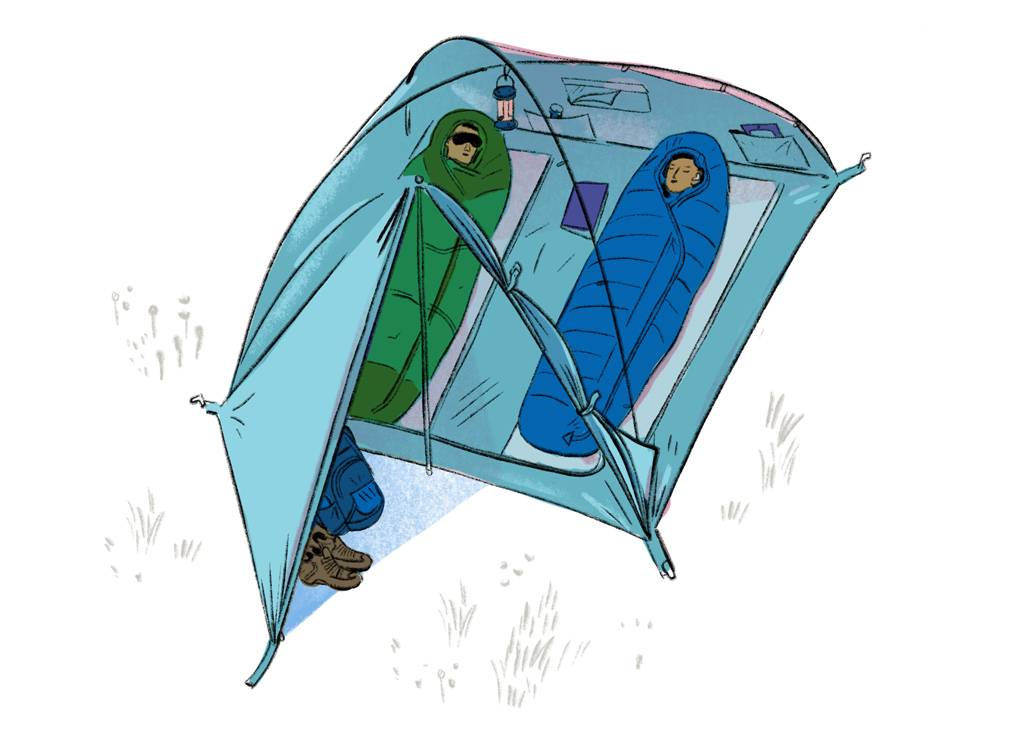
EXERCISE. If you go to bed cold, you’ll sleep cold. Set yourself up for a good night by increasing your core temperature before getting into your bag. Jumping jacks, sit-ups and push-ups do the trick.
WEAR MORE LAYERS. Add clothes, but be wary of things that cinch, like wrist hems and tight hiking socks, which can cut off blood circulation.
EAT. Your body burns a lot of energy trying to keep you warm; fuel your furnace.
GO PEE. When your bladder is full, your body expends energy to keep that liquid warm.
TIE OFF THE BOTTOM OF YOUR SLEEPING BAG. Your body can more easily warm up a smaller space.
MACGYVER A HOT-WATER BOTTLE. Fill a single-wall plastic bottle with boiling water and keep it inside your bag.

Let’s Eat
Create a 5-Star Camp Kitchen
A little foresight can maximize mealtime convenience, cleanliness and safety.
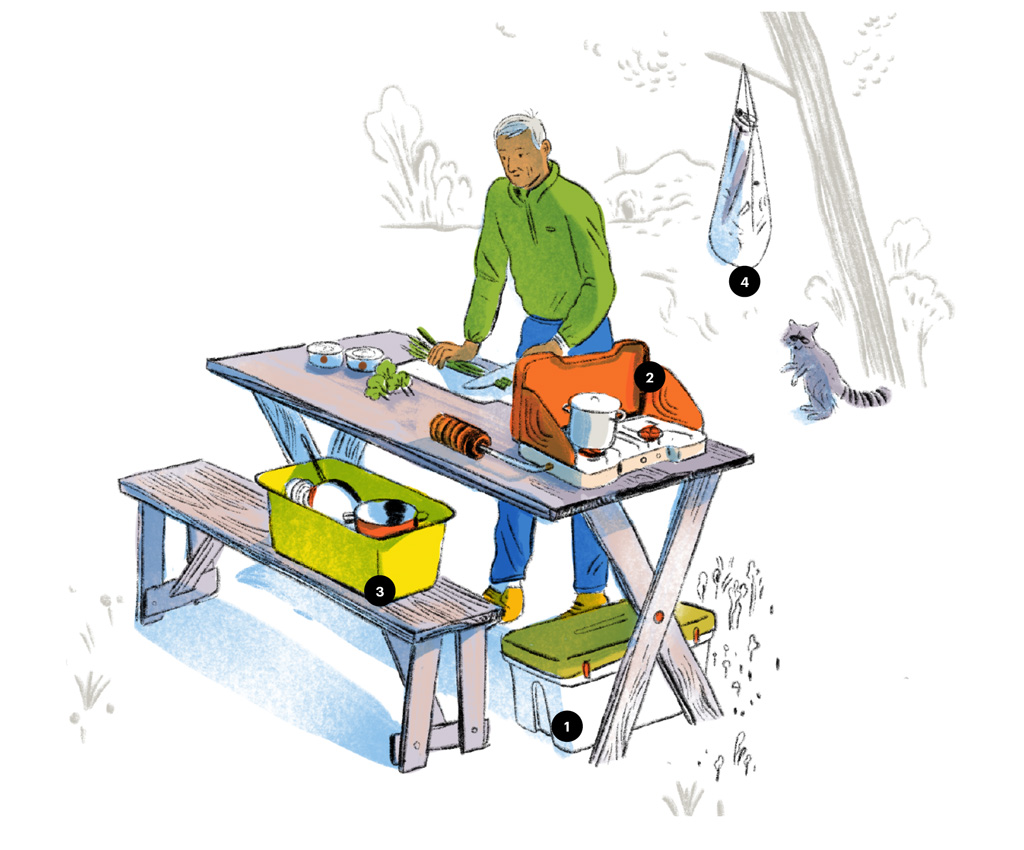
(1) Store all food away from critters. And never leave food unattended. Keep all food in coolers and sealed tubs or boxes, then move them to your car or a metal bear box (if your site has one) at night. During the day, keep coolers under a table, in the trunk or in the shade so food stays fresh longer.
(2) Create a windbreak for your stove.
(3) Keep utensils close. Anything you’ll need while cooking should be within arm’s reach.
(4) Designate a place for trash. Tie a bag to a tree, or use a pop-up clothes hamper lined with a bag as a portable trash can. Consider separating compost and recyclables into their own bags. At night, move your trash into the bear box (if there is one) or put it in your vehicle. (Always check your area’s specific regulations.)
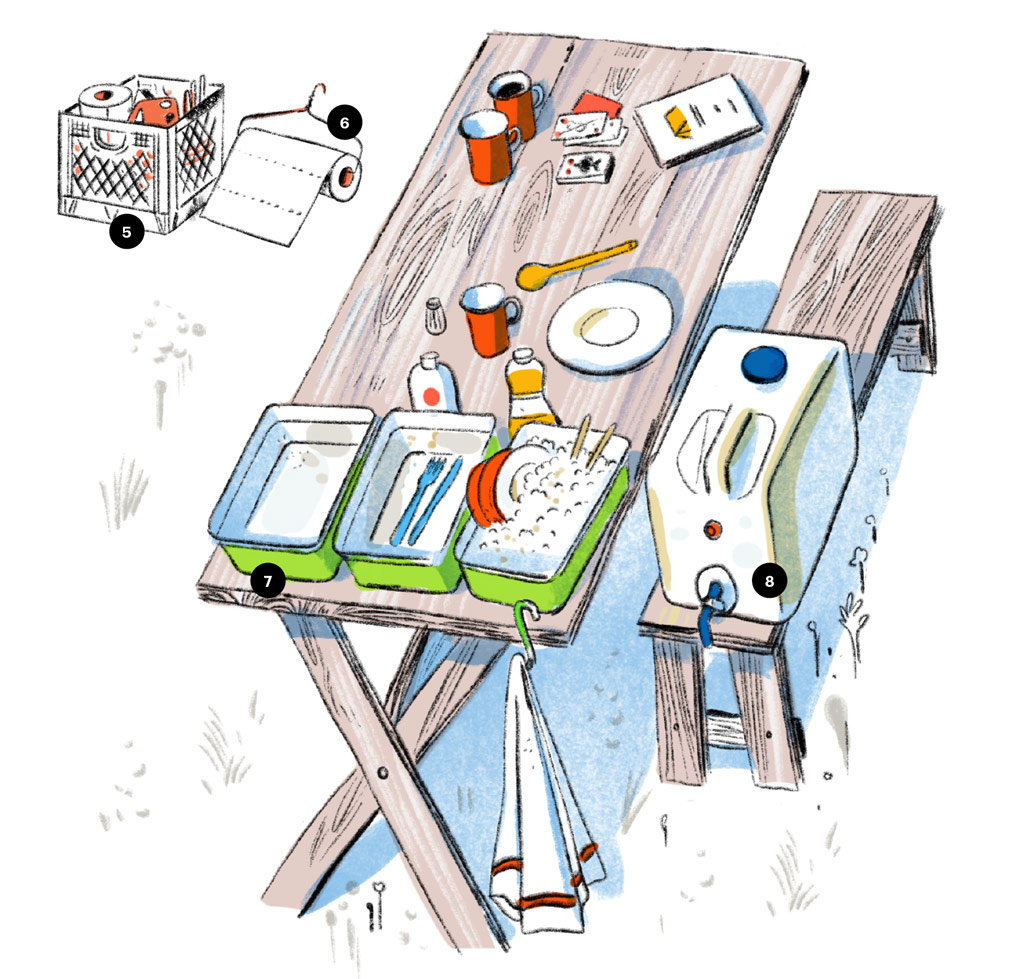
(5) Organize a pantry. Milk crates are good for keeping additional cooking supplies within easy sight. Lash utensils to the crates with hooks or bungees.
(6) Make a paper-towel dispenser. A bungee cord or coat hanger works well.
(7) Set up a three-bin wash station. Here’s how to make everyone’s least favorite chore as easy as ever: Soak and scrub dishes in a bin filled with hot, soapy water. Then rinse in another bin of clean, warm water. After, place dishes in a third bin filled with cool water and a dash of vinegar. Let dry in a dish rack or in a hanging mesh laundry bag.
(8) Make a handwashing station, too. Arrange a water bag or jug with a spout on the edge of your table. Place biodegradable soap, a hand towel and hand sanitizer next to it, and—boom!—handwashing station. Make sure to scrub your hands before cooking and eating and after using the restroom.
Make a Gourmet Meal
Bring the taste of home to the campground with these three easy recipes.


BREAKFAST French Toast
Ingredients (serves 4):
- 8 slices Texas toast (or thick-cut bread)
- 2 Tbsp. sugar
- 2 tsp. cinnamon
- Pinch of salt
- 4 eggs
- 1 cup milk
- 4 Tbsp. butter
- Optional: fresh berries, maple syrup, powdered sugar
Tools:
- Whisk
- Mixing bowl
- Skillet
- Spatula
AT HOME Cut the toast into 1 ½-inch-wide sticks. Mix sugar, cinnamon and salt and put in a reusable bag. Pack the eggs in a safe place in a cooler, then pack all other ingredients.
AT CAMP Whisk together the eggs in a mixing bowl. Add the milk and sugar mixture and combine. Warm 1 Tbsp. of butter in the skillet. Dip the toast slices into the egg-and-milk mixture, soaking each side, then place in the buttered pan. Once the toast is golden on one side (about 3 minutes), flip and cook the other side. Serve with fresh berries, maple syrup and powdered sugar, if desired.

LUNCH Cilantro-Lime Chicken Tacos
Ingredients (serves 4):
- 4 boneless, skinless chicken thighs
- 1 Tbsp. oil
- Tortillas
- 2 limes
- Pico de gallo
- Cheese
- Cilantro
- Optional: black beans, salsa, tortilla chips
Tools:
- Cast-iron griddle or skillet
- Spatula or tongs
- Knife
- Cutting board
AT HOME Marinate the chicken to taste (you can use an enchilada sauce, a taco-seasoning mixture or a dry rub of Mexican spices). Pack all ingredients inside a cooler.
AT CAMP Heat a cast-iron griddle or skillet with oil and cook the chicken, turning to ensure even heat distribution, 5 to 8 minutes per side. Remove from heat and chop into bite-size pieces. Warm the tortillas in the skillet. Then assemble the tacos by combining the chicken, lime juice, pico de gallo, cheese and cilantro in the tortillas. Pair the tacos with heated-up black beans, salsa and tortilla chips, if desired.

DINNER Coconut Curry Ramen
Ingredients (serves 4):
- 20 dried shiitake mushrooms
- 1 cup chopped dehydrated veggies
- 2 bouillon cubes
- ½ cup coconut milk powder
- 2 tsp. each: Thai curry powder, sugar
- ½ tsp. each ground ginger, garlic powder, onion powder
- Store-bought ramen
- Soy sauce
- 2 limes
Tools:
- Medium saucepan
AT HOME Chop the dried mushrooms into bite-size pieces. Place in a reusable bag with the chopped dried veggies, bouillon cubes, coconut milk powder, Thai curry powder, sugar and spices.
AT CAMP Empty the contents of the veggie mixture into your saucepan. Add 3 to 4 cups water and bring to a boil. Reduce heat to medium-low and simmer until the veggies are tender, about 5 minutes. Add the ramen to the pot and cook according to the package directions. Remove from heat and add soy sauce and lime juice to taste.
TRY THIS! For some easy gourmet, put your favorite protein, veggies and broth on a piece of foil. Add spices to taste and wrap it up tight. Toss the packet into the coals and give it about 40 minutes. Voilà
Find Your Brew
Three options, each with its own perks.

Stove-Top Percolator
PROS: You can typically make more coffee in one go; simple to set up and easy to clean.
CONS: Requires a fire or stove; takes at least 10 minutes, enough for your fingers to freeze in the morning chill.
Coffee Press
PROS: You only need boiling water; portable and easy to pack; brews full-bodied coffee (if that’s your thing).
CONS: Can take more time when outside because boiling water doesn’t stay “boiling” as long; typically brews less coffee; harder to clean.
Instant Coffee
PROS: Nothing quicker.
CONS: Everything else.
Can’t decide on a camp coffee maker? Peep our favorites here.
Spruce Up Your Drink
Add a sprig of wild rosemary or pine for a dash of flavor and panache in your evening cocktail or mocktail.
Let’s Play
Now What?
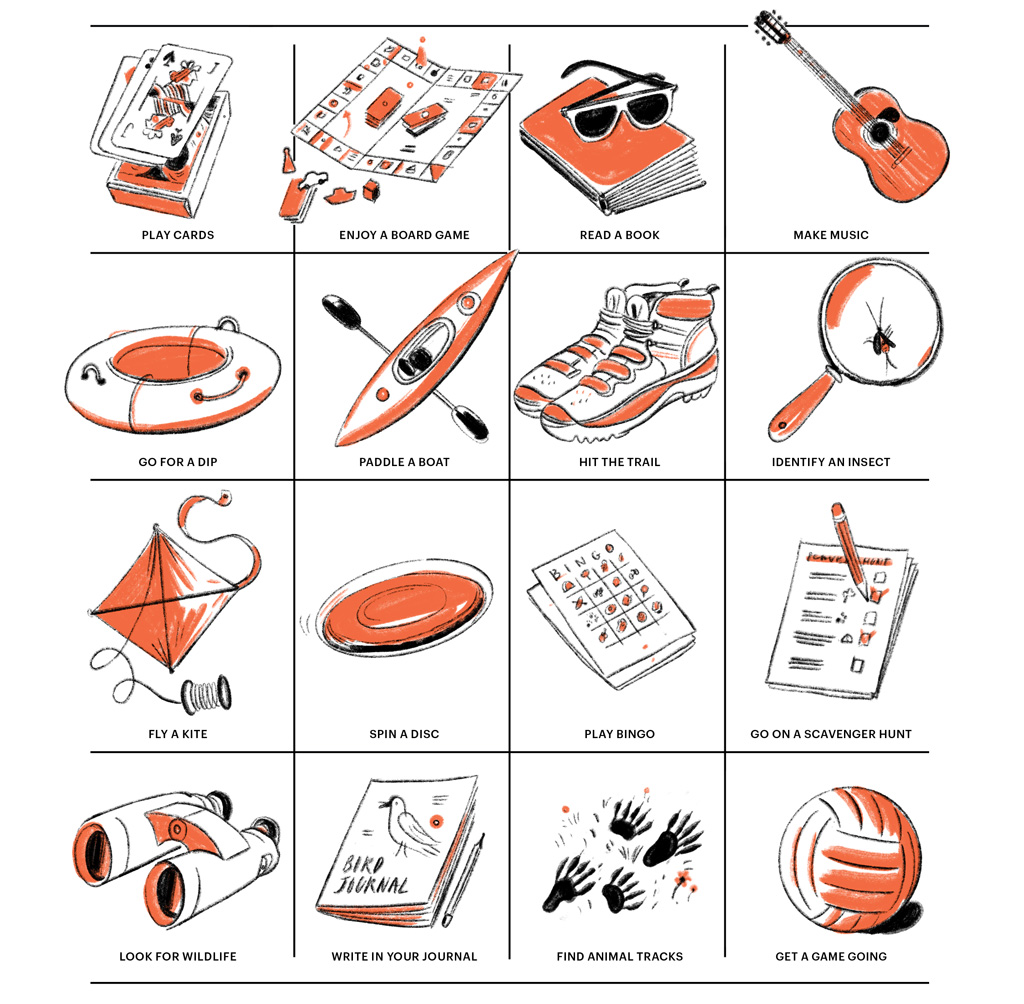
Savor your time outside however you like, or try any of these activities. Bonus: Download this Bingo board and use it while you’re camping.
Keep the Tunes in Harmony with Mother Nature
Your partners and next-door neighbors will thank you for enjoying your tunes discretely. (If you can afford an outdoor speaker for your home, you can afford some quality headphones for camp.) That lets you enjoy your sweet tunes while also allowing others nearby to listen to the sounds of nature.
Skip a Rock
It all starts with a calm body of water.

(1) Find the perfect rock. It should be flat, small enough to hold in one hand and no heavier than a tennis ball. Triangular rocks will be more stable than circular ones.
(2) Grip it right. Hold the rock with your thumb on top, middle finger on the bottom and index finger hooked along the edge.
(3) Master the stance. Face the water at a slight angle, knees bent, with your throwing hand behind you, your palm up and your elbow in.
(4) Get ready. Holding the rock parallel to the water, bend your wrist back as you keep your chest facing the water.
(5) Release. Keeping your shoulder as static as possible, whip your arm forward and down. Let go when your arm comes across your body. Flick your wrist to spin the rock so it bounces off the surface. For maximum skips, the stone should enter the water at a 20-degree angle.
(6) Try again. Skipping stones takes practice. Try throwing faster instead of harder—quickness is more important than strength.
Improve Your S’mores
There’s nothing wrong with the classic, but once you start riffing, you won’t go back.

THE GRAHAM The purpose of the graham cracker is to hold the sammie together, so really, you can use whatever you like in its place. Start small by switching to the cinnamon or chocolate varieties, or even try a cookie. Then go wild: Swap out the sweet honey cracker for something salty.
THE MARSHMALLOW The marshmallow’s chief responsibility is to bind everything with sweetness. For a similar texture, try trading it for a slice of peach or banana. You can roast them the same way.
THE CHOCOLATE Here’s where you can go all out, because the chocolate’s sole job in a s’more is to bring joy. Switch out the standard milk chocolate for white chocolate, or try something with chili pepper or mint. Trade it out for a peanut butter cup, or swipe chocolate hazelnut spread on your cracker to cash in on the silky texture. The choco-tunities are endless.

Illustrations by Peter Oumanski.
