I’m just your average hiker/backpacker/dabbling cyclist/SUP enthusiast/occasional car camper. Sound familiar? If you’ve caught the multisport bug like I have, then you probably have enough gear to not only tackle any activity, but to outfit your friends, too. You also probably have a gear closet, garage, shed or storage area that could benefit from some organization. (At present, my gear “closet” is creeping into gear “room” territory.)
So what to do with an unruly gear space? Here are four steps to get you started.
Step 1: Sort
Divide your gear into like piles. Put camp kitchenware together, sleep systems together, climbing equipment together, etc. This will help you see exactly how much of each type of gear you have.
Step 2: Discard
Weed through each pile of like items, setting aside anything you no longer want or need. Whatever is left over is what you’ll have to organize, so be judicious. If the equipment is still useful, gift it to a friend, donate it or (if it’s valuable) sell it secondhand. If it’s broken, determine whether you can repair it or have it repaired. If it’s really beyond help, make sure to recycle it properly. (At REI, we’re presently exploring ways to help our members re- and upcycle used gear; stay tuned.)
Step 3: Assess
This is where your creative problem-solving comes into play. Look at your storage space compared to the gear you have and ask yourself a few questions:
- Consider the area: How much space do I have to work with? Do I have bulky items like kayaks or mountain bikes that take up a lot of space?
- Consider the storage options: Do I need shelves or a pegboard? Do I have gear that can hang like climbing gear? Can I fit stackable bins, or do I need compressible totes?
- Consider the use: Will I need a staging area? Do I want to be able to rotate gear by season (e.g., make skiing stuff more accessible in winter and backpacking stuff more accessible in summer)? Where will I air out gear after a trip?
Step 4: Build and Organize
Once you’ve determined how you want to store your gear, go out and get the materials you need. Whether you’re building shelves or just need a few more bins, having a specific place for each item will help you stay organized in the long term. Label bins clearly. Keep items you use frequently in an easy-to-grab place. Too often, items that are stored out of sight or in inaccessible places simply never get used.
Read on for tips to help you dial in your storage, courtesy of people who have way too much gear (aka REI staff).
Storage Tips from the Pros
Totes, Bins, Cubbies and Miscellaneous Stuff Holders
- Consider clear bins instead of opaque ones so you can easily see what’s inside.
- Jim Weller, REI domain architect, includes a laminated inventory checklist in each container so he knows exactly what goes where.
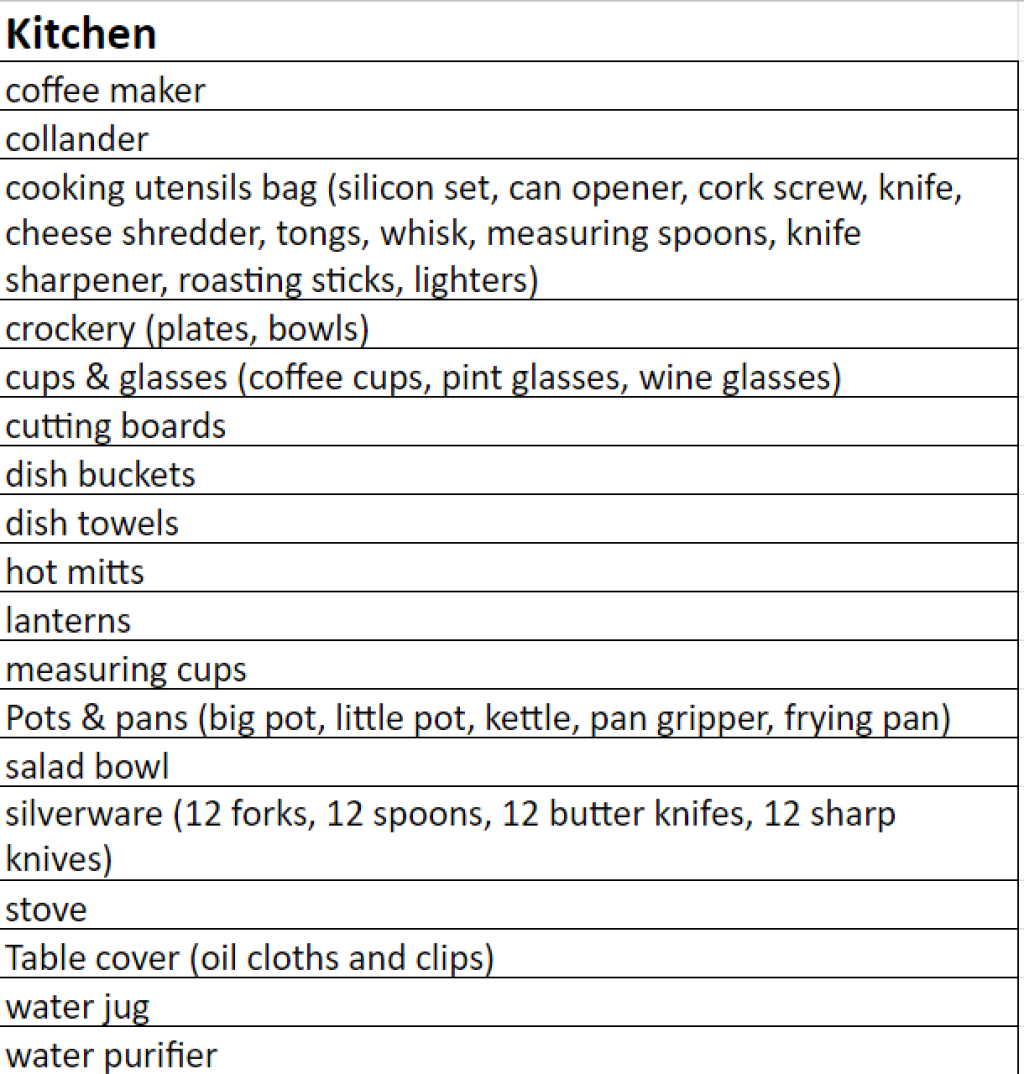
Photo Courtesy: Jim Weller
- Designate one bin as the “every trip” container, and keep the Ten Essentials inside it. Make sure to check your inventory of items that need to be refilled or replaced regularly, such as headlamp batteries, first-aid bandages, duct tape and lighters.
- Keep a few packets of silica gel in each tote to help absorb lingering moisture.
- Plastic laundry hampers with holes let shoes breathe.
- Want to skip the shelving altogether? Try REI senior engineer Ryan McCutchen’s cubby system: He screws 5-gallon buckets to a board on the wall.
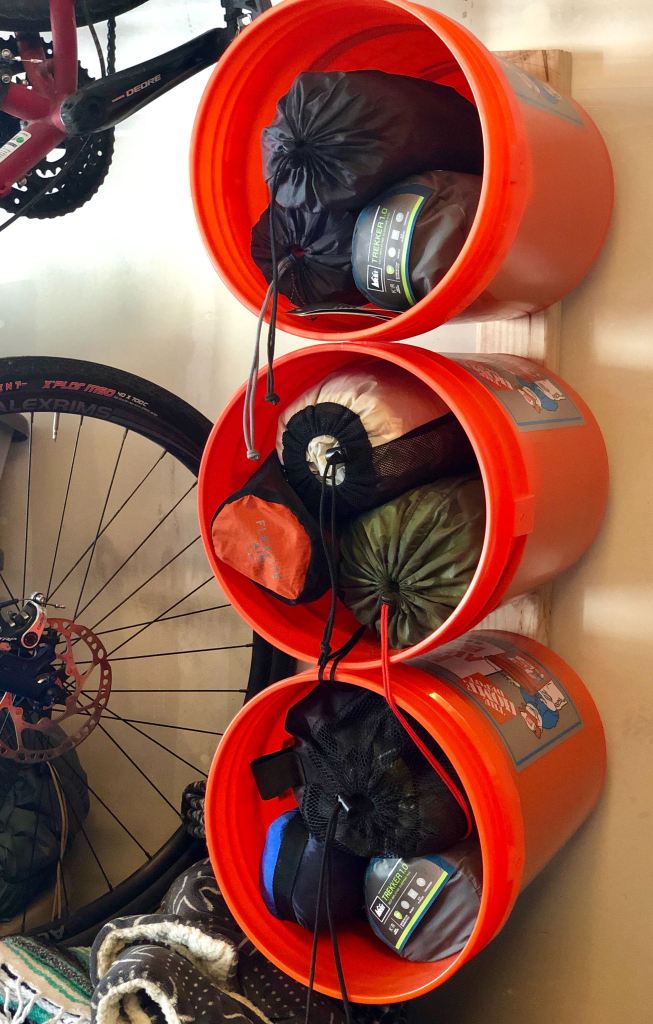
Photo Courtesy: Ryan McCutchen
Hanging Storage
- Over-the-door shoe racks are great for organizing small (easy-to-lose) sundries like headlamps, first-aid kits, etc.
- Use a curtain rod or large dowel to create hanging space between two shelving units like REI program coordinator Annie Graeter did to store rain shells and life jackets. (You could even drape sleeping bags over the rod.)
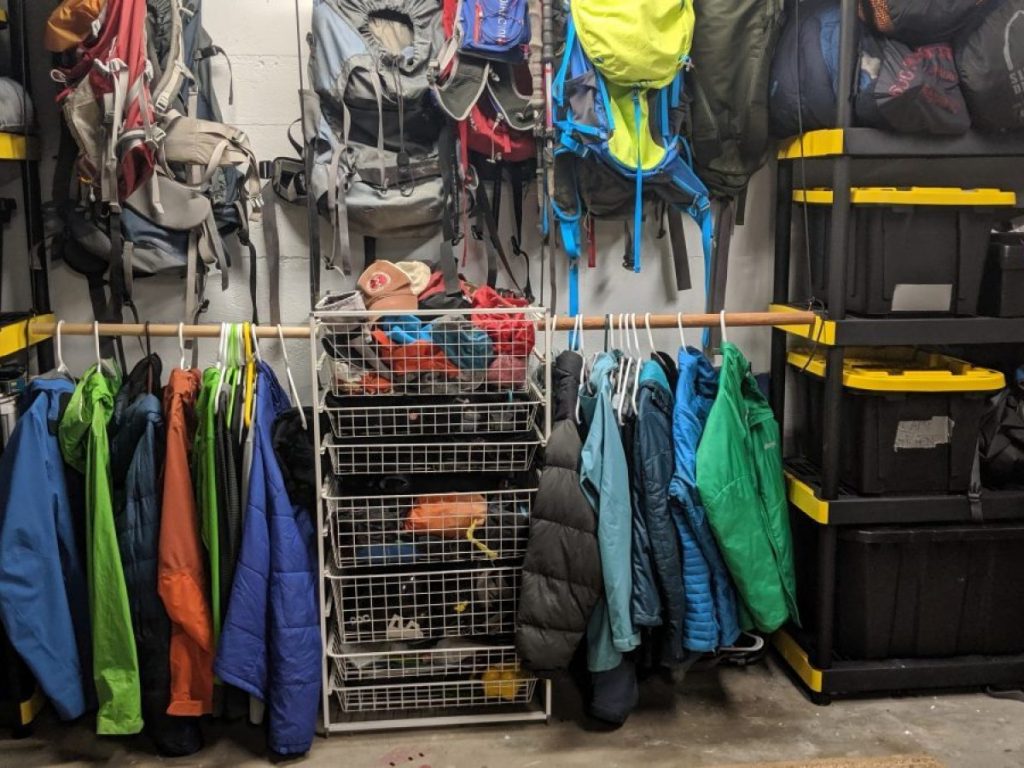
Photo Courtesy: Annie Graeter
- Hang packs from hangers or pegs. If you have items that only go out with a particular pack (like a shovel, beacon and probe or a bicycle repair kit), simply keep them in the pack itself.
- Use carabiners or hooks to utilize side space on shelving units. Hang helmets, snowshoes, trekking poles and other awkwardly shaped items.
Wall Space
- If you have the wall space, use it to get items off the floor. Pauli Payne, REI marketing campaign specialist, uses shelving brackets (minus the shelves) to hang backpacks and ropes.

Photo Courtesy: Pauli Payne
- Pegboards fitted with various hooks and hardware are perfect for hanging gear that would be too messy in a bin. Annie Graeter keeps climbing gear, ropes and packs on hers.
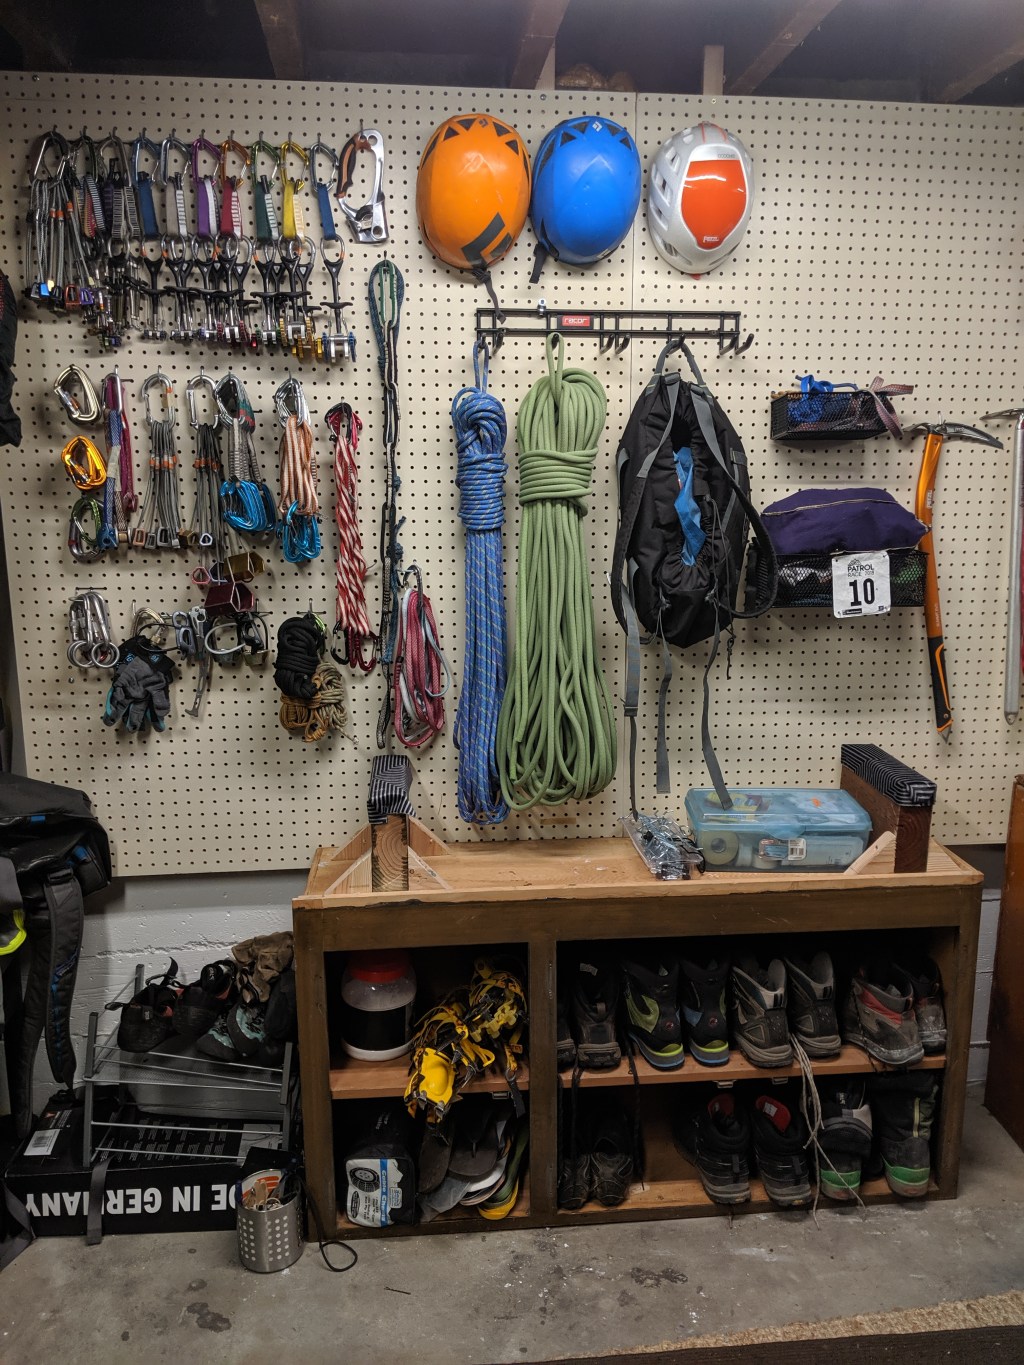
Photo Courtesy: Annie Graeter
- Buy or build a wall-mounted bike storage rack. You can fit multiple bikes on a wall by staggering the placement of hooks or pegs. Decorate your handmade bike rack with awesome stickers like Senior Program Manager Chloé le Comte did.
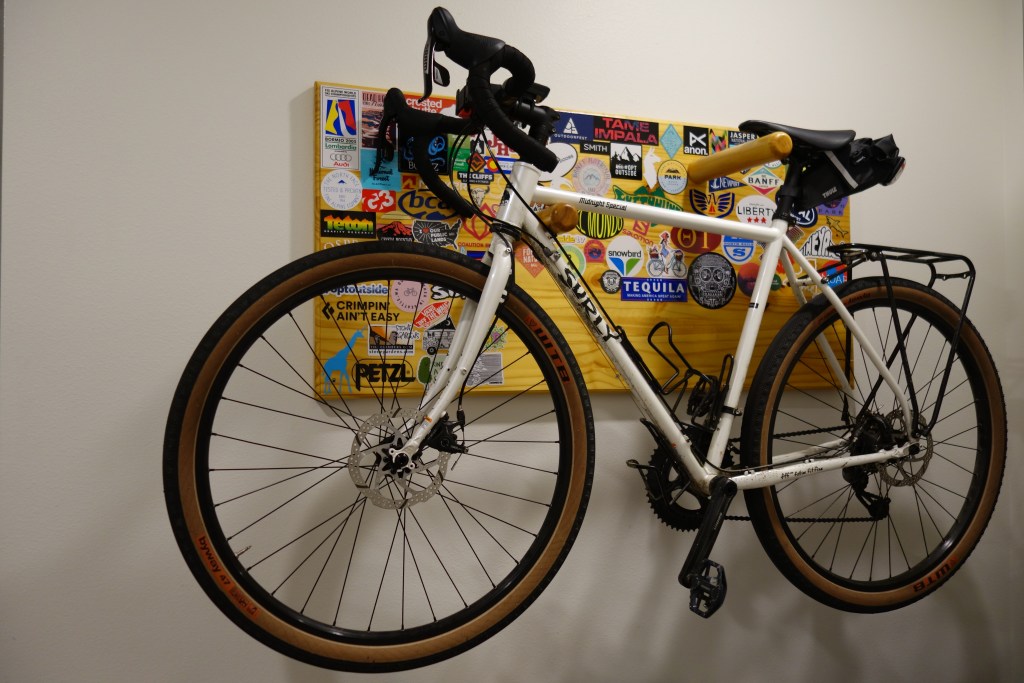
Photo Courtesy: Chloé le Comte
- Senior Software Engineer Douglas West uses ceiling hooks from the garage rafters to hang bikes wheels-up. You can also store paddling gear this way.
- Use large peg racks to hold skis and snowboards. Annie Graeter built this one from scrap wood.
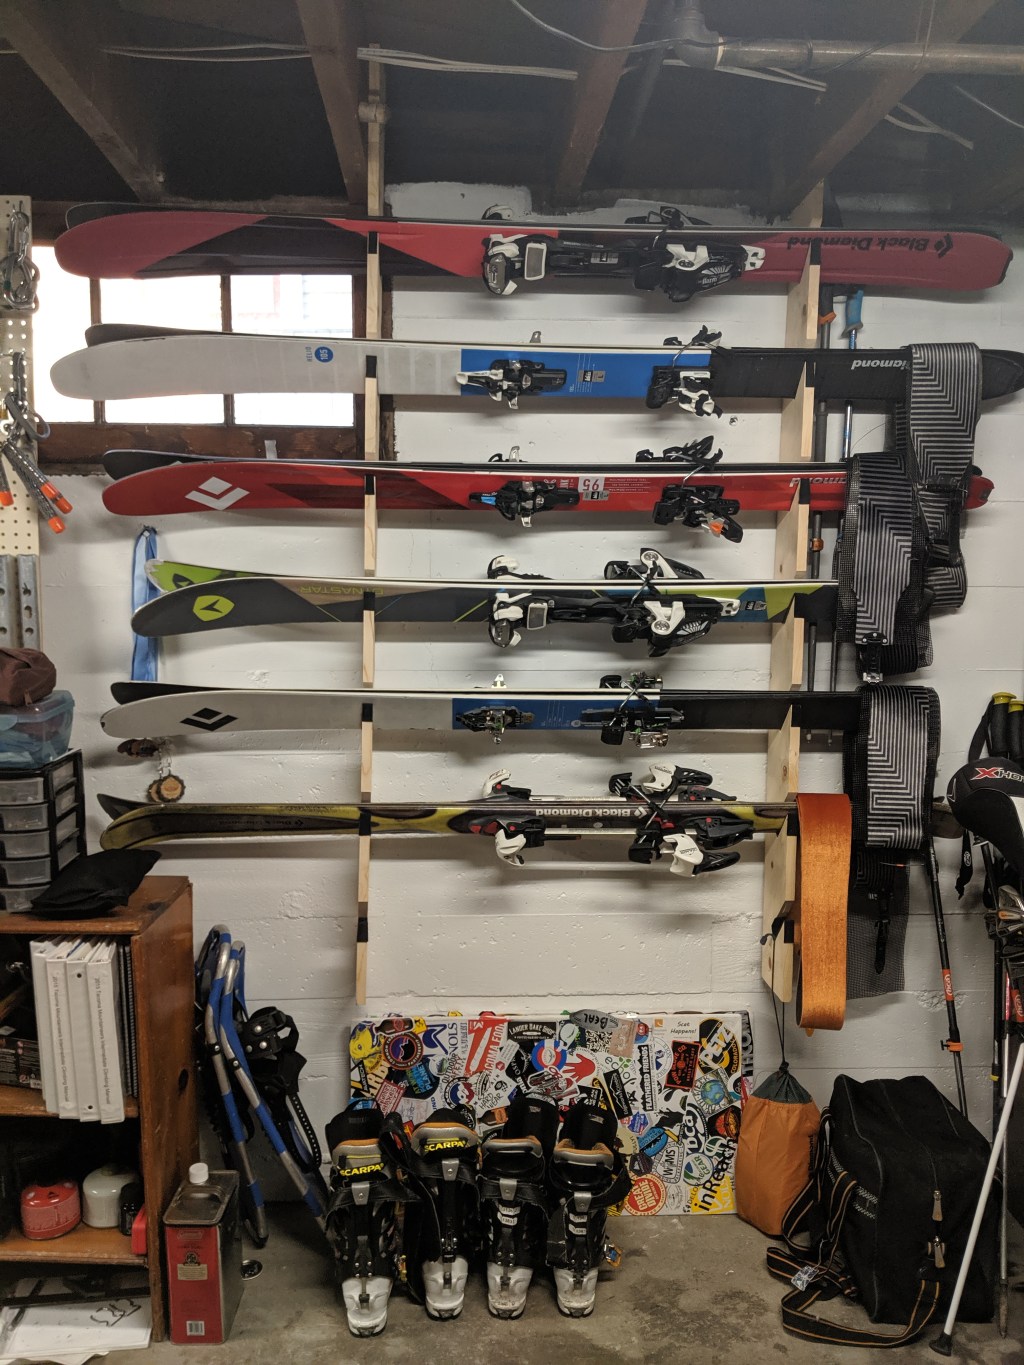
Photo Courtesy: Annie Graeter
General Care and Maintenance
- Make sure to air out gear before storing it again. Keep a heater or dehumidifier in the gear area if necessary—just make sure the heater is at a safe distance.
- Weller puts a dryer sheet in his sleeping bags, swapping in a new one every year or so. He also cleans sleeping bags and tents regularly with Nikwax products.
