Paracord is one of the most useful items to have on an adventure. From replacing a broken shoe string to making a fishing line, this cord has a wide variety of uses that come in handy in both day-to-day situations and wilderness scenarios.
DIY survival bracelets make great gifts since you can personalize the size and color. You can even make your four-legged friend a new collar. Our DIY guide will show you how to craft your own bracelet using a cobra weave technique. Once you’ve got the technique down, use your imagination to make presents for all your adventurous friends and family.
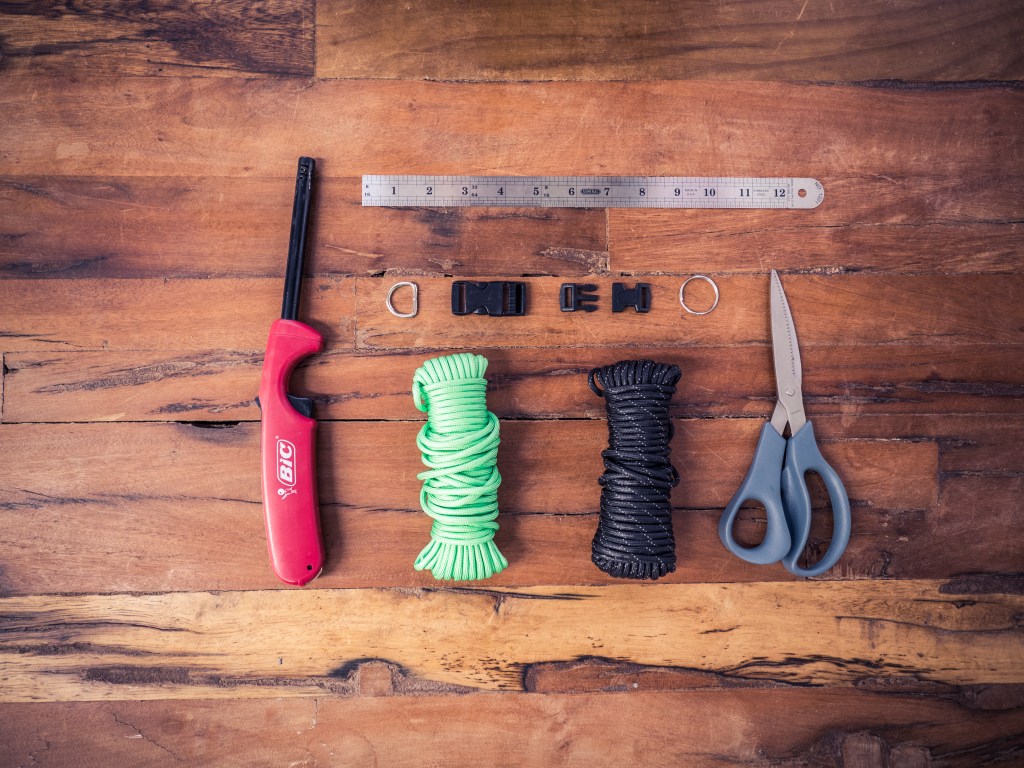
Materials:
- 1/8 in. (roughly 3mm) diameter paracord in color(s) of your choice, length determined by wrist measurement* (similar to this PMI utility cord – 3mm or this PMI 3mm Utility Cord – Package of 50 ft.)
- ¾ in. plastic side release buckle (like this .75 inch one)
* 1 inch of bracelet length equals about 1 foot, or 12 inches of cord needed. So, if your wrist circumference is 8 inches, measure out 8 feet (96 inches) of cord (see step 2).
Tools:
- Ruler or tape measure
- Scissors
- Lighter
Directions
1. Choose your color(s)
You can use one or two colors to make your bracelet. This determines the way you attach the utility cord to the buckle and the amount of each color cord to measure out. We used two colors.
2. Measure your wrist
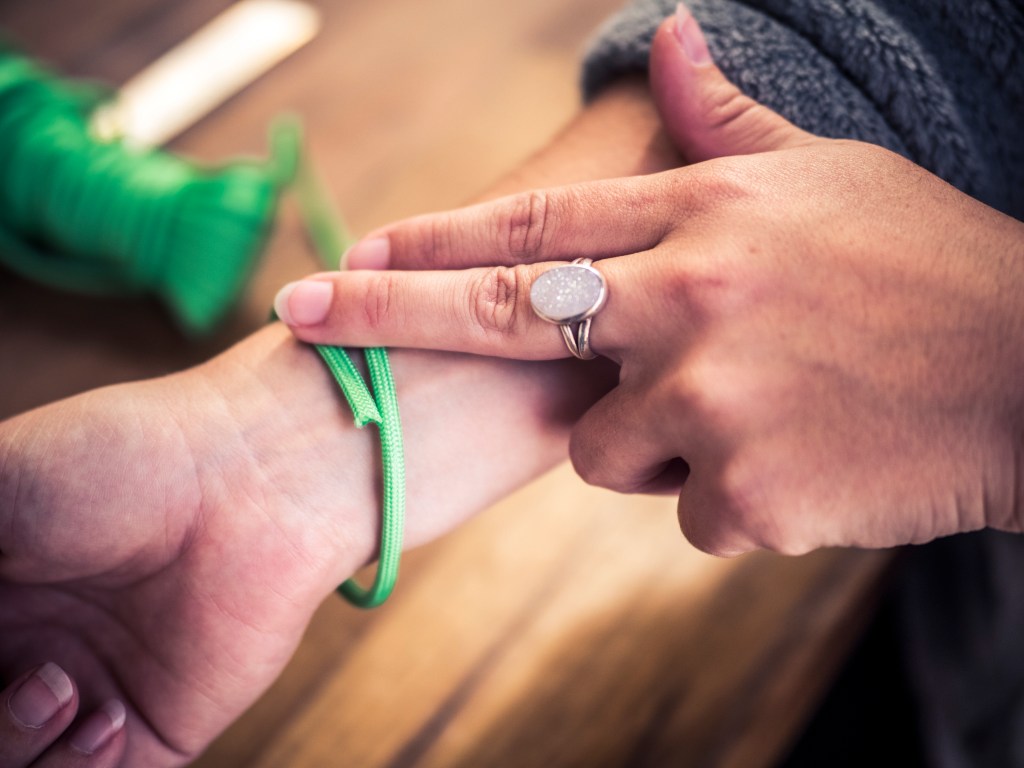
Wrap a length of paracord around your wrist, noting where the end hits the cord.
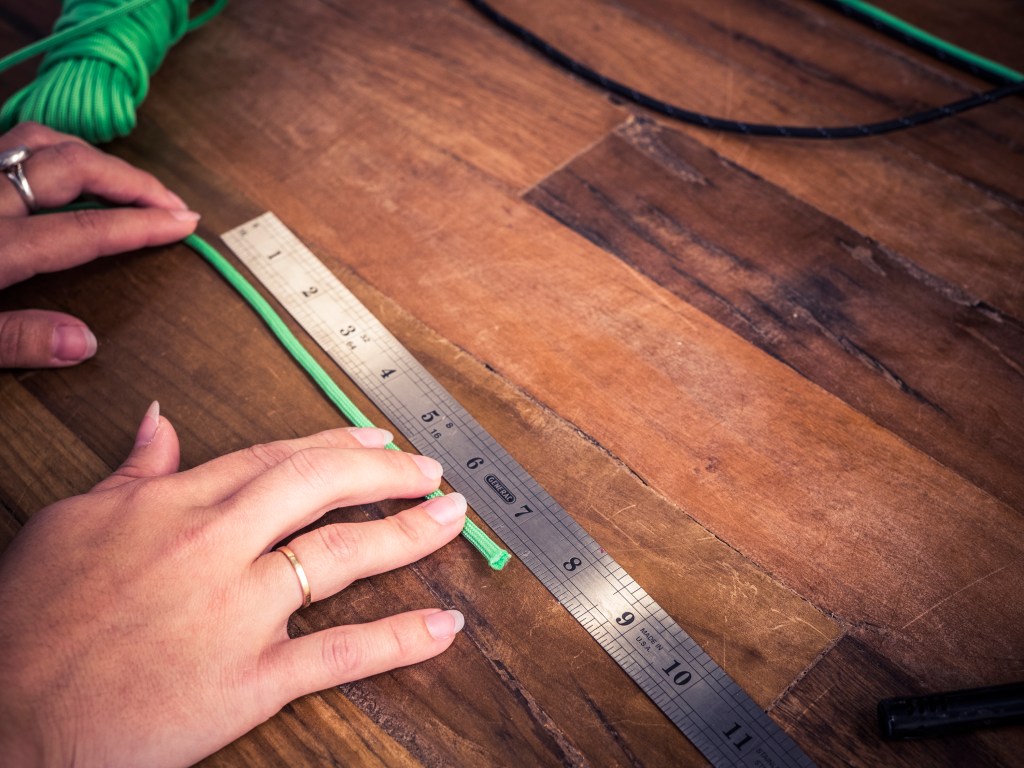
Measure the length with a ruler. Ours measured 7.5 inches.
3. Measure out cord
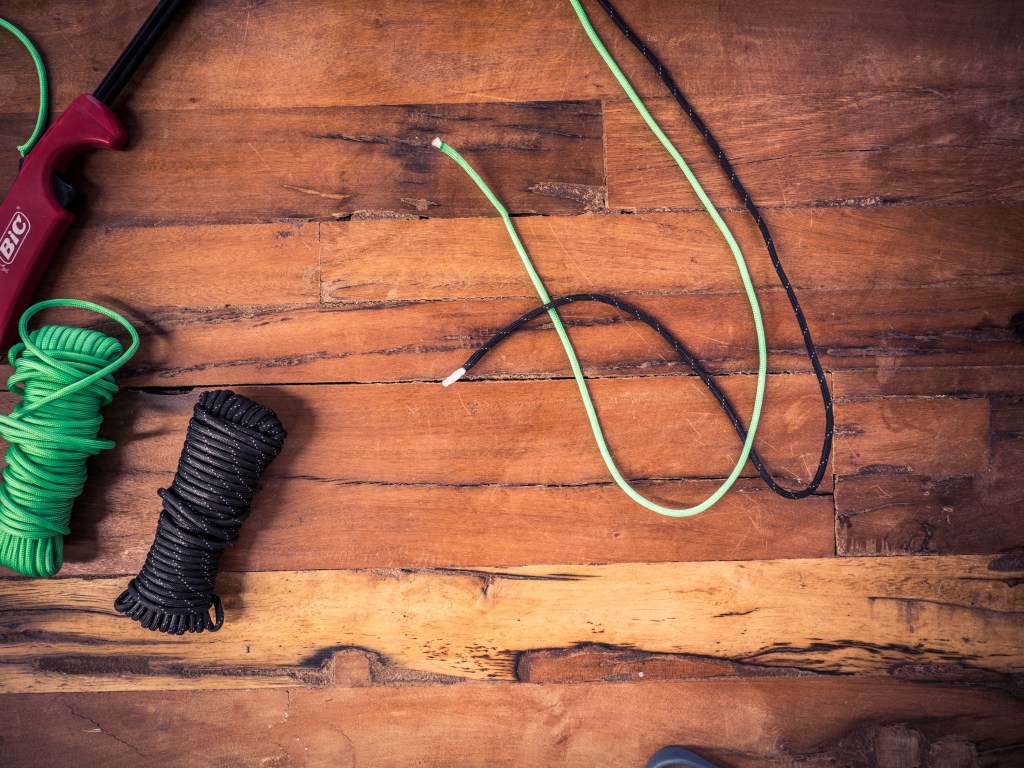
If you are using one color for your bracelet, multiply the number of inches in Step 2 (your wrist circumference) by 12. If you are using two colors, multiply that number by 6. This calculation will give you the total number of inches you’ll need for your length of cord. In our example, we ended up with 45 inches for each of the two colors we’ll be using (7.5 x 6 = 45). We also added 6 extra inches just to make sure we had enough.
4. Attach paracord to buckle
If you’re using two colors, you’ll first need to join the two lengths of cord together. There are many ways to do this: We used the “Manny” method which splices the two ends together and offers more strength, but you can also simply fuse the ends together using your lighter.
To attach the cord to one of the buckle ends (either buckle piece works), use a girth hitch. Here’s how:
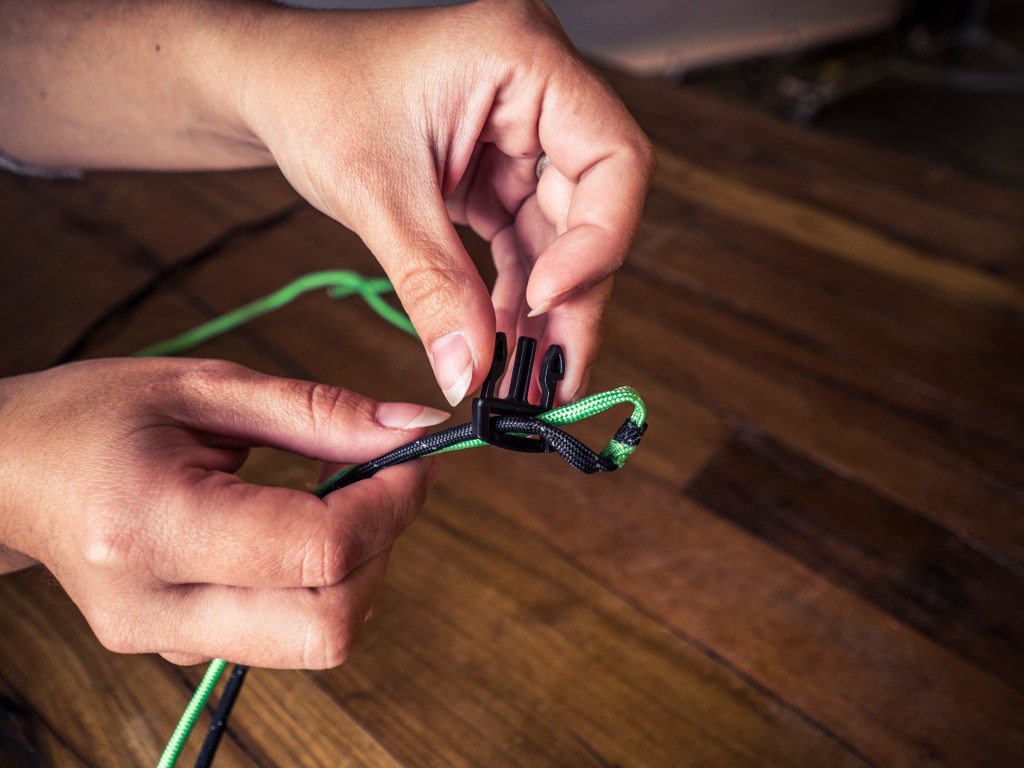
Find the center of the full length of cord by holding the loose ends together and pinching the loop at the other end. Thread the loop through one side of the buckle so it sticks out an inch or so.
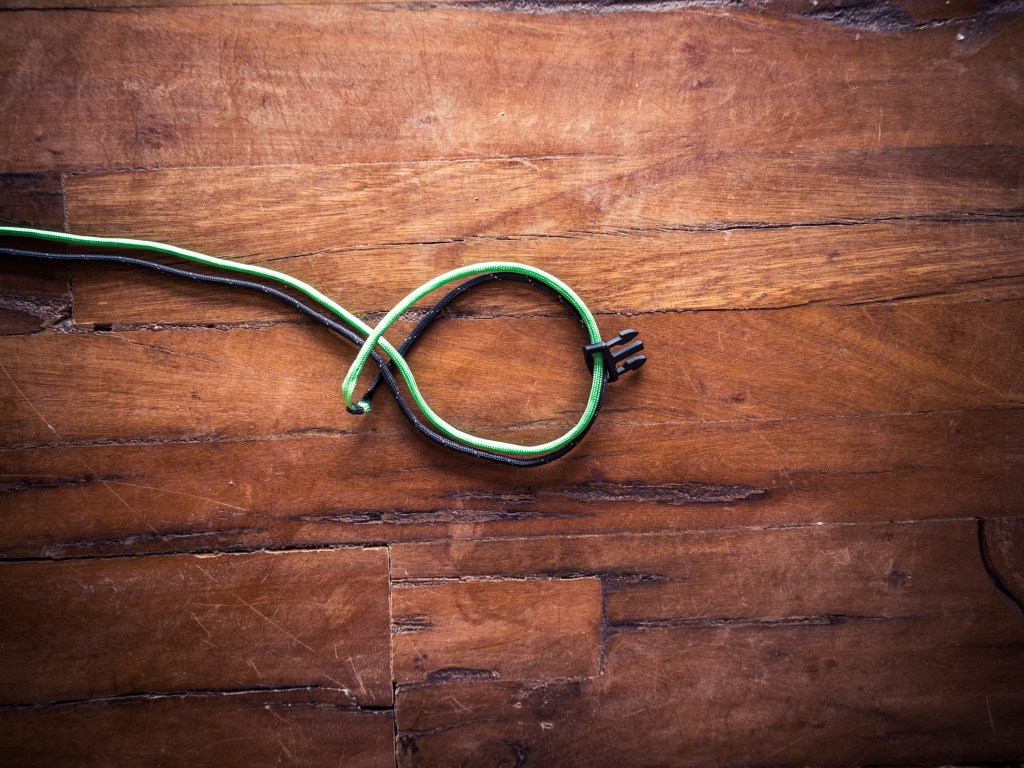
Thread the loose ends through the loop and pull the cord snug against the buckle.
5. Determine bracelet length
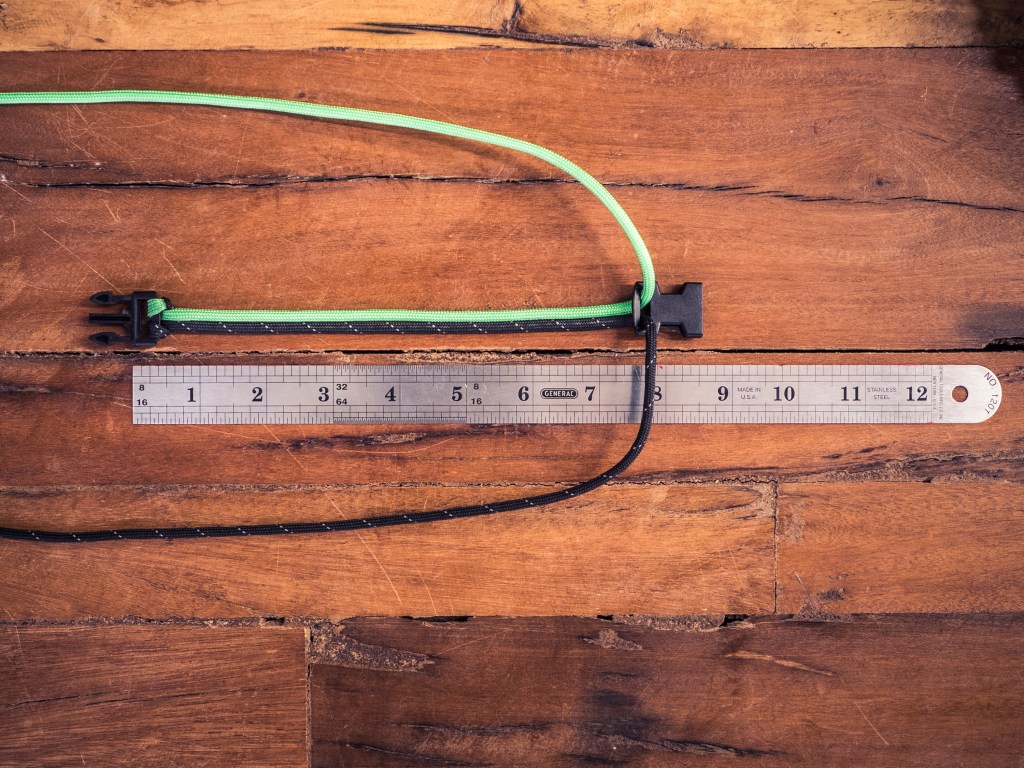
Thread the dangling free ends of the cord through the other buckle piece. Measuring from one buckle to the other (excluding the male prongs), position the free buckle so the bracelet length equals your wrist measurement plus one inch. Our initial length was 7.5 in., so we wanted our bracelet to be 8.5 in. long. This gives a comfortable fit.
6. Weave the main bracelet
Now you will weave the body of the bracelet using cobra stitch. It helps to secure the buckle with the free ends to your work surface with a piece of tape so it doesn’t move around while you’re braiding (not shown).
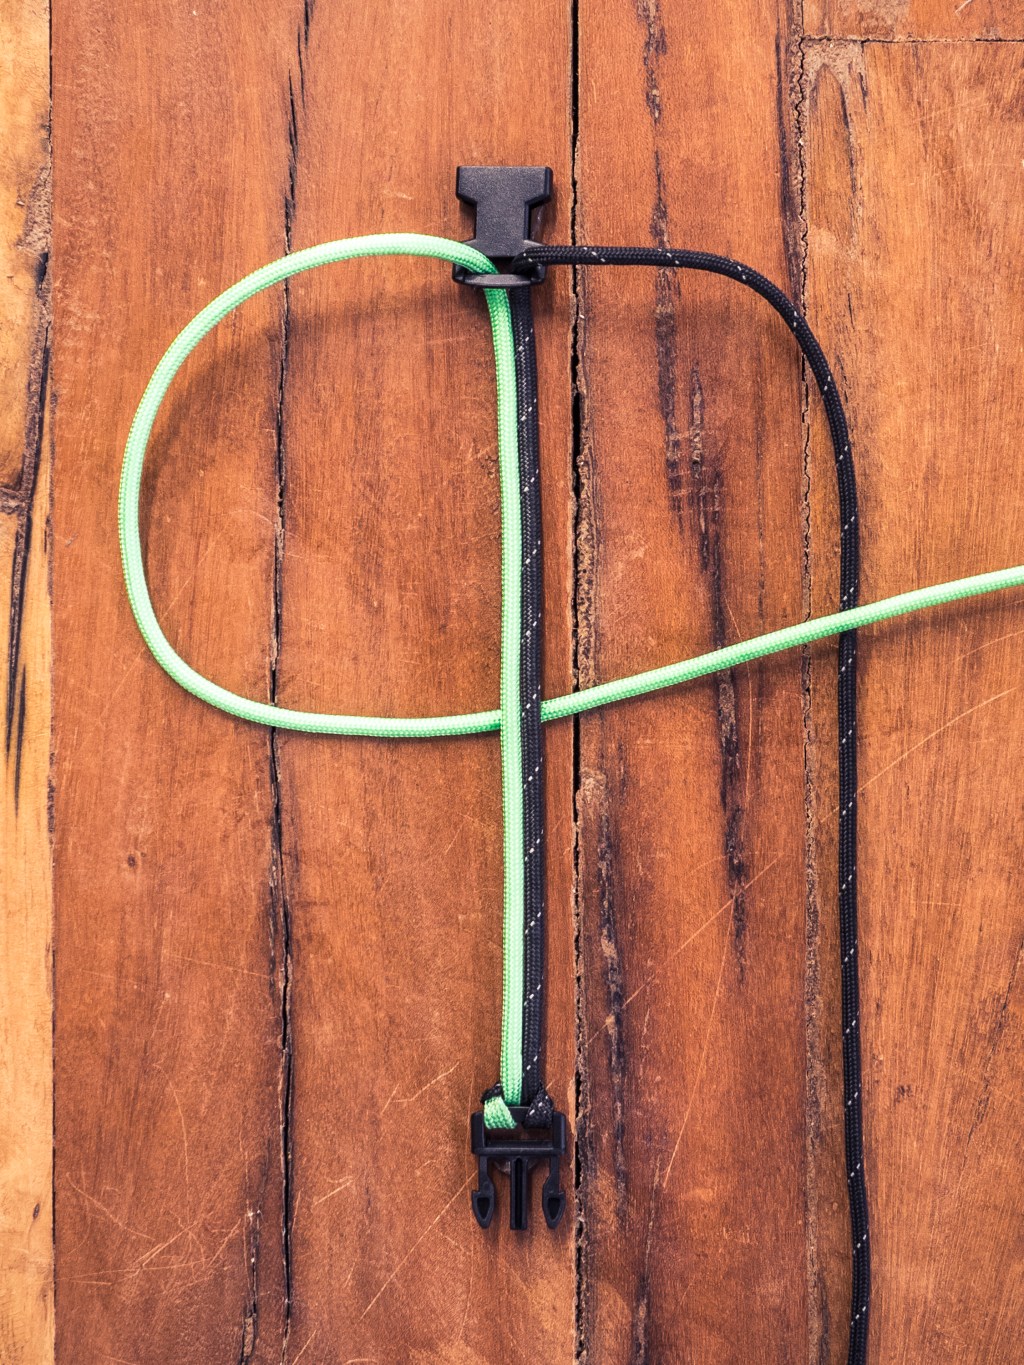
Pick up the left-hand cord and thread it behind the center strands. Cross it over the top of the right-hand cord.
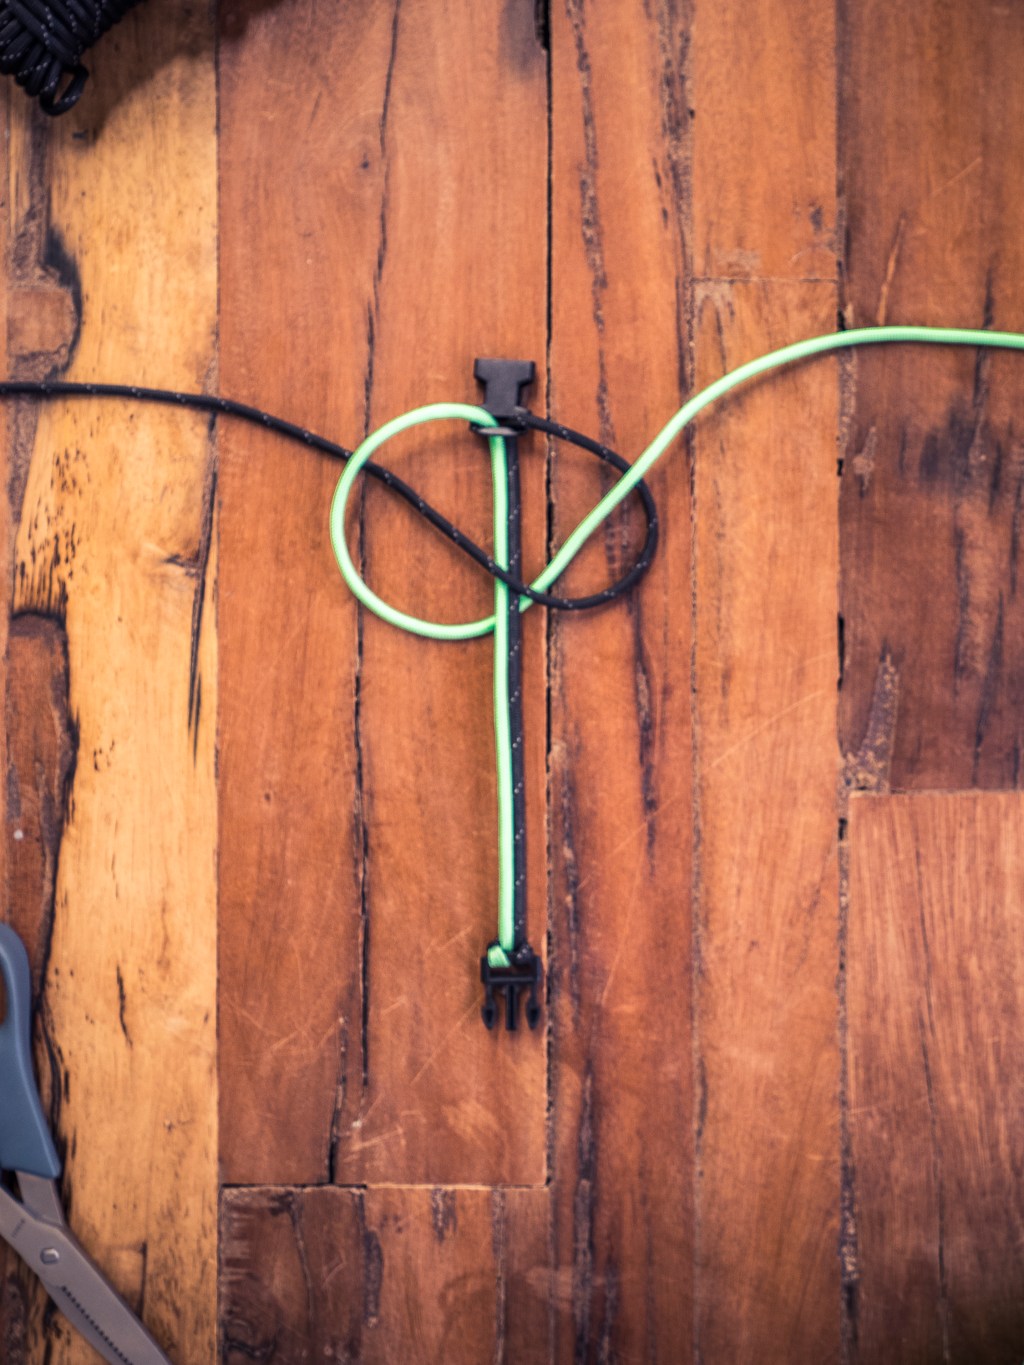
Pick up the right-hand cord and cross it over the center strands, then through the loop created by the left-hand cord.
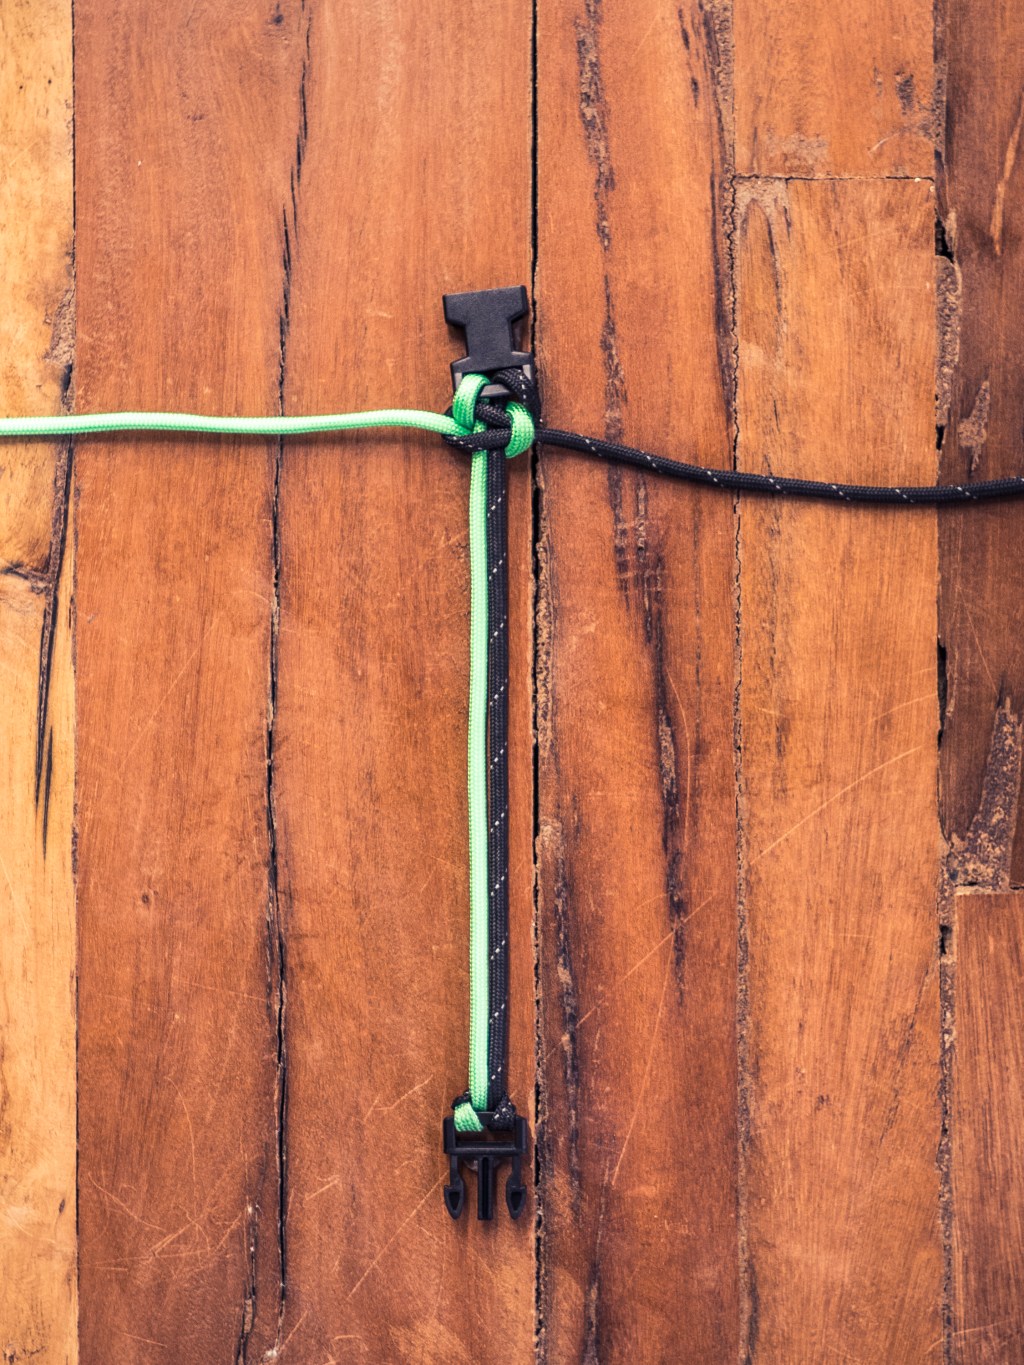
Snug the cords tight.
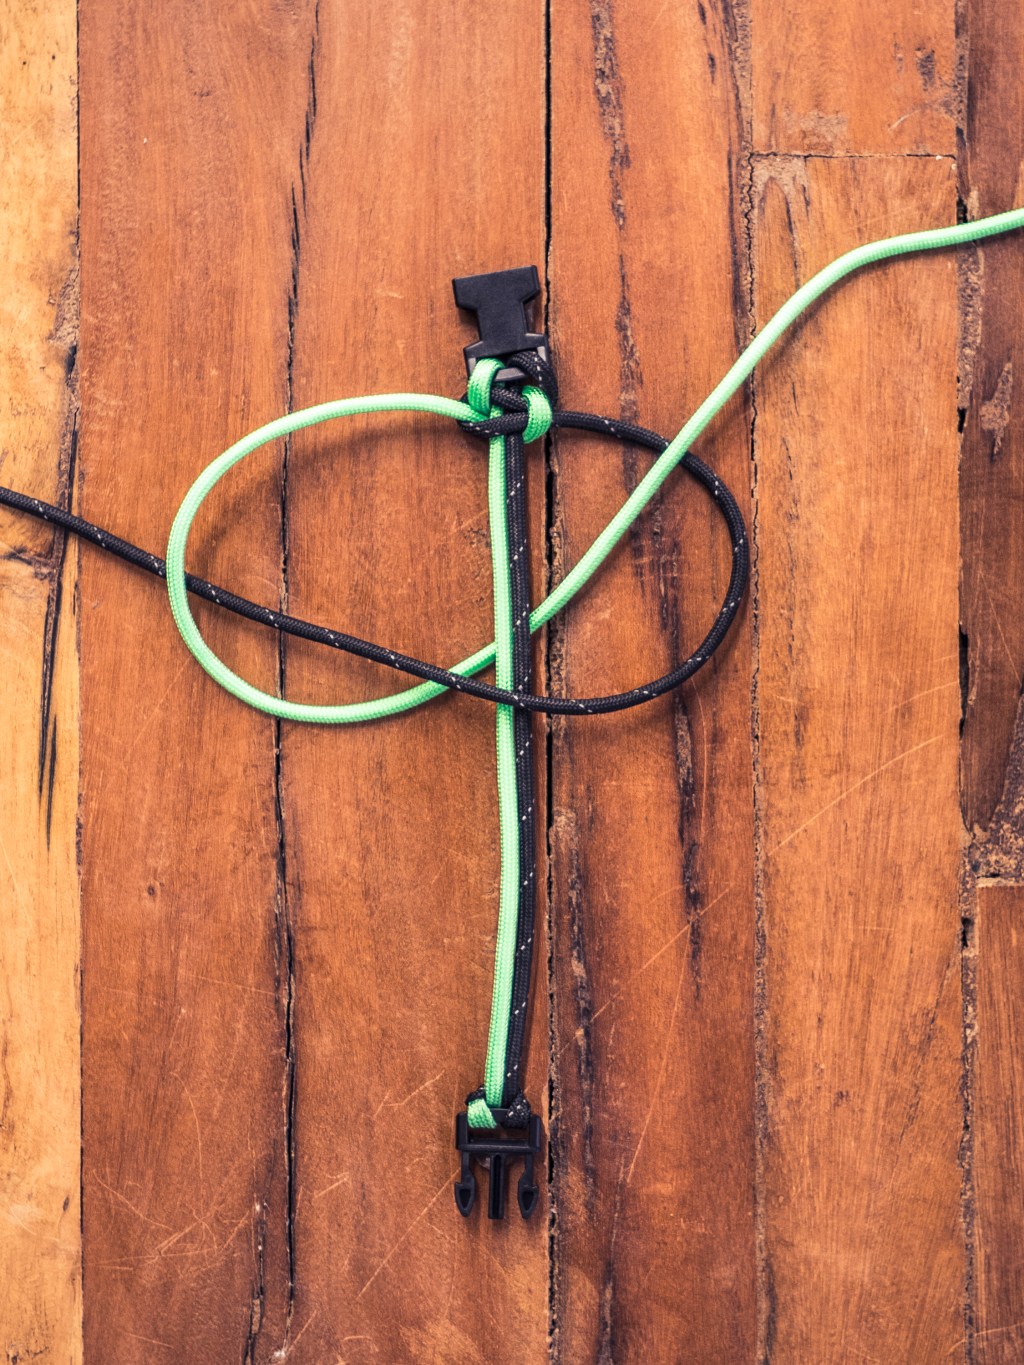
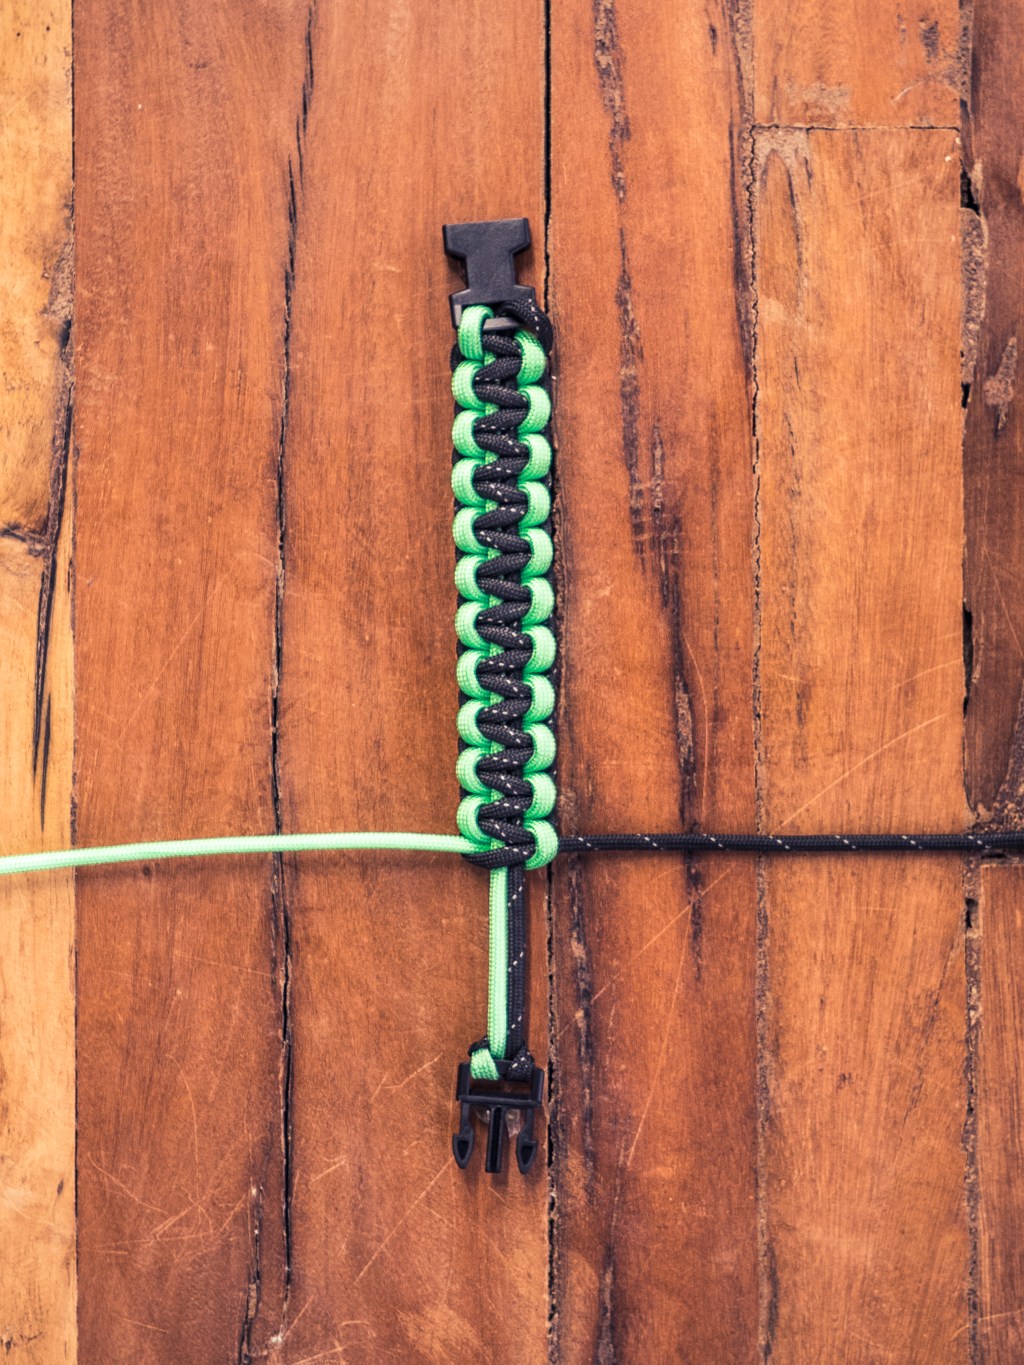
Repeat the weave, alternating sides, until you reach the other buckle. You will be able to tell if you forgot to alternate because the braid will start to rotate. Simply undo the last knot and continue.
7. Finish
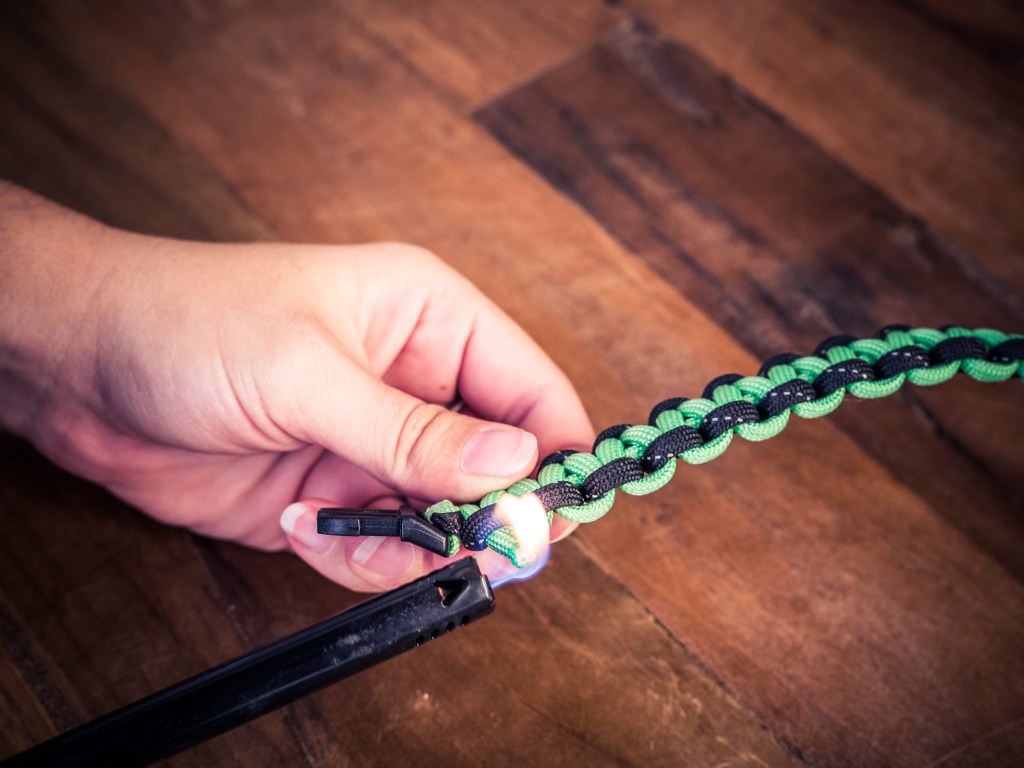
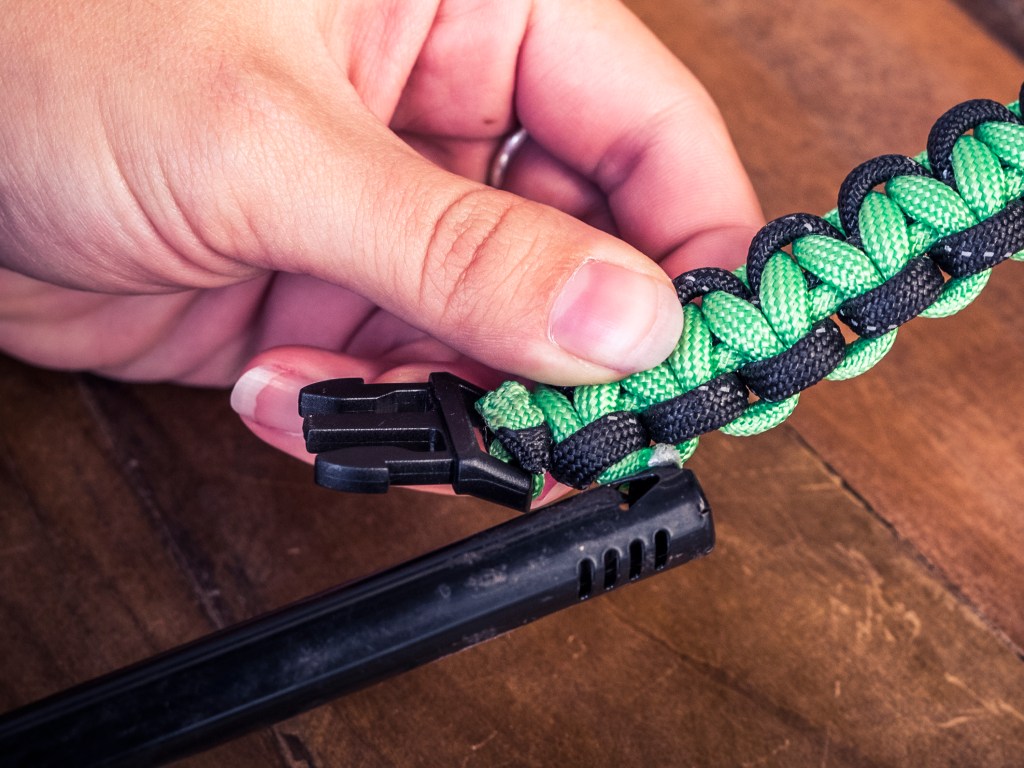
Once you’ve completed the body of the bracelet, trim the ends of the extra cord to about half an inch. Burn the trimmed ends and press them to the bracelet cords to “glue” them in place. (Use the end of the lighter or pliers so you don’t burn your fingers).
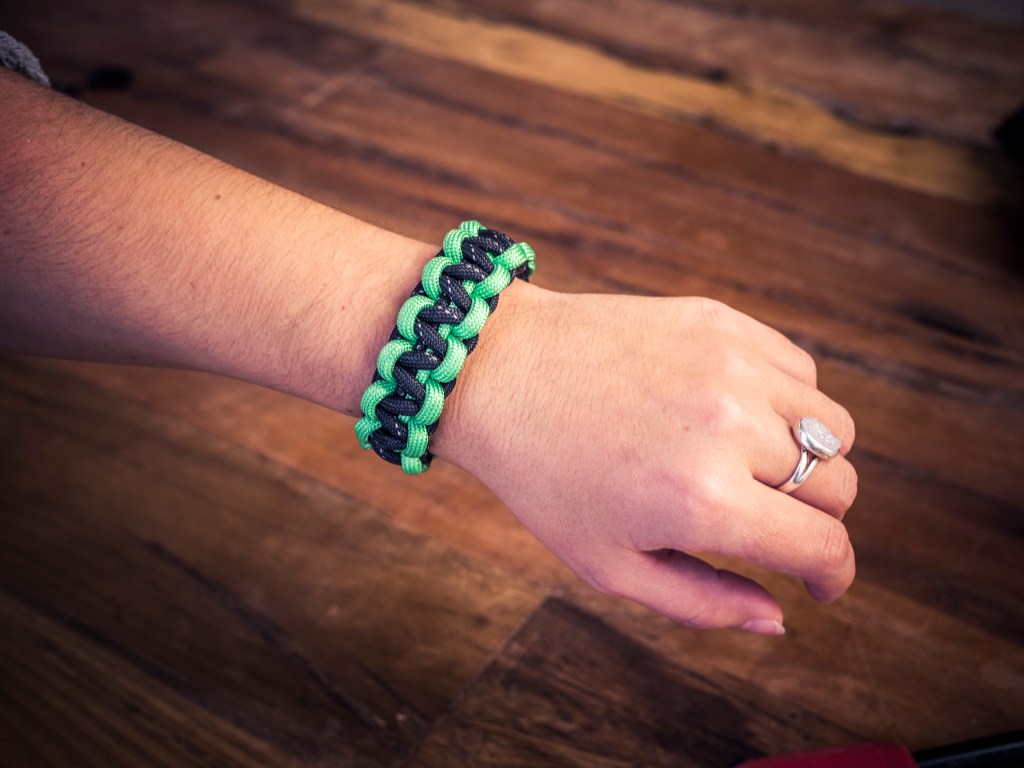
Wear your completed bracelet with pride! You’ll be prepared if you have to secure an emergency tarp or sew a torn garment on your next adventure. Simply pull or cut the secured ends and unweave until you have the amount of cord you need.
8. Other projects
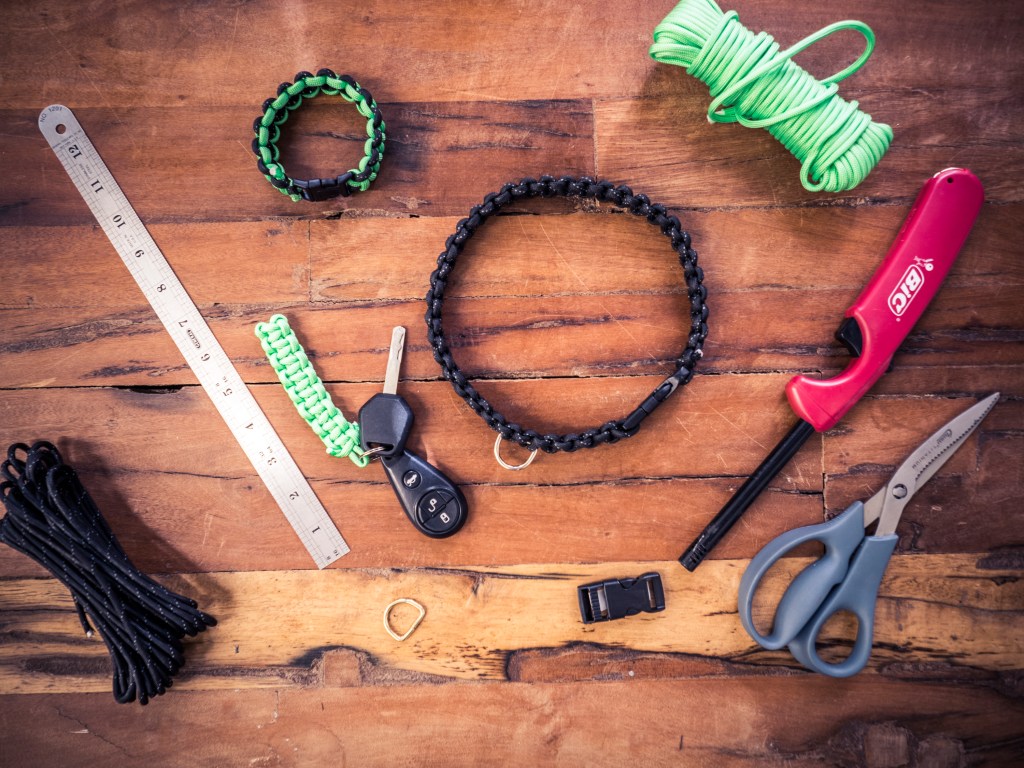
Now that you know the cobra weave, you can make more bracelets or other fun gifts for all the adventurous people in your life. We made a dog collar and a keychain fob. If you want even more paracord goodness, check out this DIY for holiday ornaments.
