[Editor’s note: This story is part of our van life collection—articles that offer do-it-yourself projects, tips and hacks for retrofitting your adventure mobile for life on the road. Be sure to check out how to build a kitchen and maximize storage space in your van.]
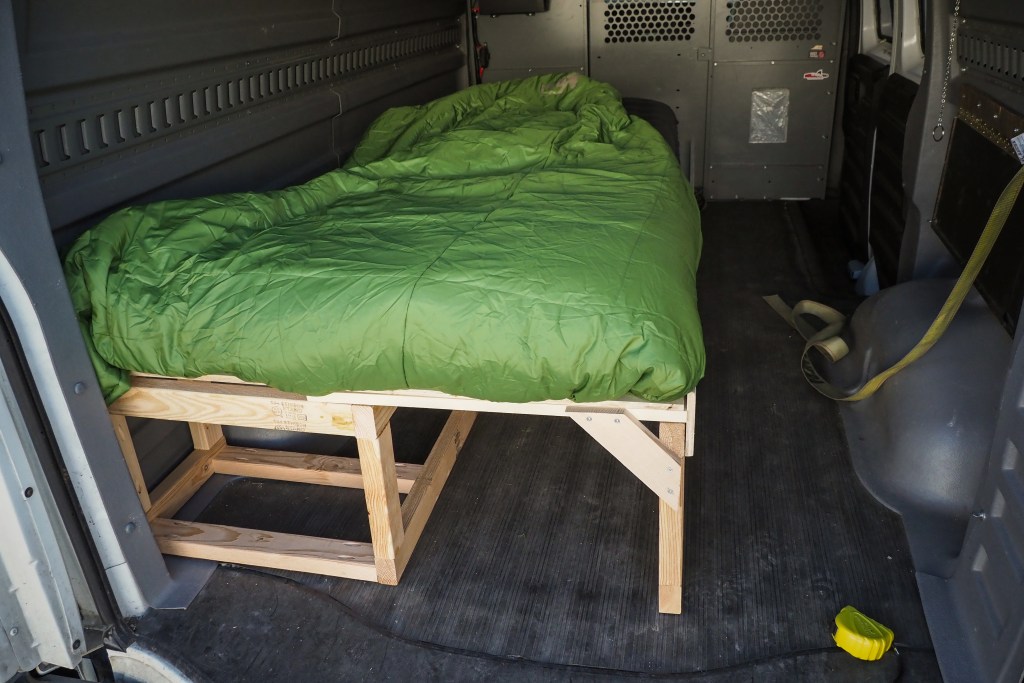
Have you fantasized about taking off on an adventure, embracing the freedom of the road and sleeping comfortably in your car, wherever your tires take you? Whether it’s for a months-long trip or a weekend at the crag, this DIY sleeping platform will make your #VanLife dreams come true, thanks to a pullout design and room for storage.
For this DIY, you should be comfortable with a saw and a drill. You will also need to carefully adapt all measurements to your own van or SUV. Read through the entire article before buying materials. The measurements of your vehicle will dictate the amount of materials you need to purchase.
Materials:
- Ten 2 x 3 in. x 8 ft. boards
- One 1 x 4 in. x 8 ft. board
- Eight 1 x 3 in. x 8 ft. boards
- One 2 x 2 in. x 8 ft. board
- Wood glue
- Box of 2 in. wood screws
- Box of 1¼ in. wood screws
- Box of ½ in. wood screws
- One 4 x 8 ft. x ½ in. plywood sheet, cut into three widths at 77 in. long; ours were 24 in., 18 in. and 4 in. wide
- Two piano hinges or four door hinges
Tools:
- Marker
- Hacksaw, handsaw or chop saw
- Pocket hole jig
- Drill and bits
- Two clamps
- Sandpaper
Directions:
We built this two-person sleeping platform for a standard full-size van. Depending on your vehicle’s dimensions you can modify the width for one person. The pullout design takes up less space when you aren’t sleeping and allows gear to be stored underneath.
1. Measure your vehicle
Before you do anything else, you need to determine what size your bed platform will be.
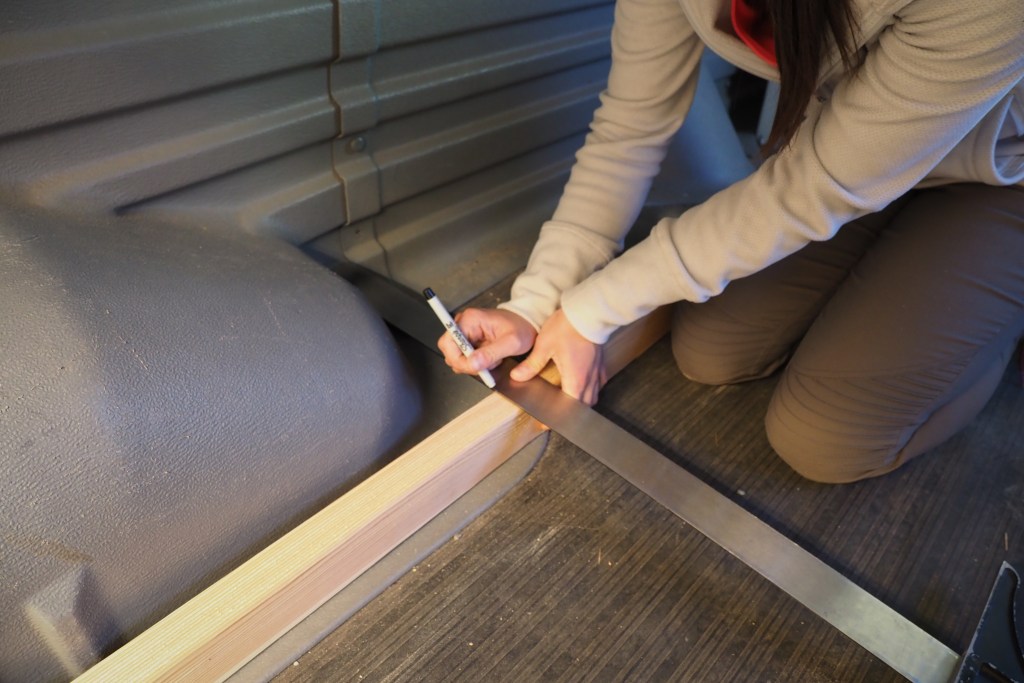
Length: Measure the interior length of your vehicle from behind the front seat (or to wherever you want the platform to extend) to where the platform will end near the back of your vehicle. Make sure you measure the shortest “line” so the platform doesn’t stick out past your vehicle’s rear doors or trunk, taking into account the wheel well and any other structures. Our platform is 77 inches long.
Height: Two things will dictate the height of your sleeping platform: any structures it needs to clear (like a wheel well) and the amount of storage space versus head room you want. Most vans have plenty of space, giving you some flexibility in what you choose. We made our platform 17 inches tall. When determining height, consider these questions: Are there particular storage bins you want to fit underneath? Do you want to be able to sit up comfortably? Don’t forget to account for the height of your mattress and thickness of building materials.
Width: You can calculate the width measurement once you know the height of your bed. Think about these things: Do you want to sleep one person or two? Will you be sleeping on foam you can cut to size or sleeping pads? We wanted to fit two 20-inch pads, so our platform is 42 inches wide.
2. Cut the boards
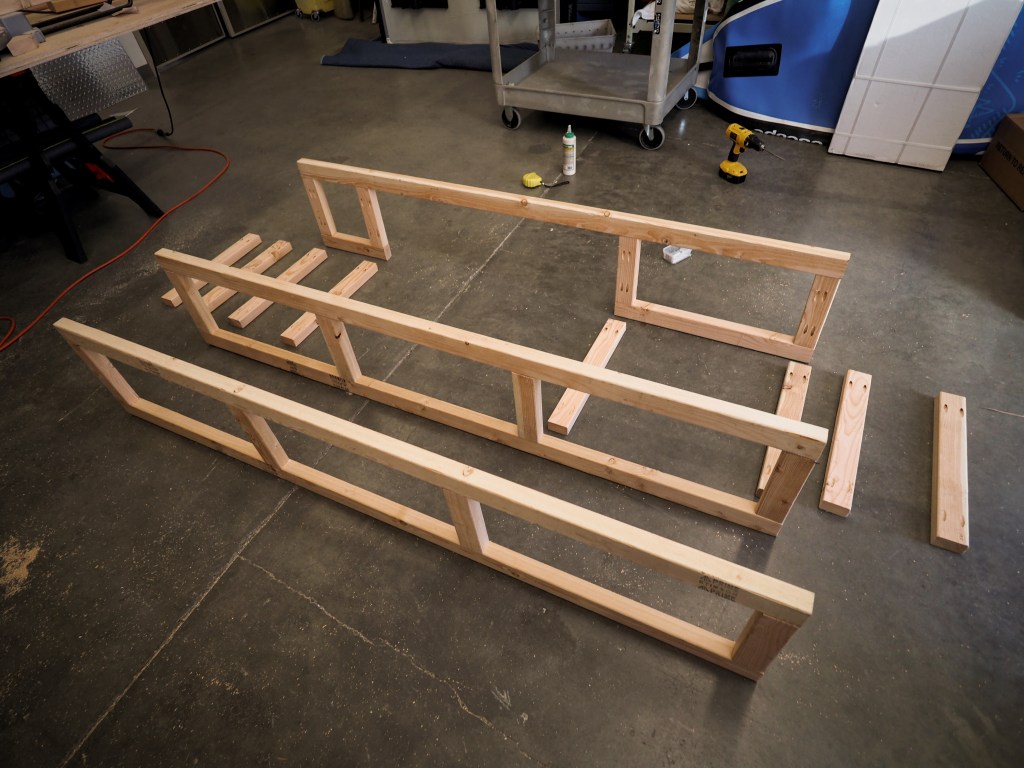
The platform is created from three rectangular frames with supports. Two are identical; the third has an open base to allow space for a wheel well.
Note: All of the following dimensions are based on our van; adjust your measurements accordingly.
Measure and cut the following lengths of wood:
- Length: Five 2 x 3 x 77 in. pieces
- Width: Eight 2 x 3 x 19.5 in. pieces
- Height: Twelve 2 x 3 x 10 in. pieces
- Wheel well allowance: Measure the space needed to clear your vehicle’s wheel well and cut two 2 x 3 in. pieces for the bottom of a 77 in. frame; ours were 13 in. and 25 in. (seen above on the uppermost frame)
- Slats: Fifteen 1 x 3 x 24 in. pieces; two 1 x 4 x 24 in. pieces
- Sliding crossbars: Three 2 x 2 x approximately 21.5 in. pieces (see step 6 for exact measurement)
- Structural support gusset: One 1 x 4 x 9.5 in. piece (see step 9 for details on cutting 45-degree angles on the support)
You can also have the hardware store do this for you.
3. Make pocket holes and assemble frames
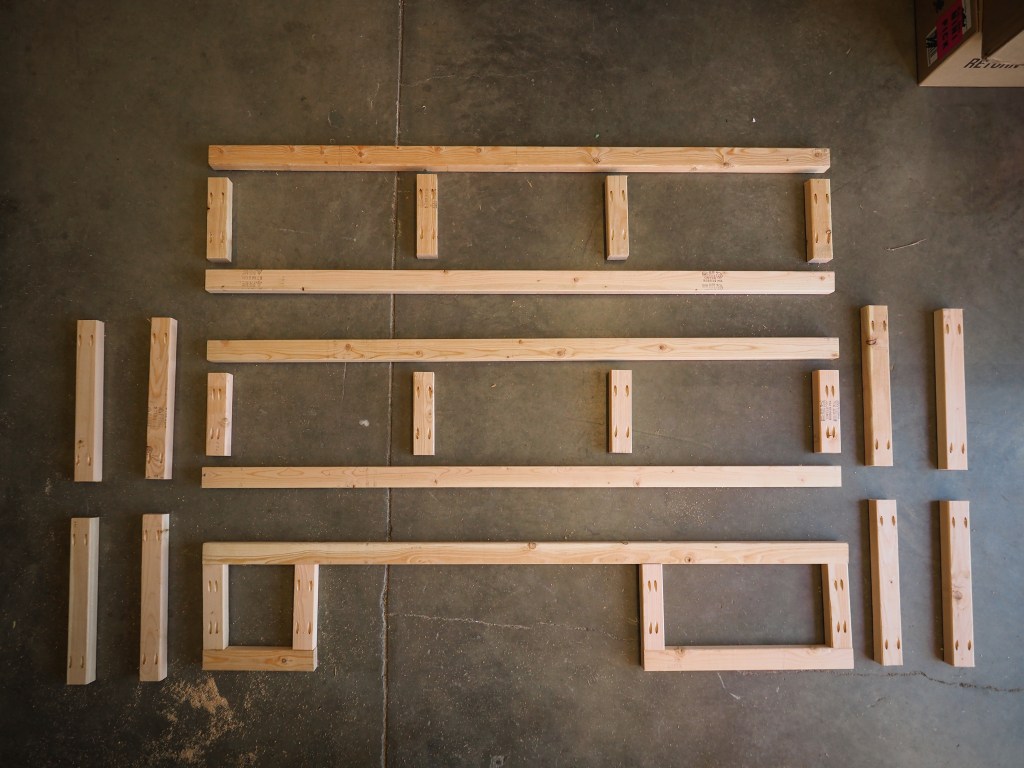
Lay out pieces as seen above. On each of the 20 shorter pieces that are lying vertically in the picture, pick a side and make two pocket holes on each end using the pocket hole jig (follow the directions that came with the tool).
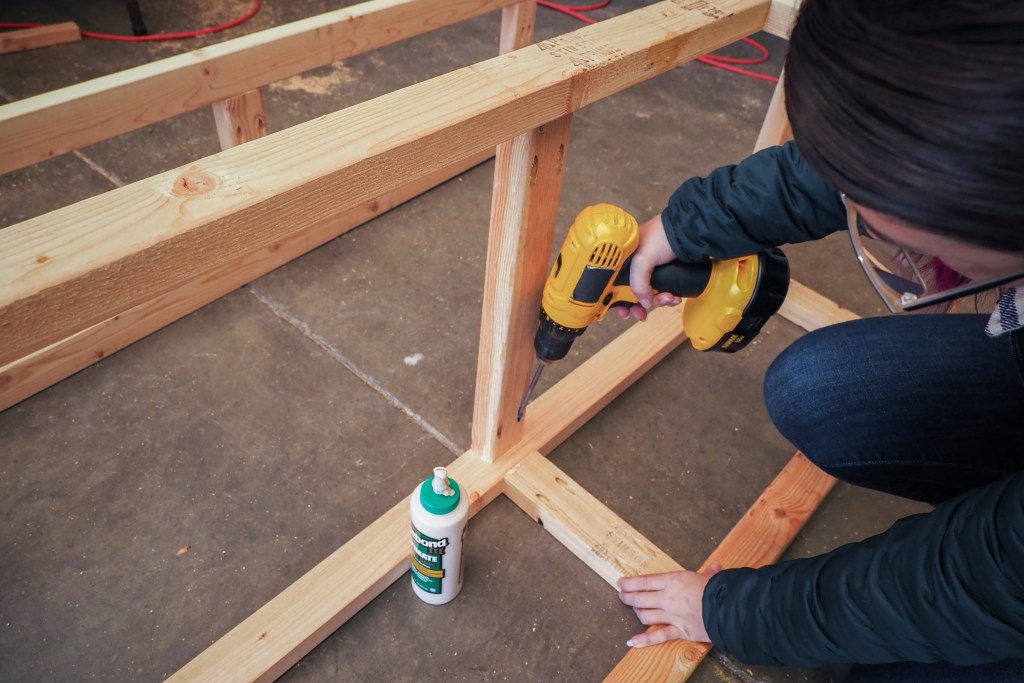
Assemble each of the three frames by applying wood glue to the connecting surfaces, then drill a 2 inch screw into each pocket hole. Evenly space the vertical supports along the 77-inch lengths. Leave the 19.5-inch lengths aside for Step 4.
4. Assemble platform box
Connect one of the two identical frames to the one with the wheel well space to form a box.
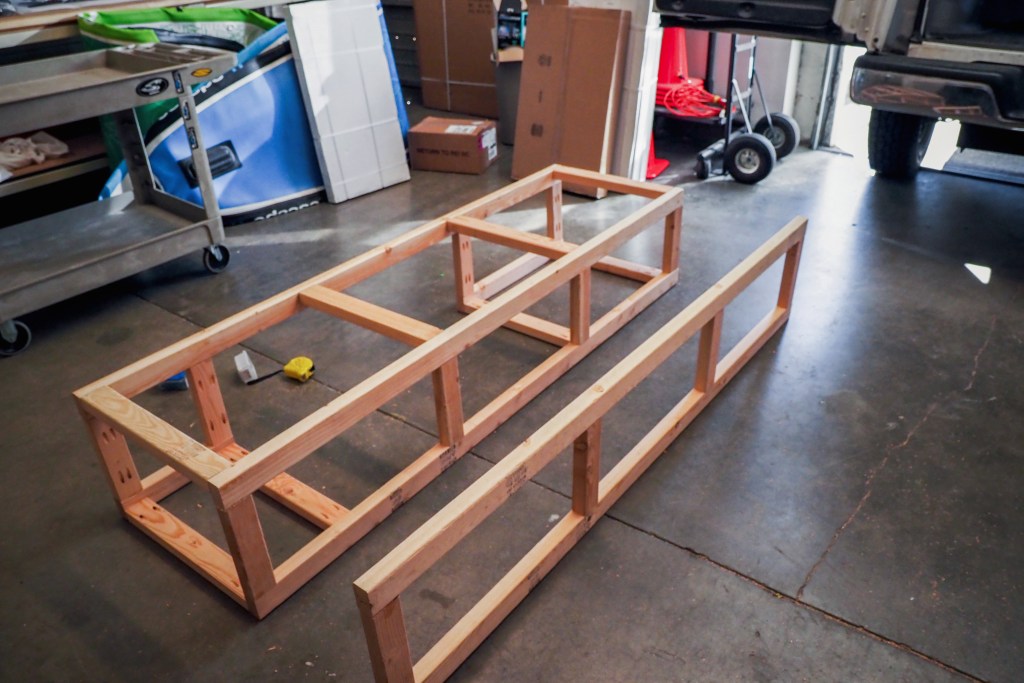
Using the eight 19.5 inch pieces, assemble the box structure as pictured above. Apply wood glue to each end as you go and drill 2 inch screws into the pocket holes.
5. Assemble sliding extension
Position the third frame snugly against the side of the box that does not have the wheel well space. This piece will ultimately slide away from the box to extend the platform. We will call the main box A and the third frame B for clarity through this step.
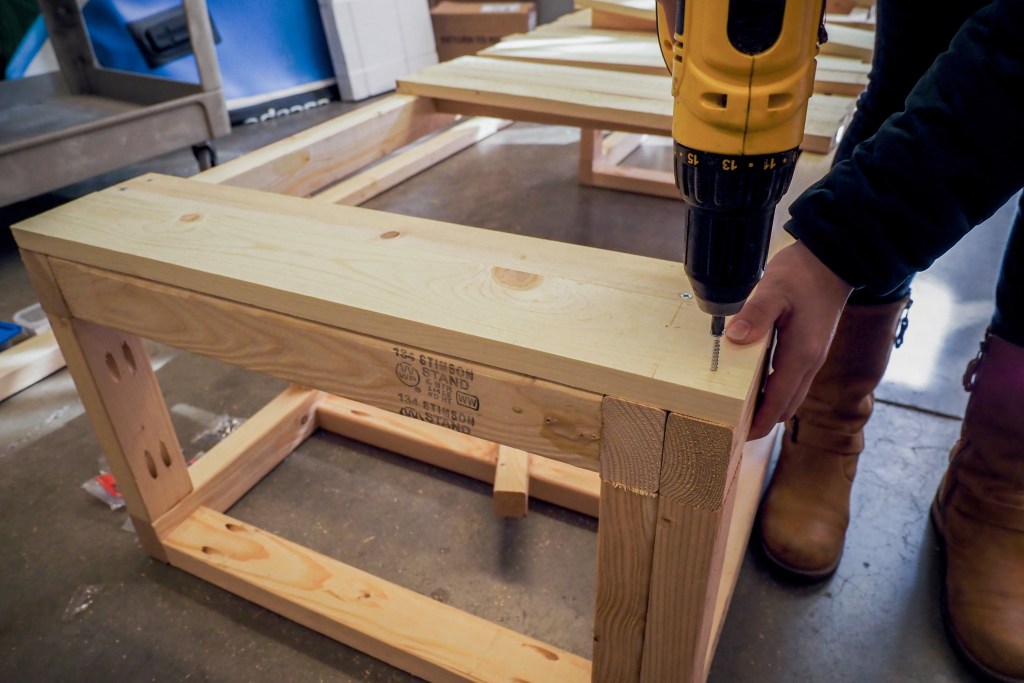
Place one of the 1 x 4 inch slat pieces running across one end of the A box as seen above. Secure the piece to the B frame by drilling twocrews into the end resting on the B frame.
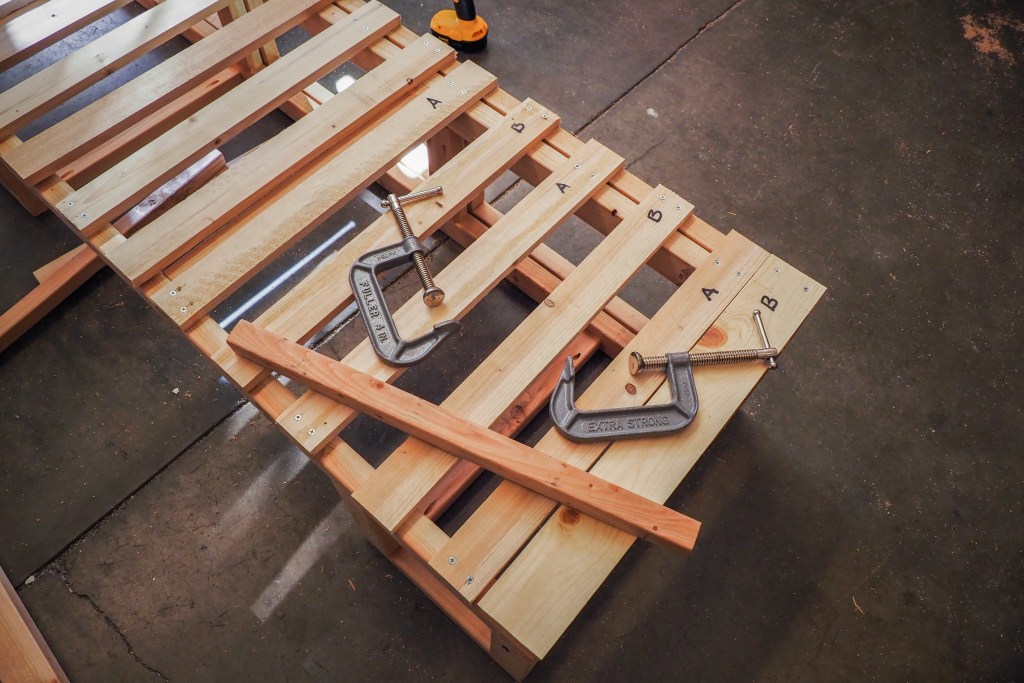
Position a 1 x 3 inch slat snugly against the 1 x 4 inch piece. Drill two screws at each end, attaching the board to the A box only. Then, alternate screwing slats into A box and B frame as pictured. The space between slats should equal the width of one slat: three inches. For each slat that attaches to A, screw it in on both ends. For each slat that attaches to B, screw it in only on the end that touches B. (Later on, you will put screws in the other end, but hold off for now.) Continue this for the length of the platform, ending with the second 1 x 4 inch piece.
6. Assemble sliding extension
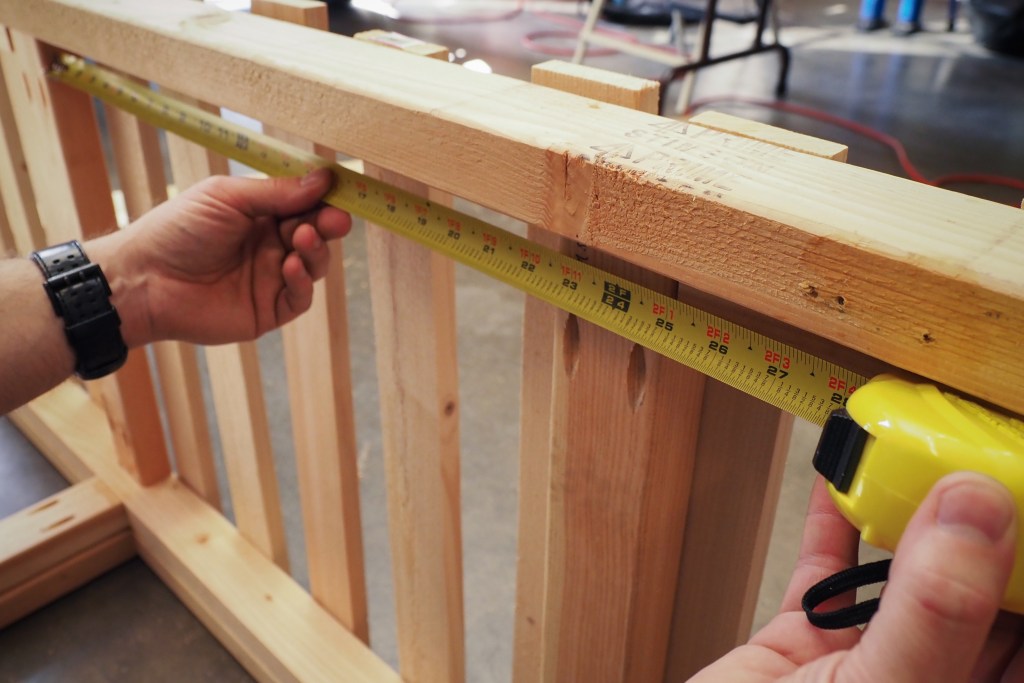
Measure the inside length of the A box between each set of supports, leaving a ¼-inch gap on either side so the pieces slide out easier. Cut three approximately 21.5-inch lengths of 2 x 2 inch wood (length will depend on your measurements). These will be the sliding crossbar for the B slats.
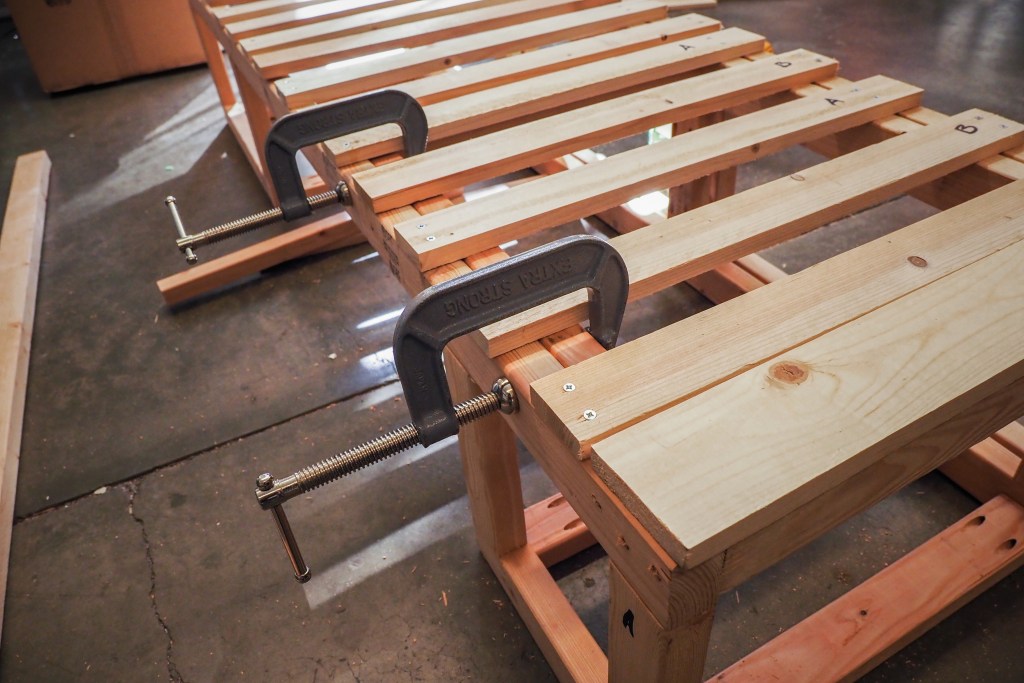
Use two clamps to hold one piece of the crossbar in place between the supports of the A box beneath the ends of the unattached B slats.
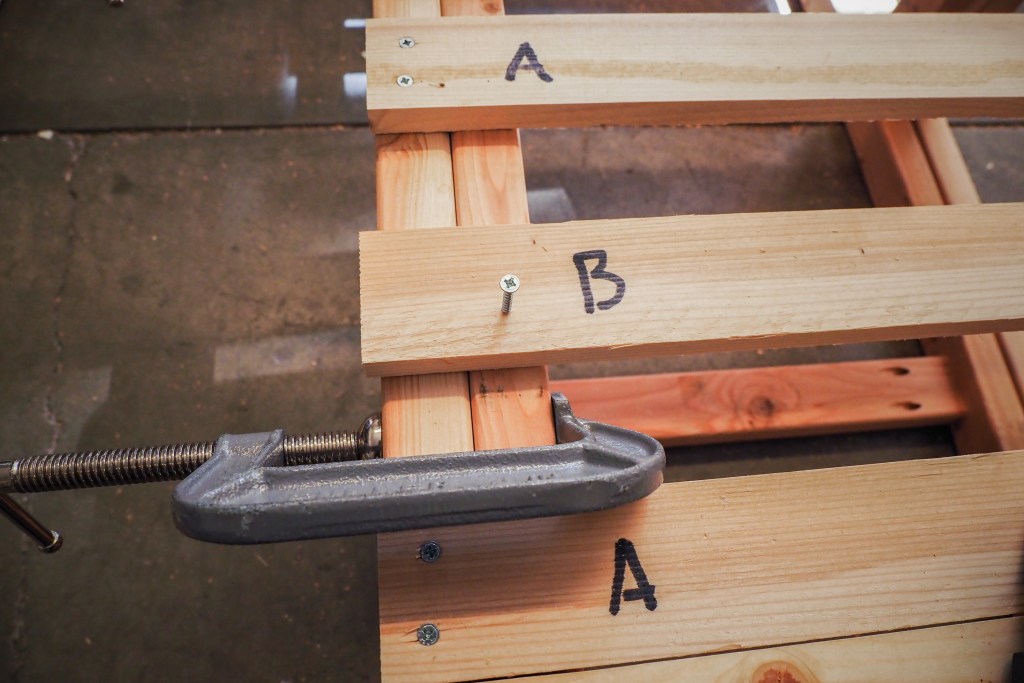
Use two screws to secure each B slat to the bar. Repeat with the two remaining 2 x 2 inch pieces and B slats.
7. Sand edges
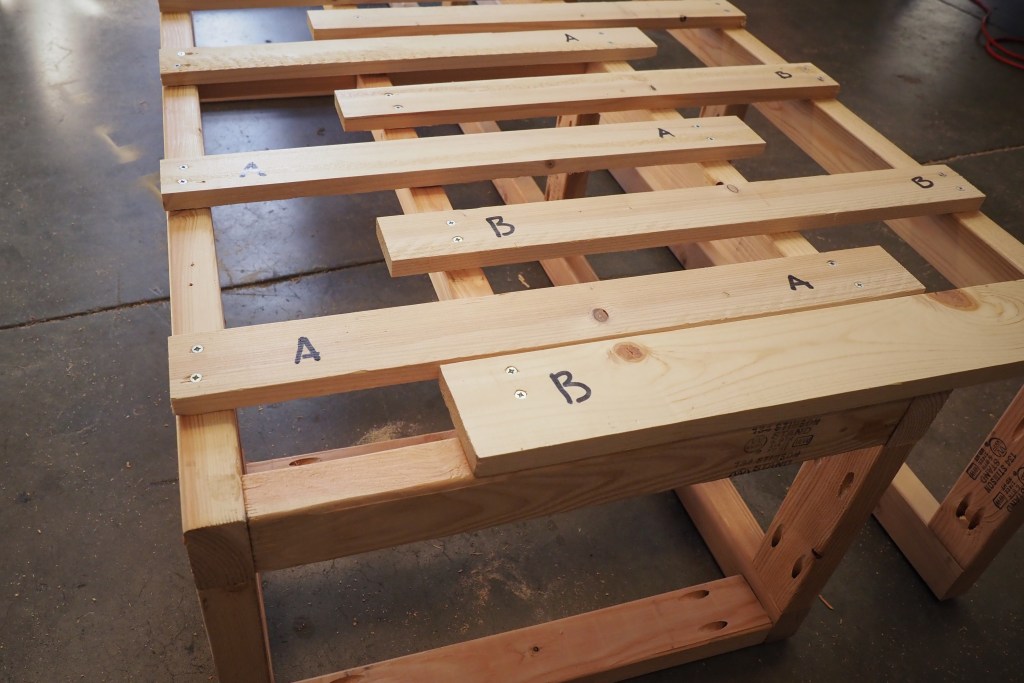
Your extending box is now complete.
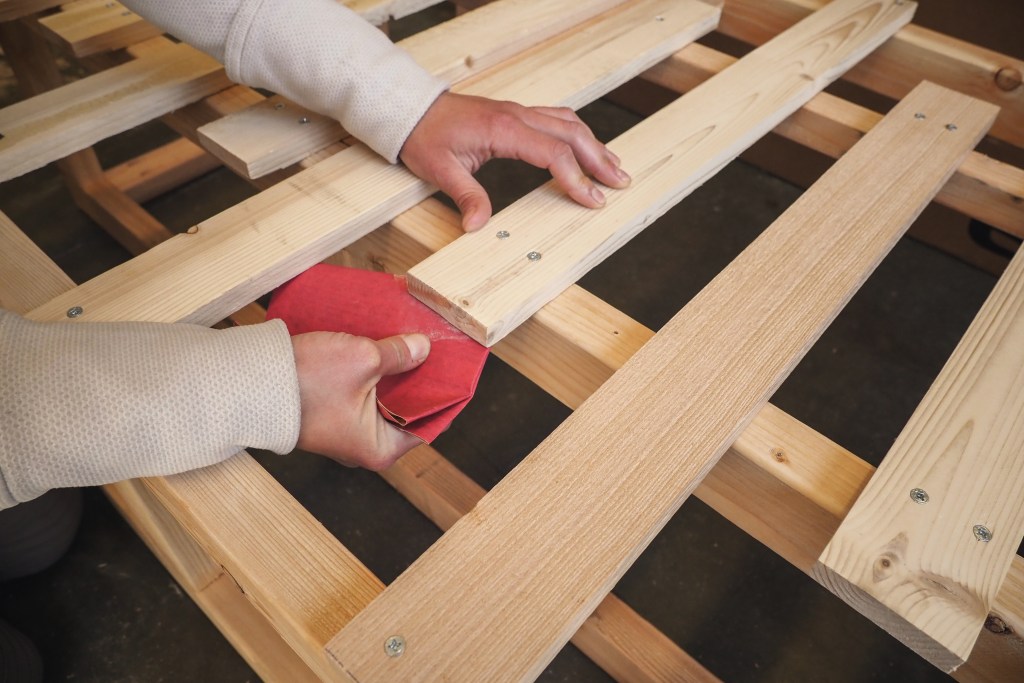
Sand all the edges to make sliding it in and out easy.
8. Make folding platform
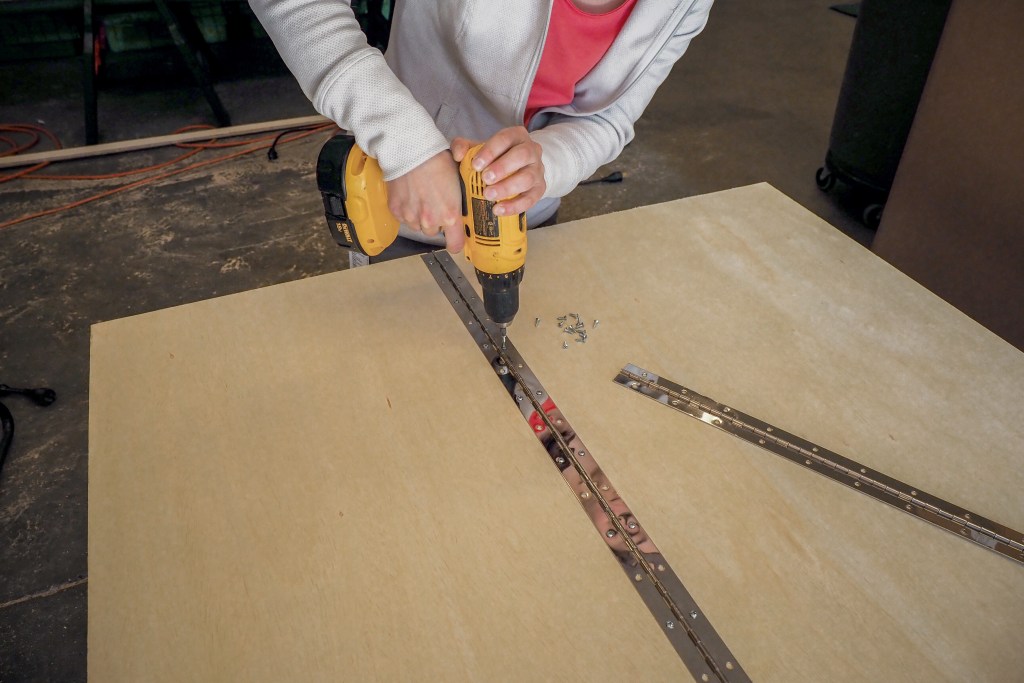
Join the two large pieces of plywood lengthwise using the two hinges and ½” screws.
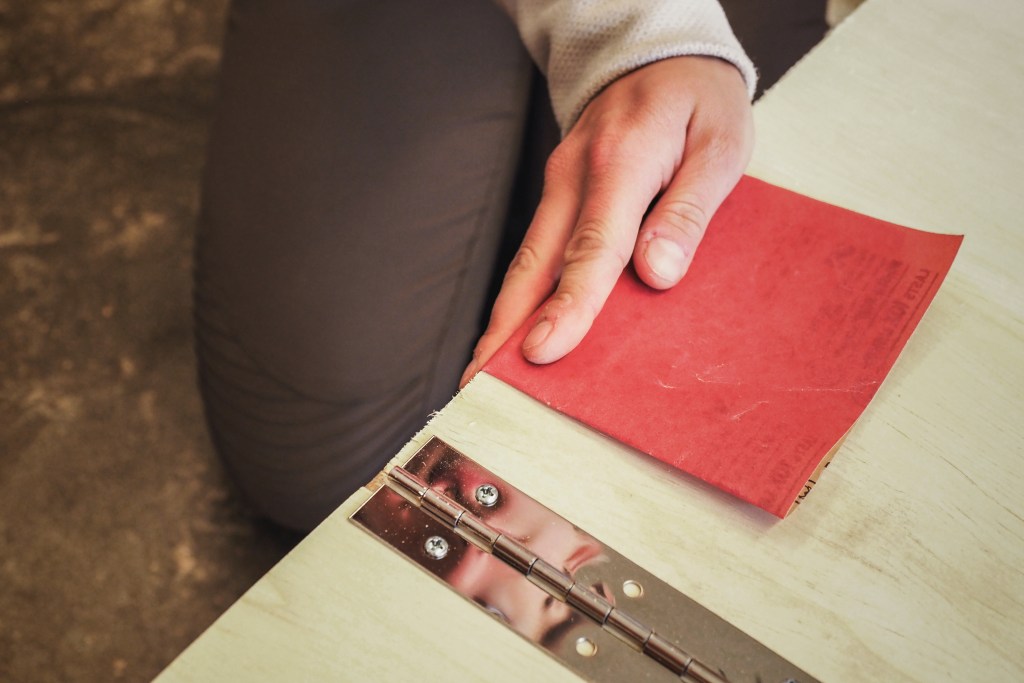
Sand edges to keep them from damaging your bedding.
9. Attach gusset
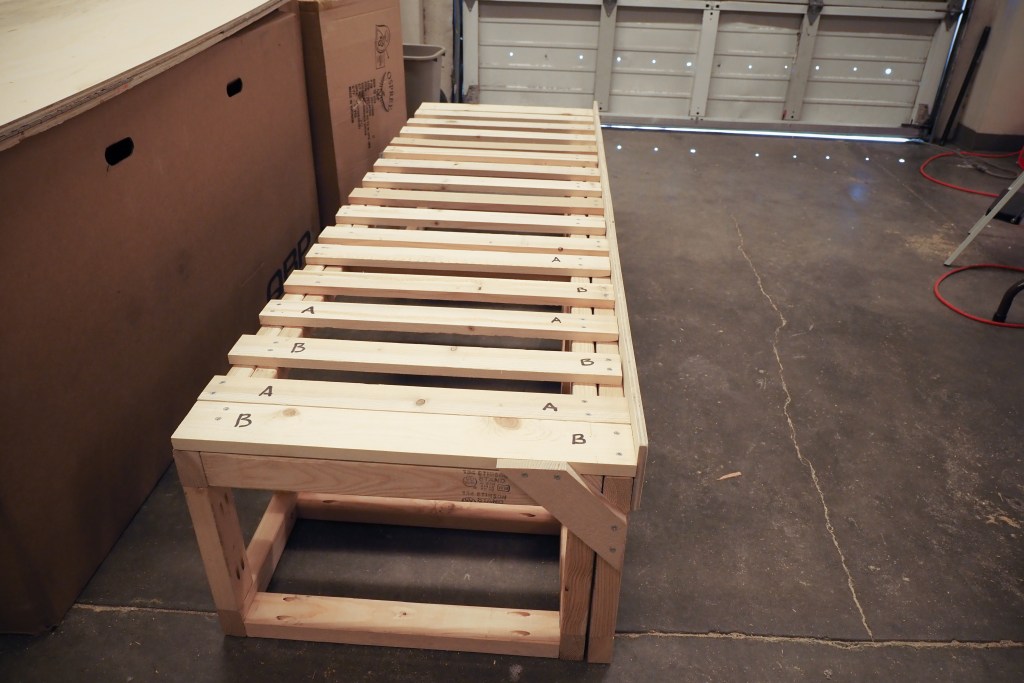
Take the 1 x 4 x 9.5 inch piece; this will act as a gusset for extra structural support. Cut 45-degree angles at both ends, and screw the gusset piece to the B frame and the first B slat as pictured with 1¼ inch screws.
10. Attach extender guard
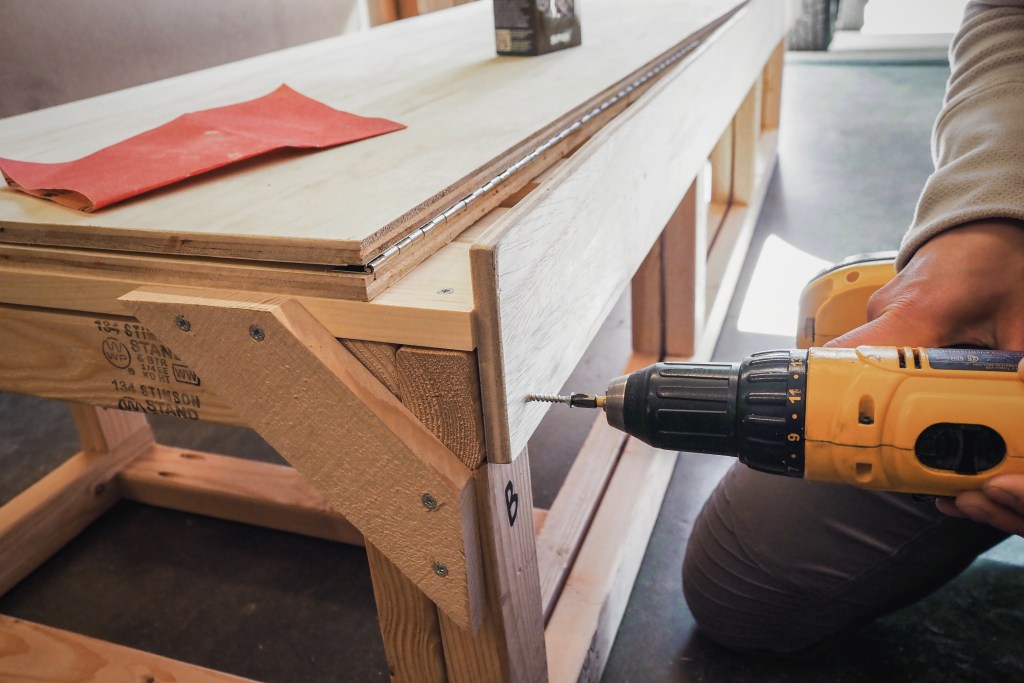
Use the extra 4-inch-wide piece of plywood as a guard for the extender piece. This holds the folded plywood in place when the platform is in bench mode. Using screws, secure the plywood vertically onto the B frame as pictured above.
11. Assemble the sleeping platform
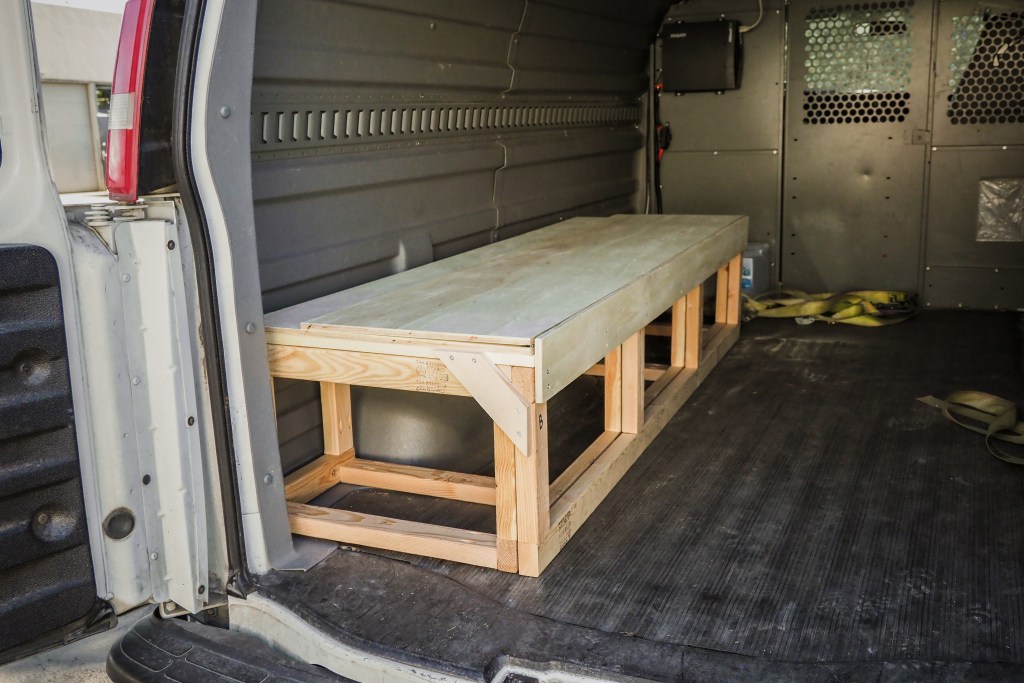
Place the folded plywood onto the box, with the wider piece on the bottom and the hinges against the extender guard. Place the platform in your vehicle.
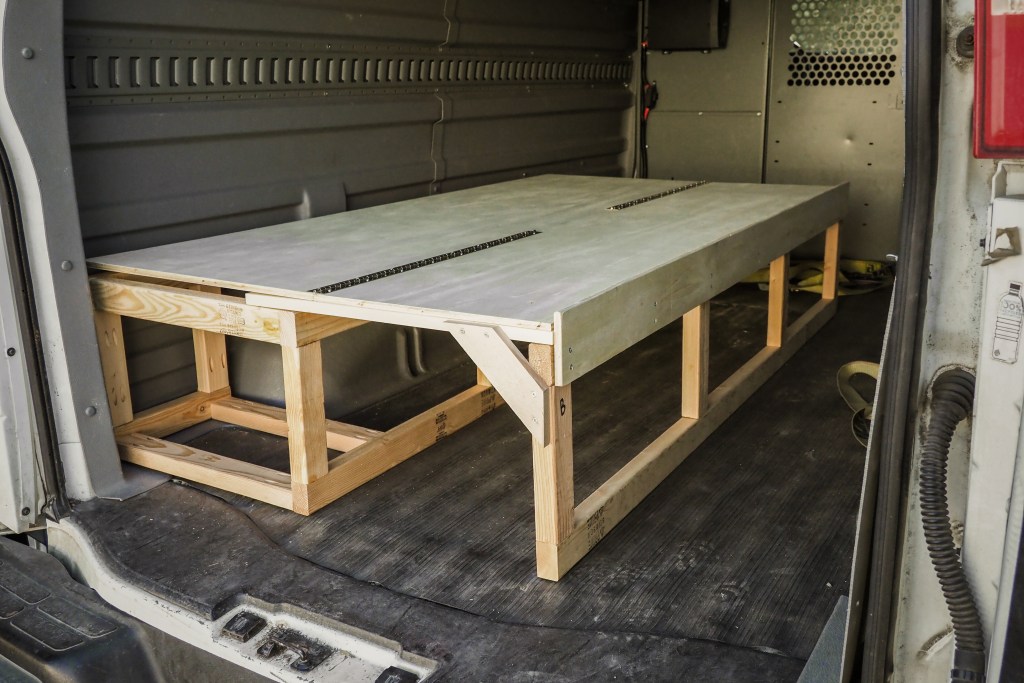
To use, extend the slider and fold the hinged plywood out.
12. Make the bed
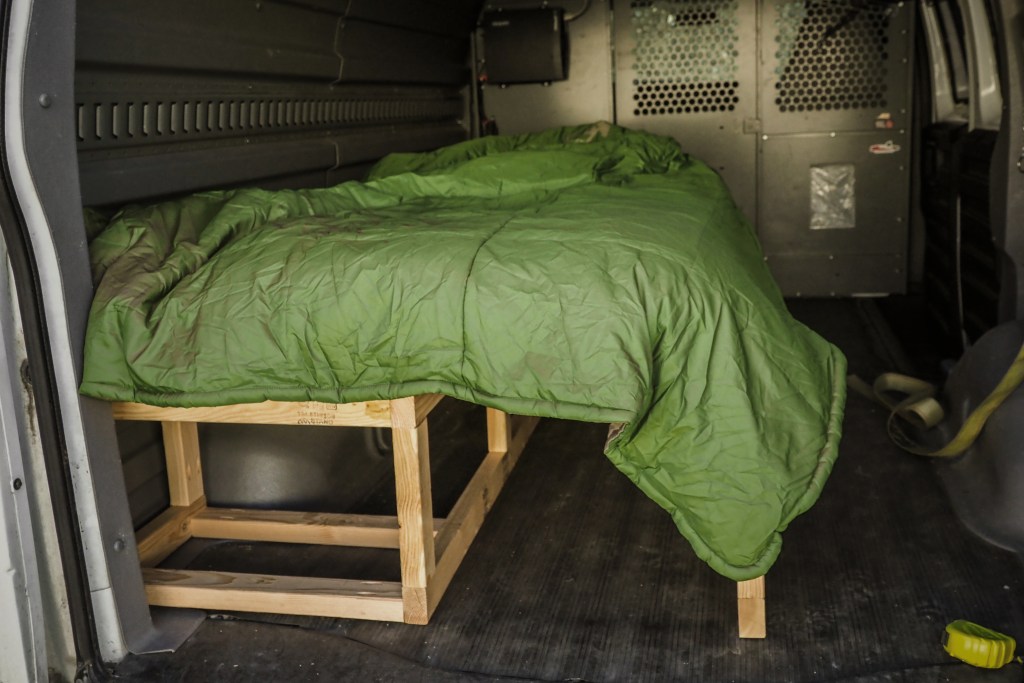
Choose your favorite mattress, pillows and blankets and enjoy your bed and newfound freedom! For maximum snoozing pleasure, check out 11 Tips for Sleeping in Your Car.
