[Editor’s note: This story is part of our van life collection—articles that offer do-it-yourself projects, tips and hacks for retrofitting your adventure mobile for life on the road. Be sure to check out how to create a sleeping platform for your van.]
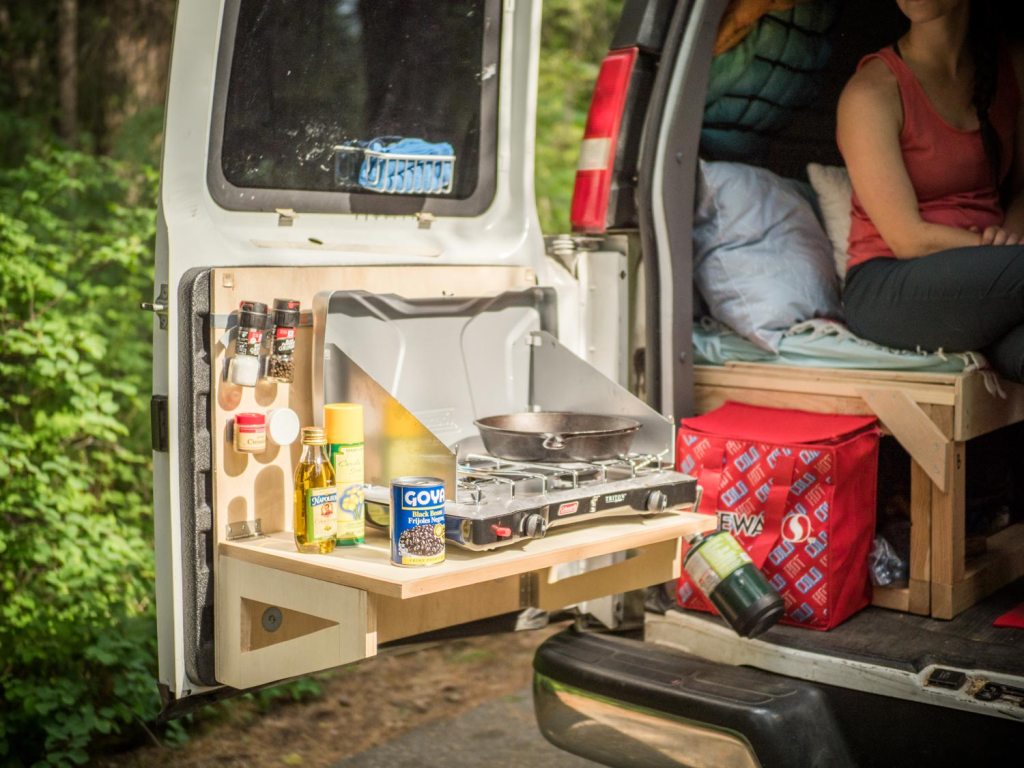
A nomadic lifestyle offers freedom and spontaneity, but it’s much more enjoyable when you aren’t reliant on fast food for sustenance. You might be surprised by the quality of meals you can pull together on the road with the right setup; van life can be as gourmet as you want. Two fold-out tables, one for food prep and one for a stove, make cooking out of your van much easier. A variety of storage hacks keep cooking items and other gear handy and secure.
You will need to adapt the DIY’s dimensions and material amounts to your own vehicle, but it should be fairly simple to adjust.
DIY Fold-Out Van Table
 Materials:
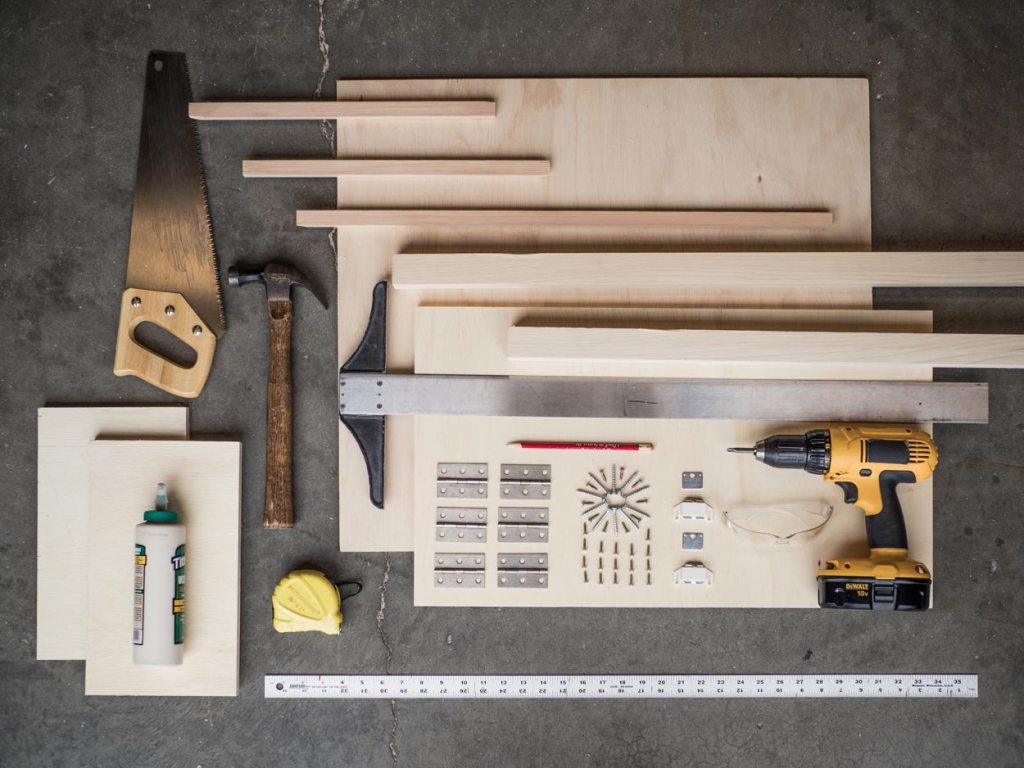
For one table:
- 4 x 4 ft. sheet of ¾ in. sanded plywood
- 6 hinges with screws
- Wood glue
- ¾ in. trim molding (optional)
- 9 brad nails
- One ¾ in. webbing strap with buckle or slider
- Four ½ in. grommets with installation kit
- Extra tent pole pieces or two 2 in. screws
- Extra tent pole piece or one large washer
- Elastic cord
- Small washers
- Four ¼-20 2 in. bolts
- 4 flat cut washers
For optional door supports (see step 1):
- 5 ft. of 2 x 2 in. board
- Six 2 in. wood screws, size #10
Tools:
- Tape measure
- Clamp
- Jigsaw
- Drill with 3/8 and 3/16 in. bits
- Phillips screwdriver
- Hammer
Directions:
1. Adapting the DIY to your vehicle
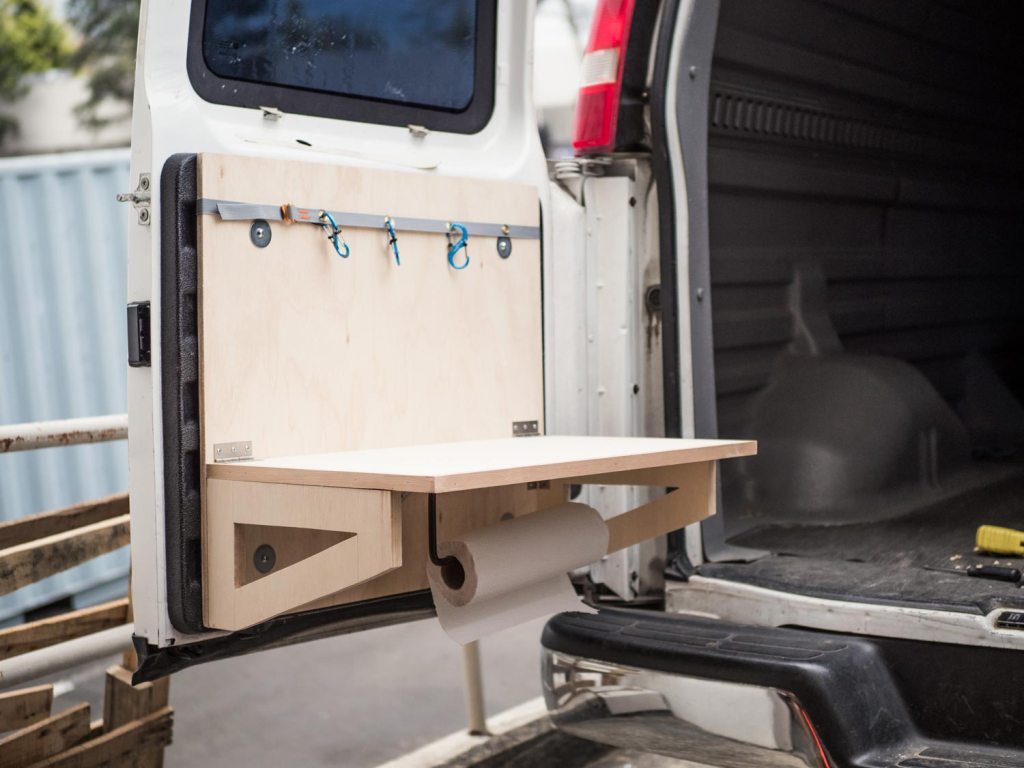
We made two fold-down tables, one on each of our van’s back doors (the materials list is for one table, so double it if you want two). You will need to determine the measurements of your own vehicle’s doors and adjust the dimensions accordingly. Be mindful of your door mechanics and don’t install a screw that will interfere with your ability to open and close the doors of your van.
The structure of our van doors necessitated extra supports to attach the tables; you will have to decide if your vehicle needs these as well. If your doors are flat, you probably don’t need additional support. Our van doors are curved with plastic ridges. The supports we added create a strong, flat surface for the table installation hardware. If the doors are flat, you likely will not need this extra support and can skip step 3.
2. Get your door dimensions
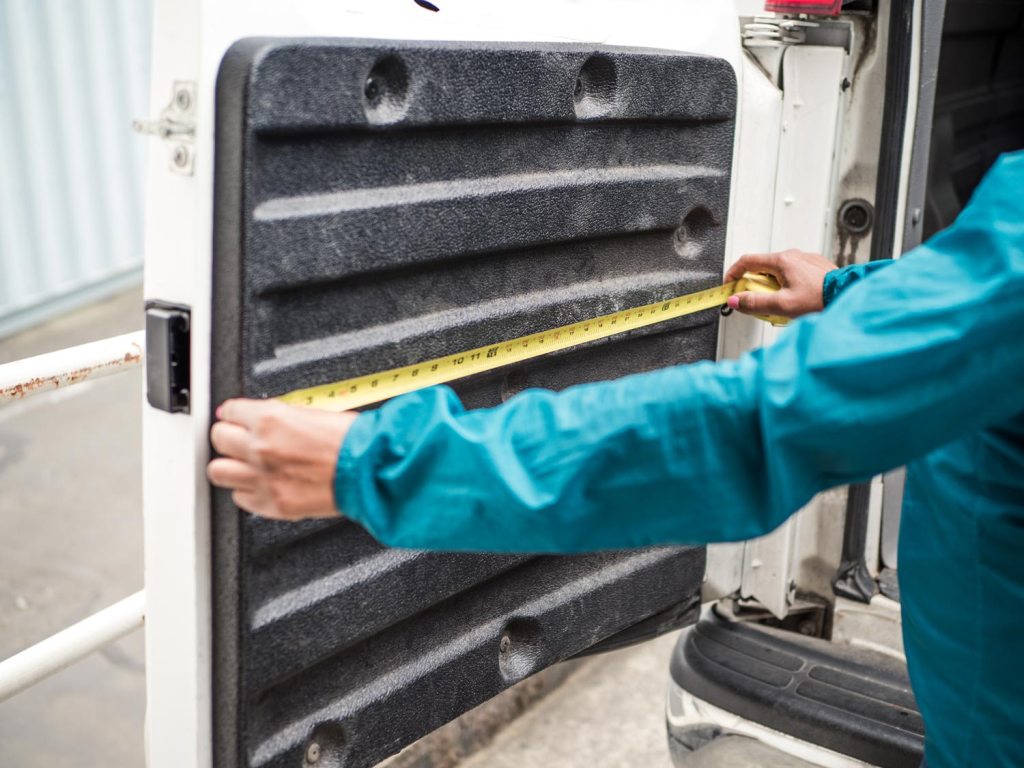 Measure the width and usable height (excluding windows, if any) of your vehicle doors. Our doors were two different widths, so our tables and back panels were cut accordingly. We had the plywood cut at the hardware store: table 1 measured 27 x 15.5 inches with a back panel of 27 x 24 inches; table 2 was 24.25 x 11.5 inches with a back panel of 24.25 x 18 inches. Save the extra plywood pieces for the table supports in step 4.
Now is also a good time to think about how high you want your table(s) to be. This can depend on how tall you are, the height of your vehicle and at what height you’re most comfortable chopping vegetables and stirring a pot on a stove. You’ll ultimately set the height in step 4 when you install the table supports.
3. Make door supports (if needed; see note in step 1)
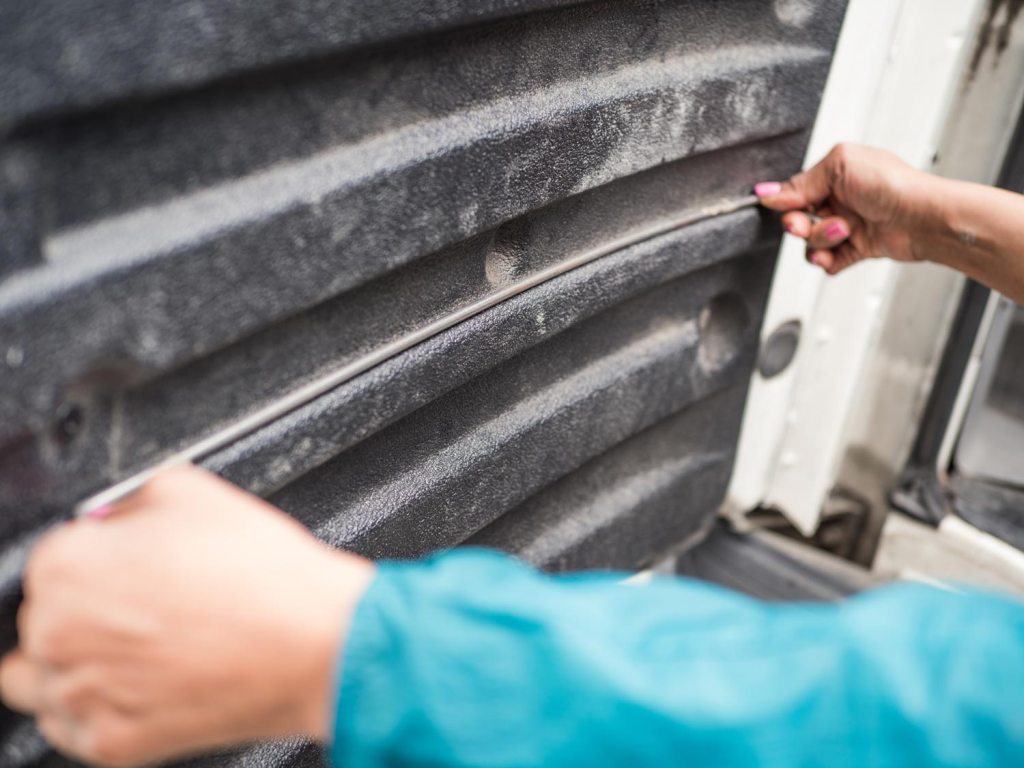
Use a piece of wire as a guide and bend it to match the curvature of the van door.
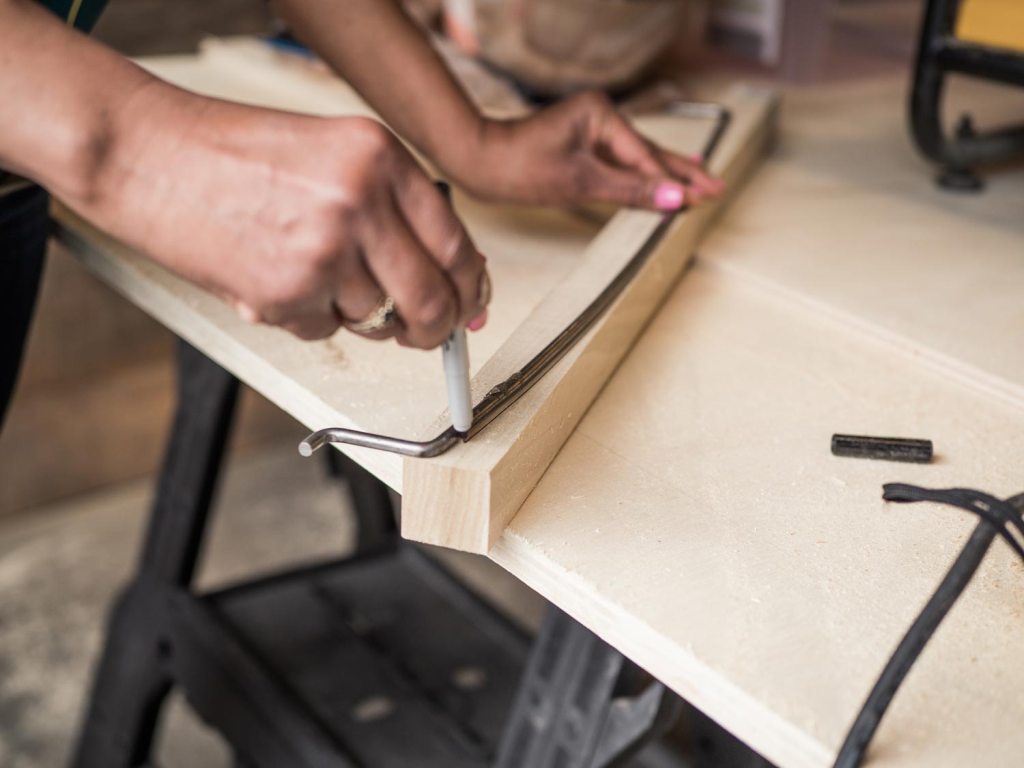
Trace the curve onto a piece of 2 x 2 inch wood.
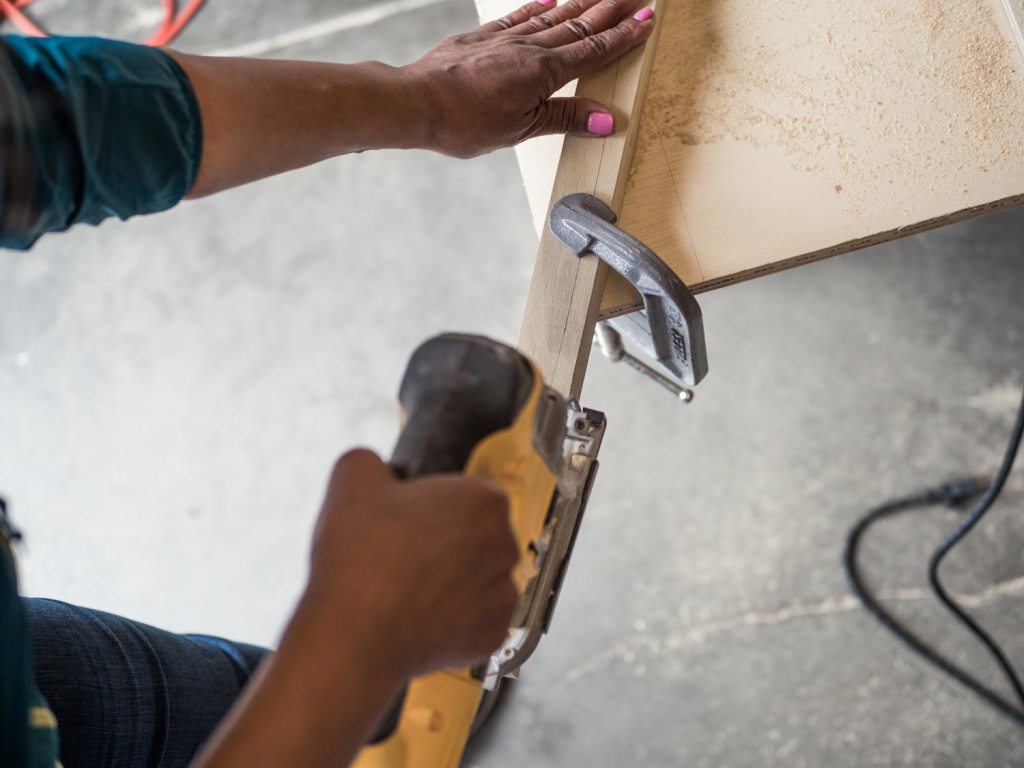
Clamp the wood securely in place and cut along the curve with a jigsaw.

Repeat. You should have two support pieces per door.
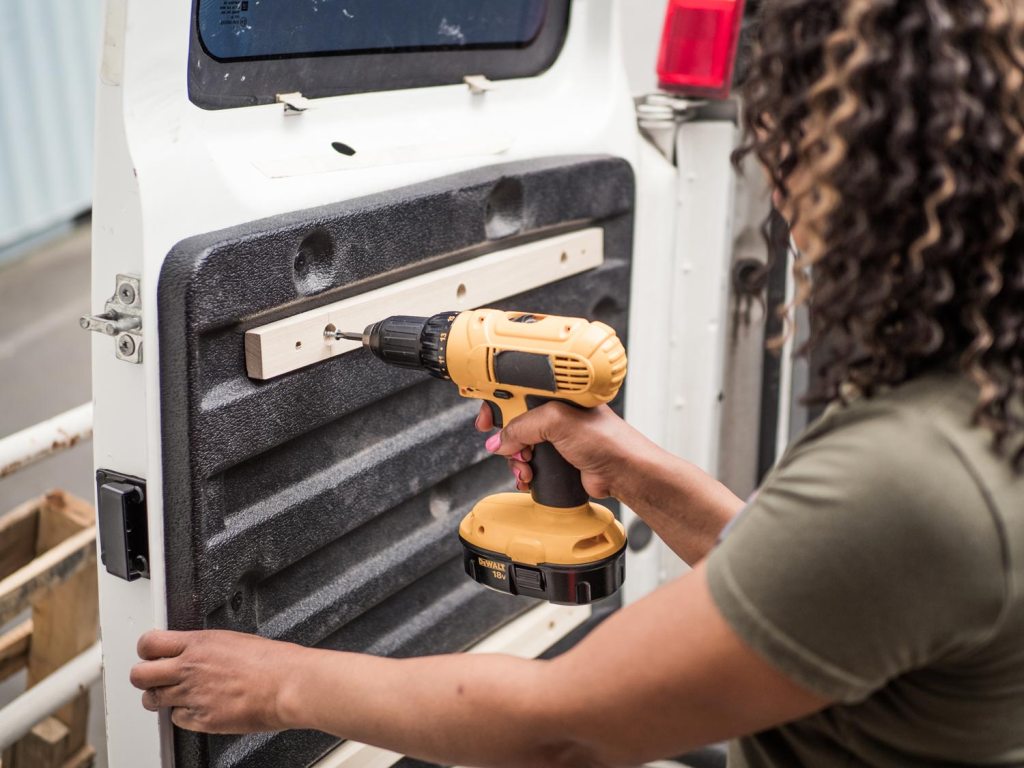
Countersink three ½ inch deep holes, evenly spaced along one of the supports. This allows the screws to sit flush with the board and to go farther into the door. Attach the support to the door using 2 inch wood screws. Repeat with the other supports.
4. Make and install table supports
This design relies on two fold-out plywood supports that hold the table in place. You can keep it simple and use two rectangular pieces of plywood, but we used a jigsaw to make ours a little fancy with center cut-outs and an angled shape (this is optional). The cut-outs make a good place to tie a garbage bag.
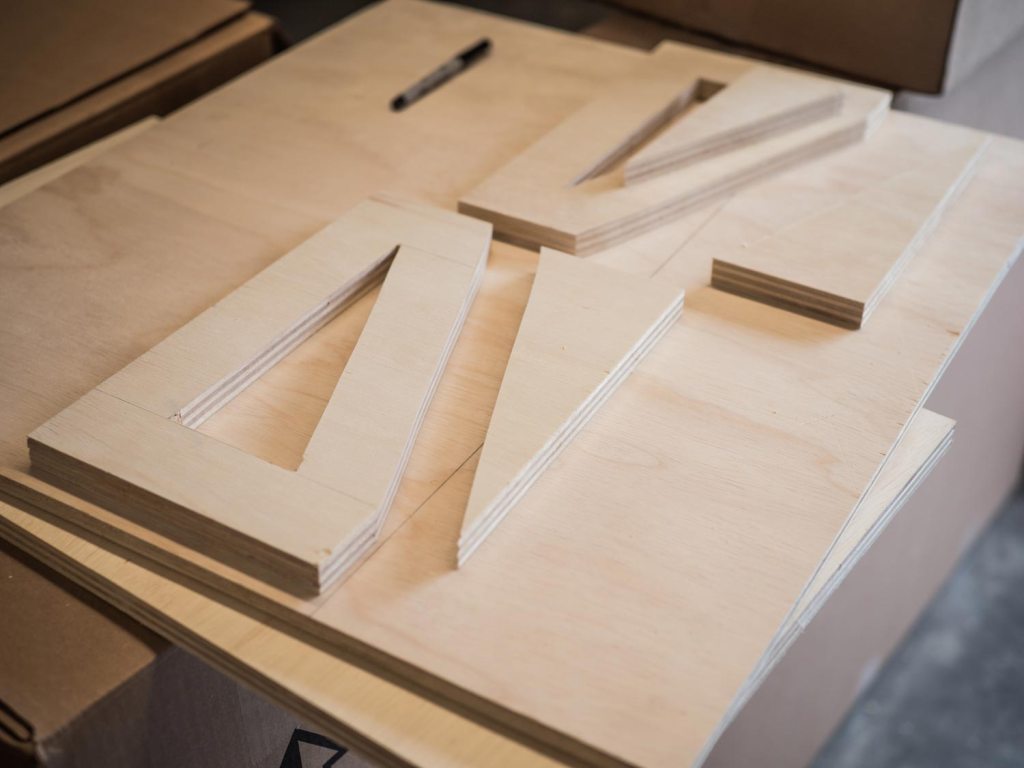
Your supports should be long enough to cover at least three-quarters of the depth of your table in order to securely hold the weight. And, you’ll want at least a ¼ inch gap in between the supports when they lie flat on the backboard. Our supports for the larger table measured 12.75 x 7.5 inches.
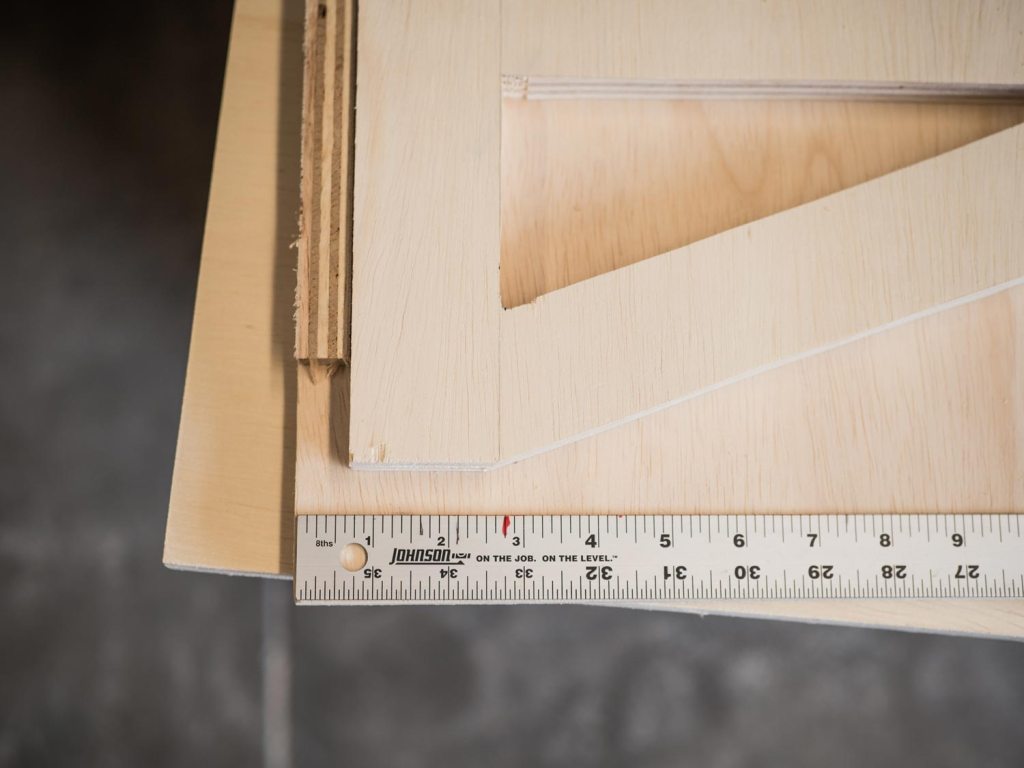 Determine where on the backboard to place the supports based on the desired height of the table. Mark the placement of the supports so you know where to place the hinges. Make sure to leave clearance at the edge of the backboard to accommodate the thickness of the support when it folds open.
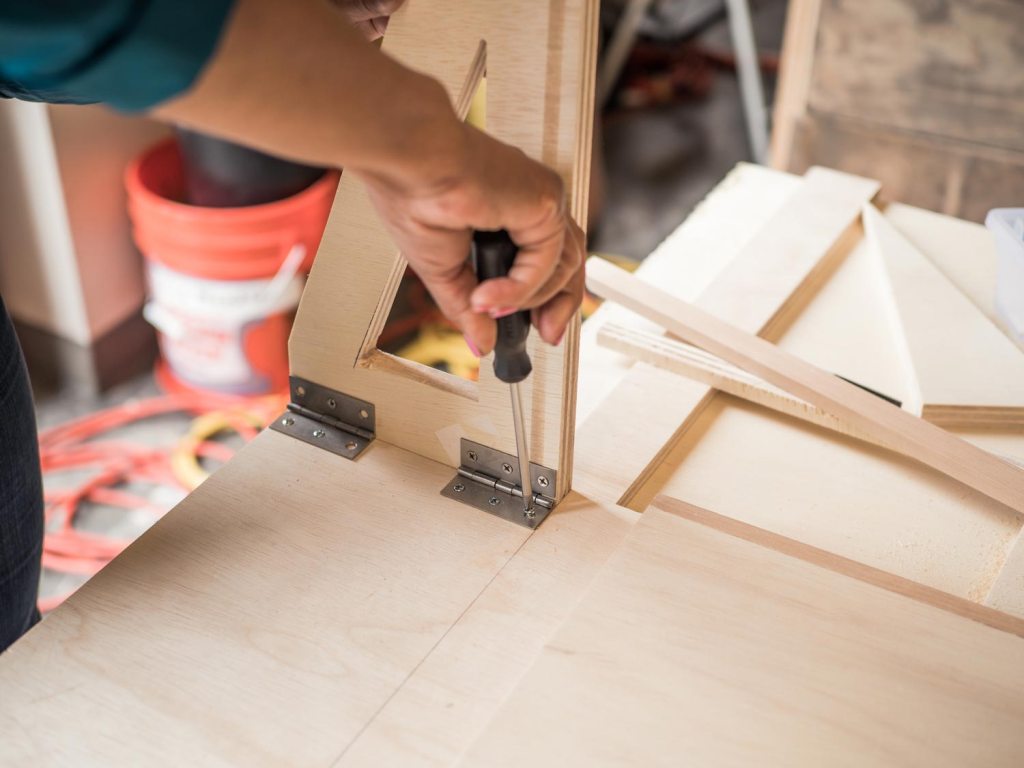 Install the hinges on the inside of each support, with the tops of the supports at the height you want your table.
5. Add table trim (optional)
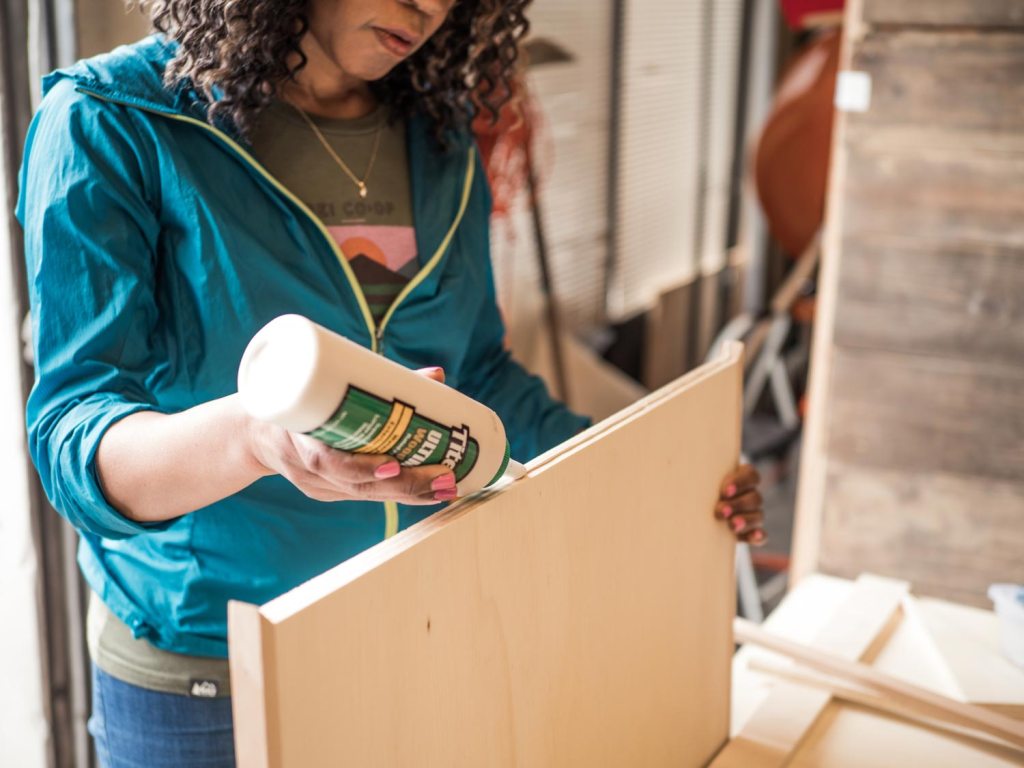
We added trim to our tables for a nice finish; this is an optional addition. To install the trim, apply wood glue to the three outer edges of the tabletop.
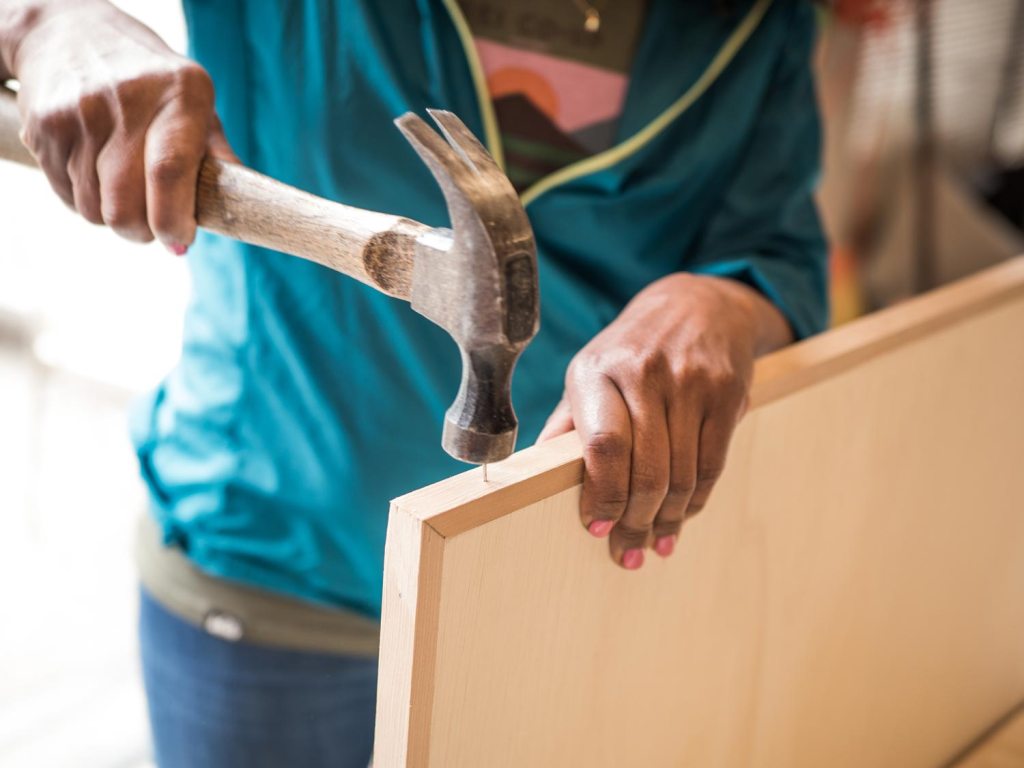
Then, use three brad nails per edge to secure the trim to the table.
6. Add table lock points
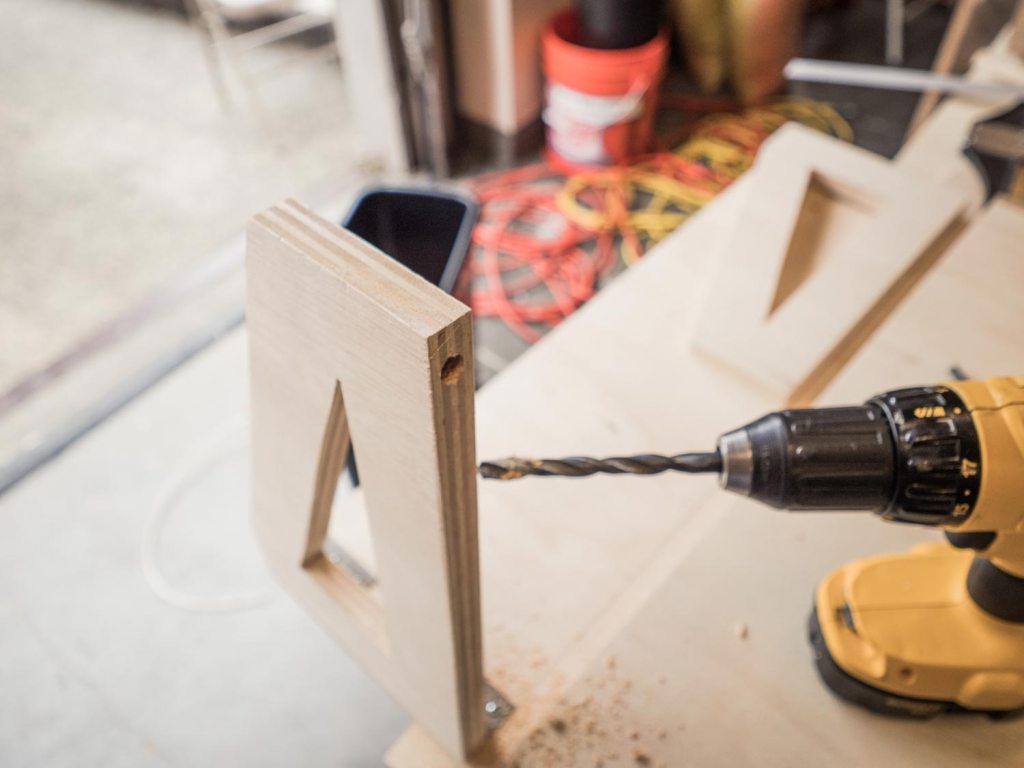
Using the 3/8 inch bit, drill a hole into the top of each support 1 ½ inches back from the front edge.
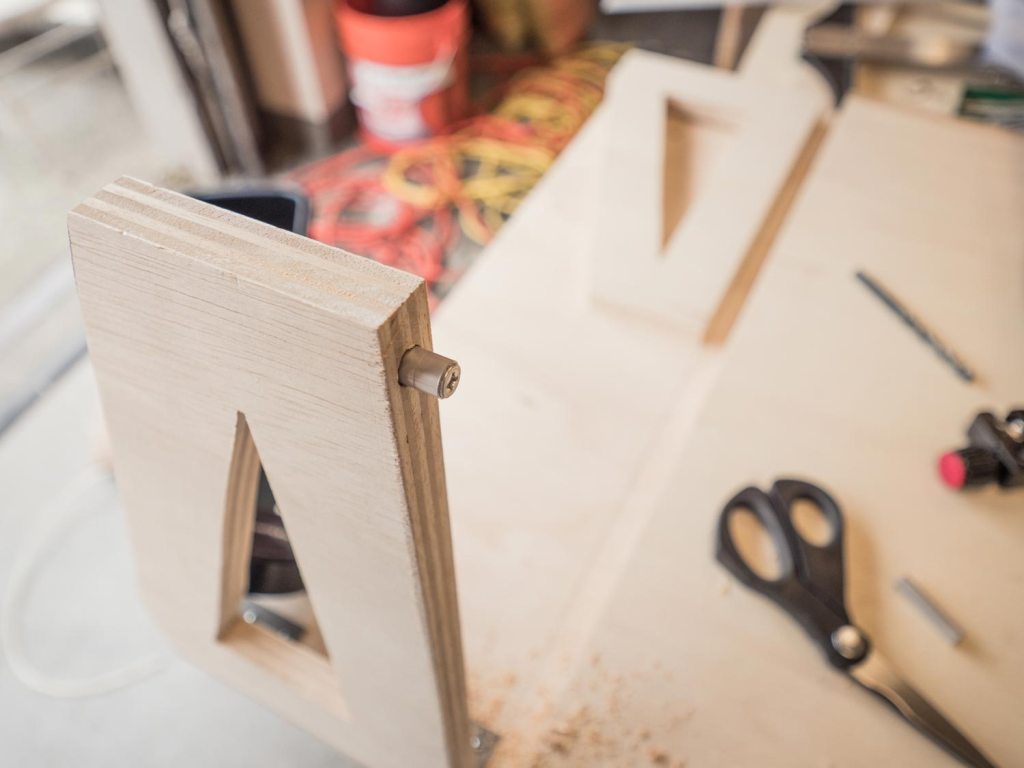
Screw a 2 inch wood screw into the hole until it sticks up about a quarter of an inch. Repeat with the other support. These will serve to hold the supports securely in place while the table is in use. We gave ours some flair by cutting a couple of pieces of extra tent pole and screwing them into the supports with the screws; this is optional.
Set the table onto the open supports with the back flush against the backboard. Mark where the table hits the screws or tent poles.
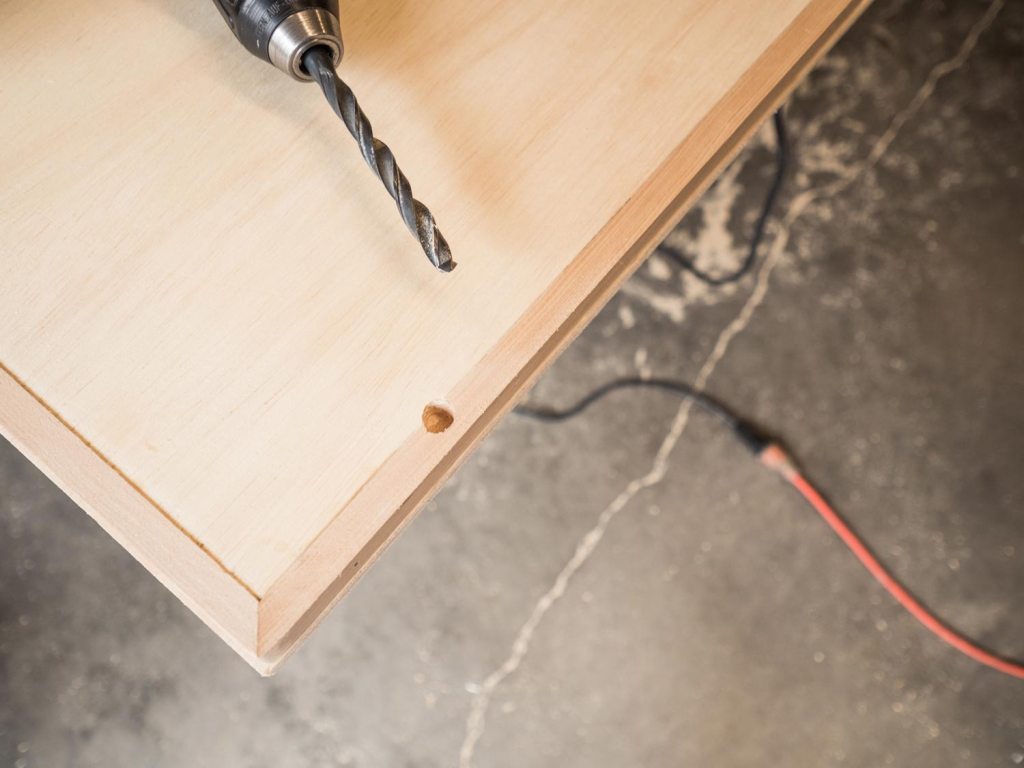 Use the 3/8 inch drill bit to make holes at the marks on the underside of the table.
7. Install table hinges
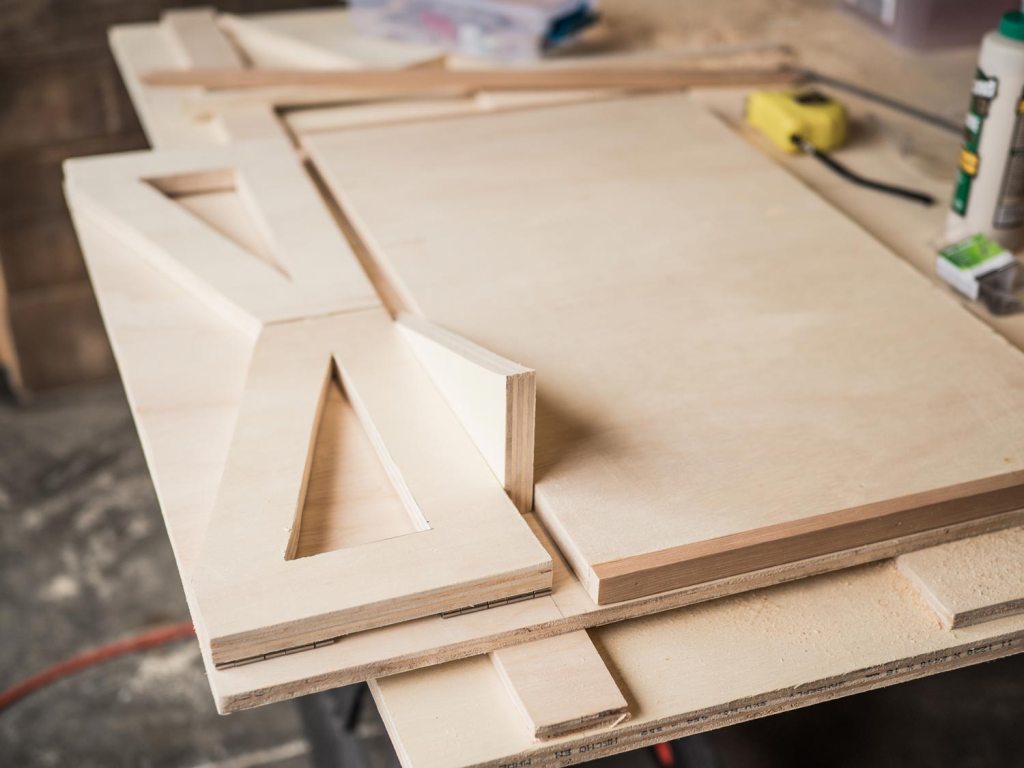 Fold the supports down flat and place the table flat on the backboard above them. Make sure to leave clearance between the tops of the supports and the table to accommodate the thickness of the table when it folds open (you can place a piece of plywood that’s the same thickness as your table in between the tops of the supports and your table to maintain the appropriate clearance). Mark the edge of the table.
Install hinges on the top side of the table.
8. Add support closure
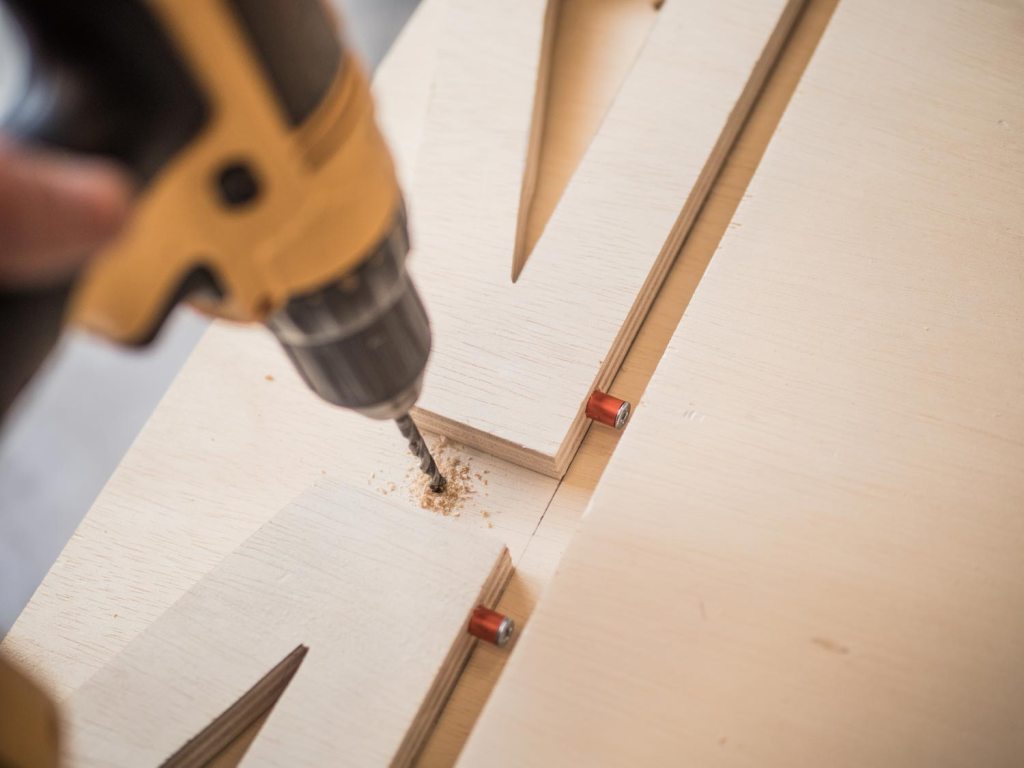
Using the 3/16 inch drill bit, drill a hole directly between the folded-down supports.
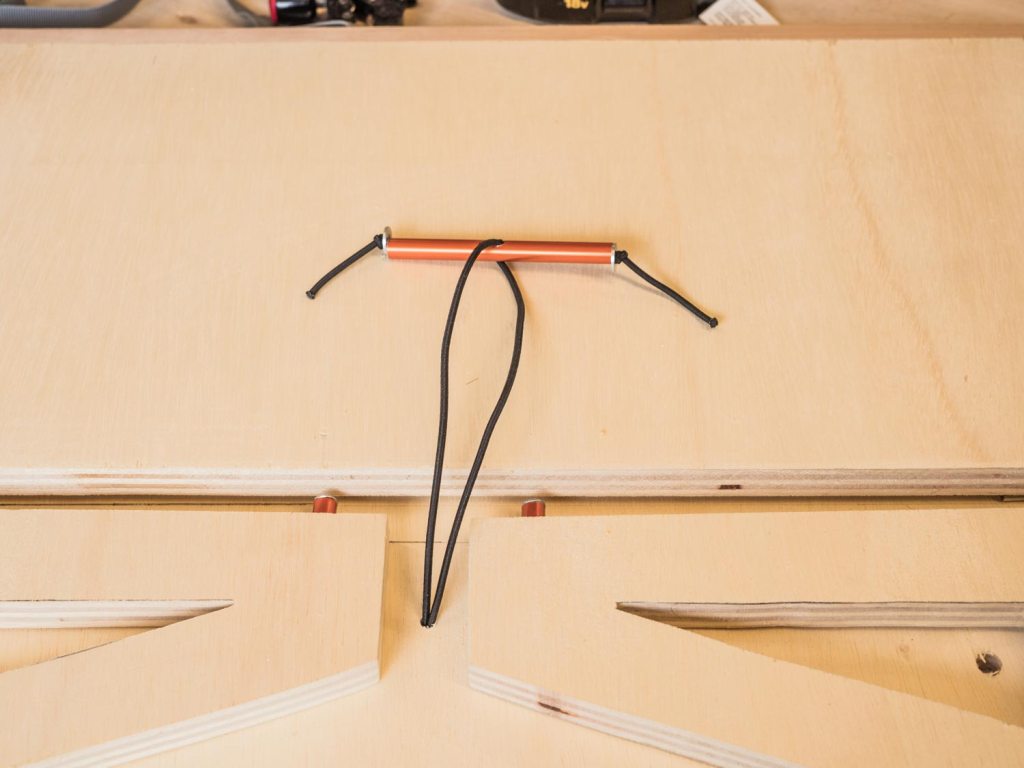
Thread some elastic cord through a piece of tent pole, large washer or similar item and feed the two free ends through the hole to the back of the backboard.
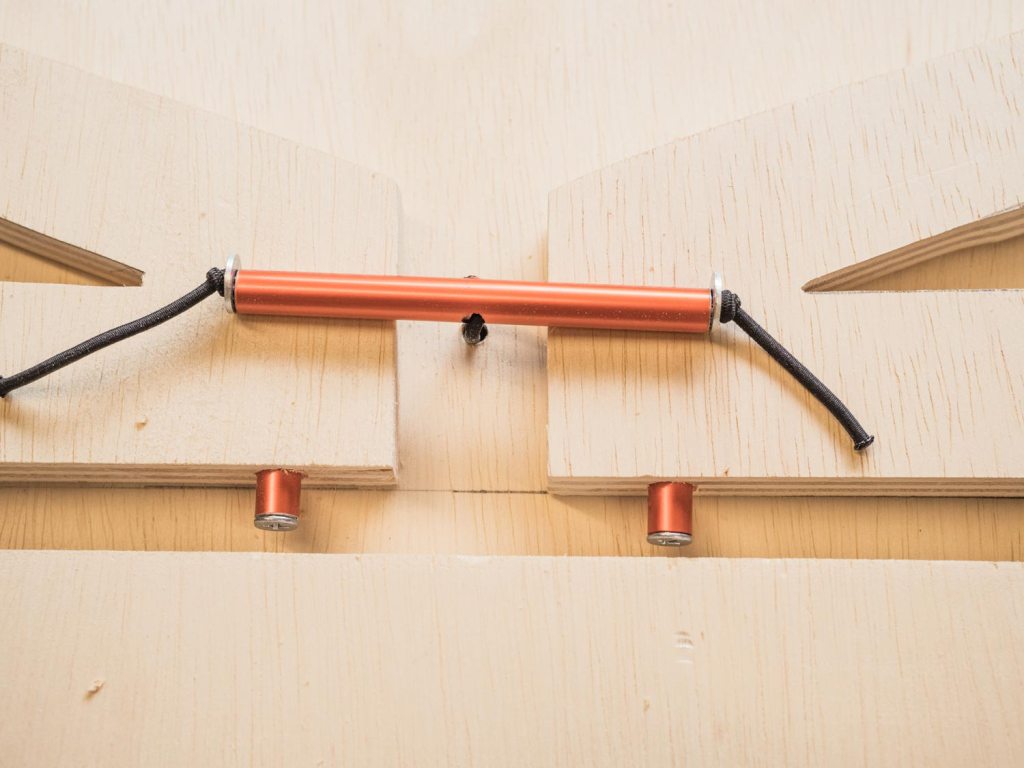
Pull the cord taut so the pole or washer sits snugly against the front of the supports, holding them securely in place. Thread a small washer onto the free cord ends and knot.
9. Add webbing
Cut two lengths of ¾ inch webbing or similar. The combined length of the two pieces (connected with a buckle or slider) will depend on the size of your table; it needs to be long enough to run around the width of the table with 4 inches or so of wrap-around on each side.
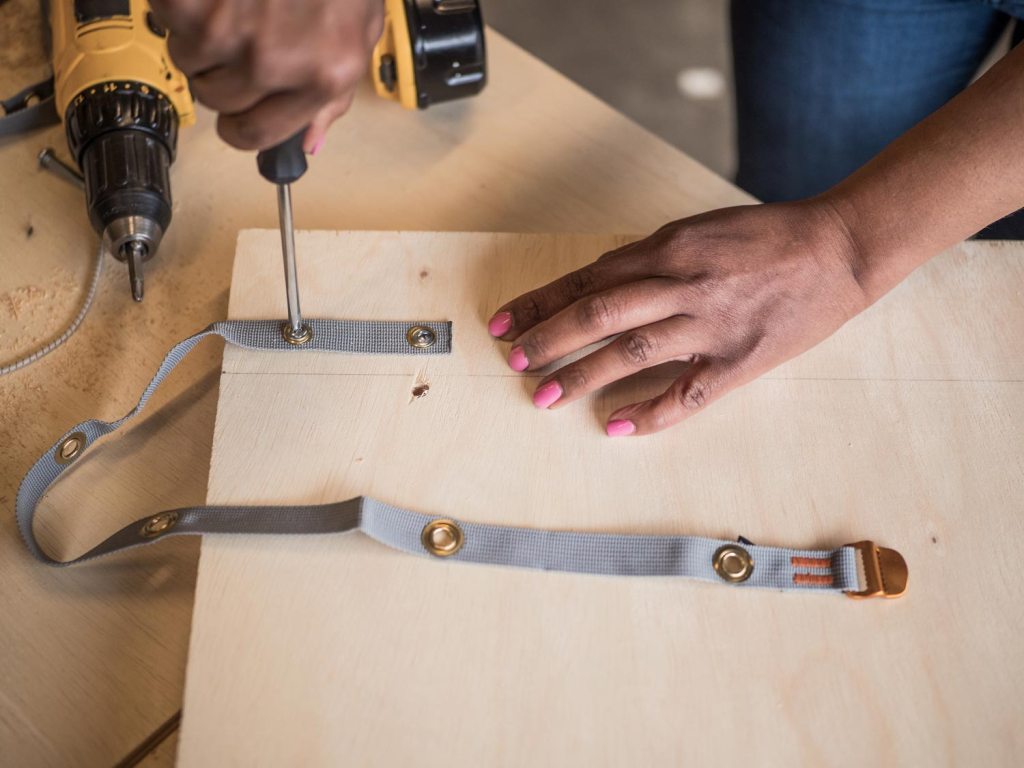
To secure the webbing pieces to the backboard, install two grommets on one end of each piece of webbing. Screw the grommets into the upper back of the backboard so they wrap around the folded-up table. Use a buckle or slider to attach the two webbing pieces and secure the table in place. We added a few extra grommets across the front of our webbing to hang things like utensils.
10. Attach table to vehicle door
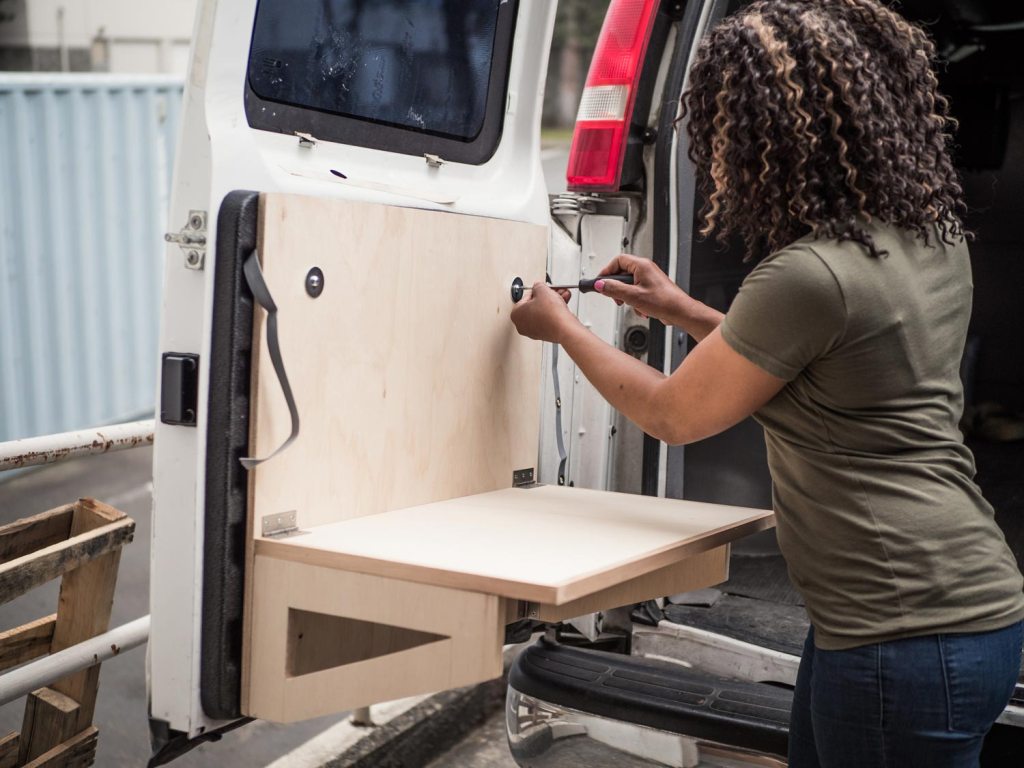 Fold the table down by unclipping the webbing. Have someone hold the backboard up. Thread a 2 inch ¼-20 screw through a washer and screw it into the door (or door support if you followed step 3). Repeat on all four corners of the backboard. To install the bottom two screws, it will be easiest if you fold the table up, but leave the supports unfolded.
11. Add extras and repeat
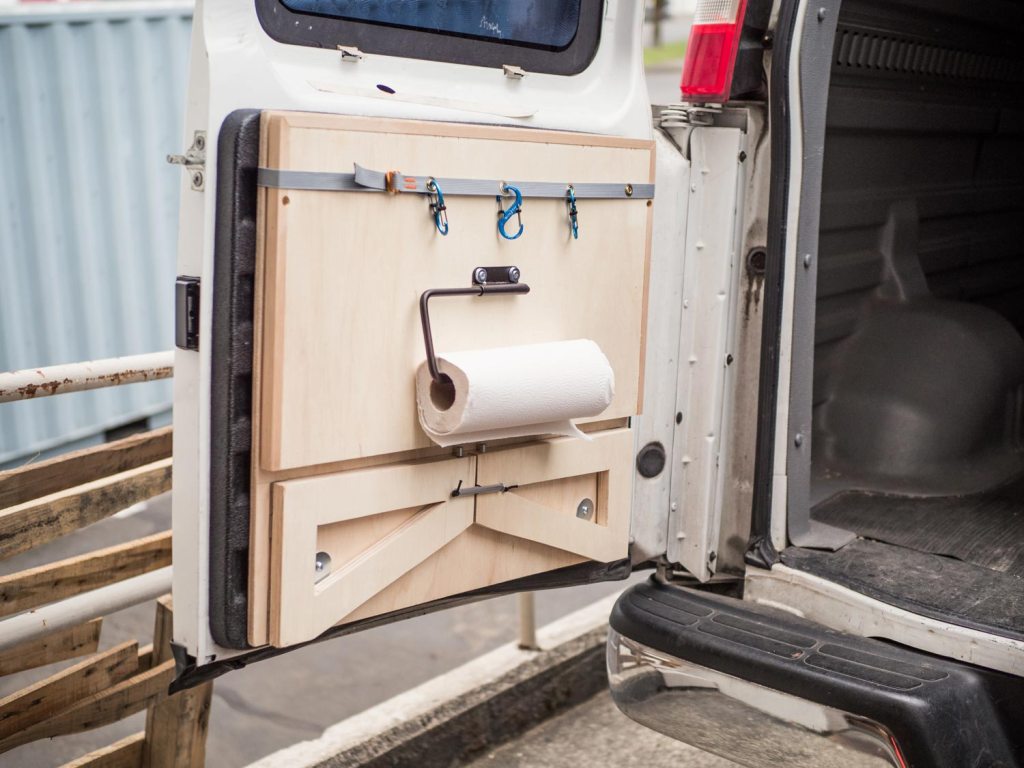 Feel free to add accessories to your table, like a paper towel holder and mini carabiners for hanging utensils. To make a second table, repeat the process, adjusting the measurements as necessary for the other door.
12. Dinner time
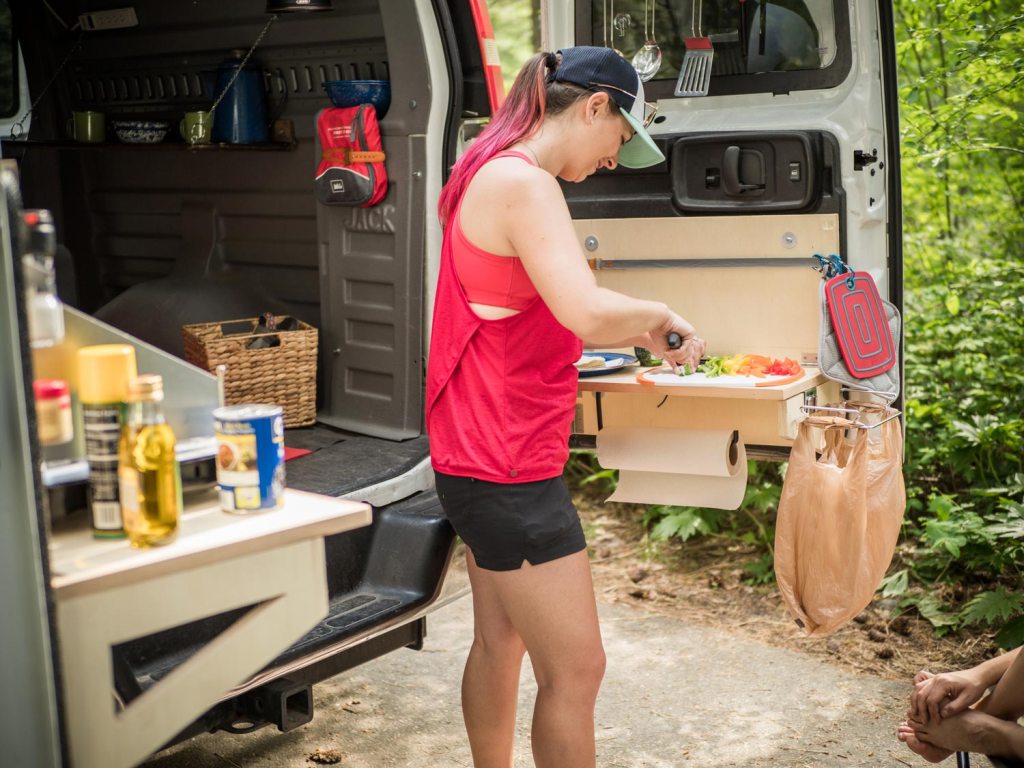 Find yourself a sous chef and get ready to whip up a gourmet camp meal that will delight your friends. Check out our selection of car camping recipes for inspiration on your next trip.
Van Life Storage Hacks
1. Safety first
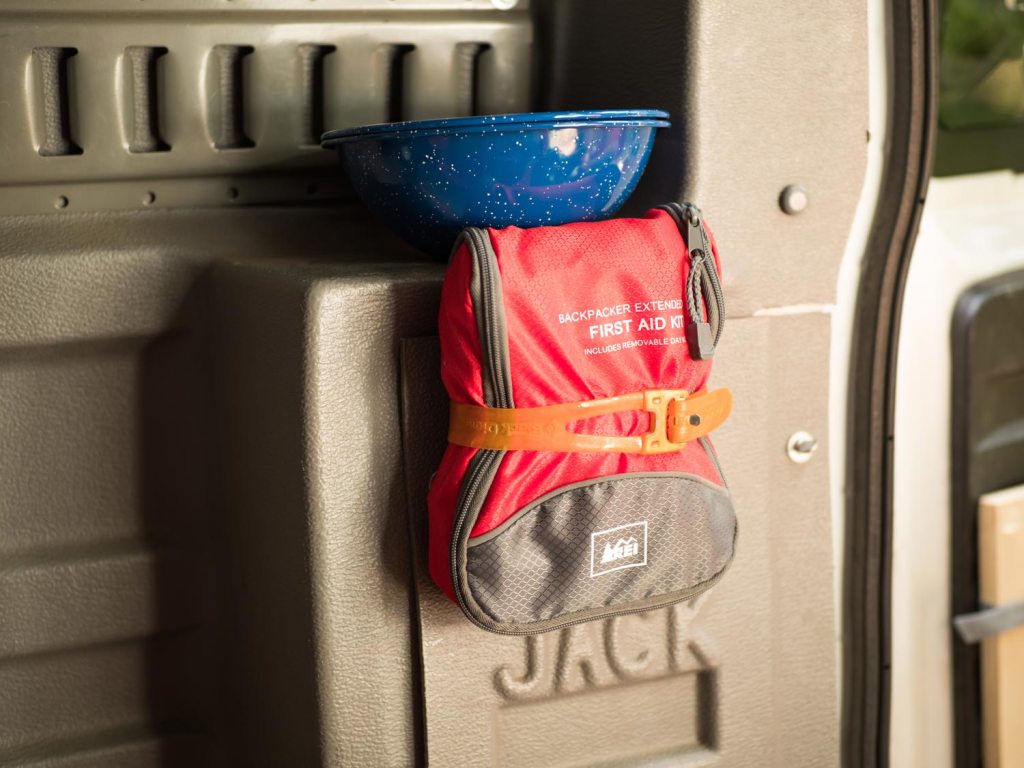 Always have quick access to your first aid supplies by screwing a ski strap or web with a slider to a wall of your vehicle and securing your kit.
2. Mise en place
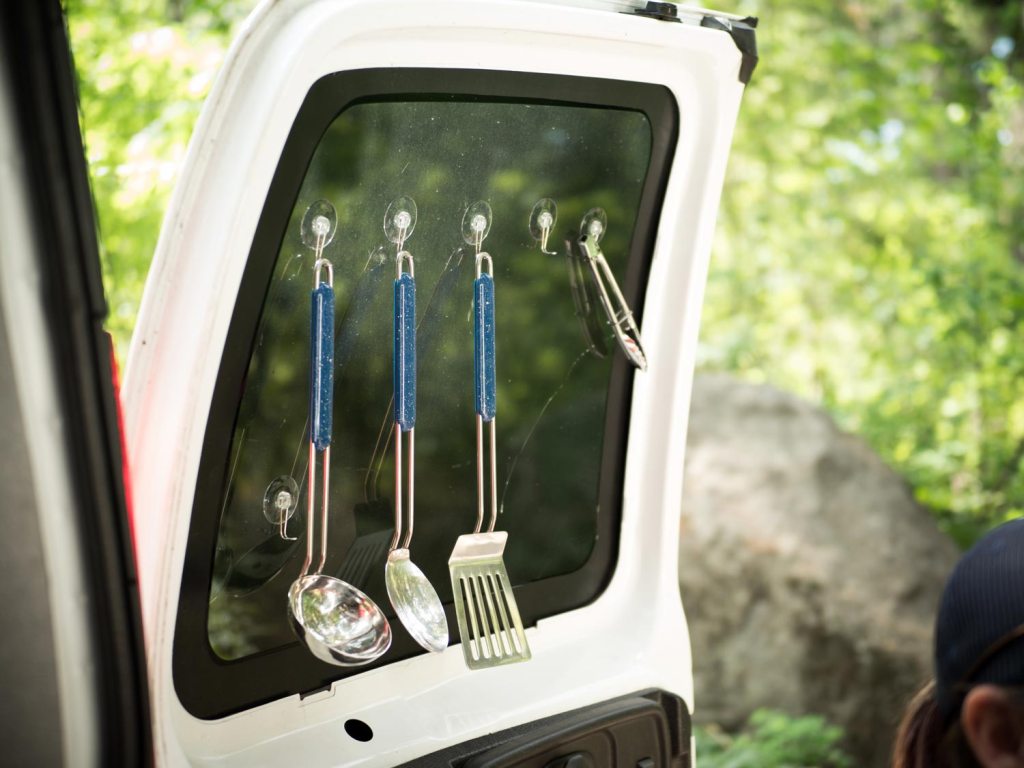 Adhesive hook and loop pieces, cut to size and placed wherever you need to keep something on hand, are perfect for smaller items like spices that can be easy to lose. Suction cup hooks hold hanging items when your vehicle is stationary for easy access when cooking.
3. Taking on cargo
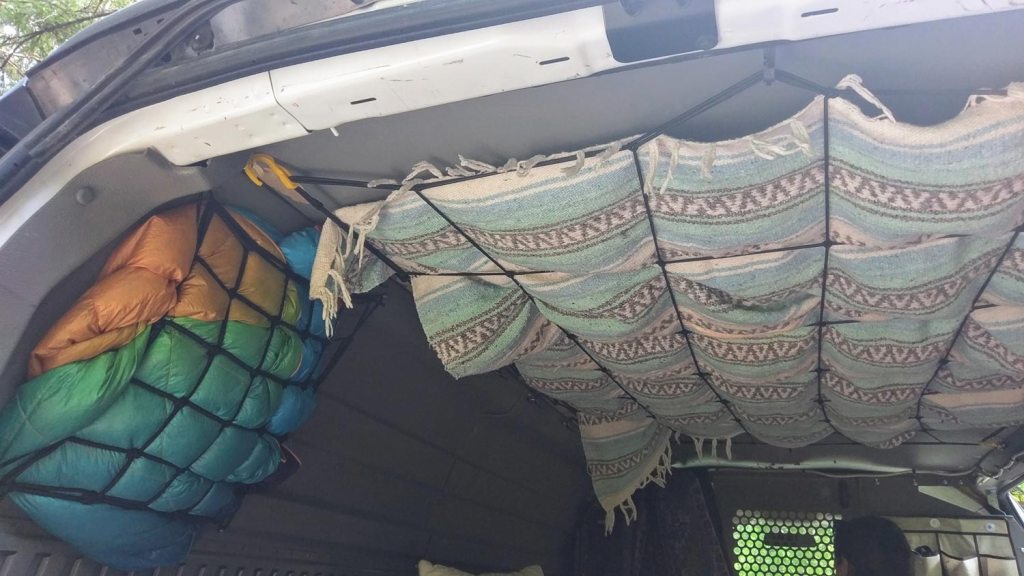
Hang a cargo net to use the ceiling space in your vehicle. D-rings snapped into rubber cable guides, available at any hardware store, let you install loops where you need them to fit. Remember: only store lightweight items in overhead nets.
4. Deep pockets
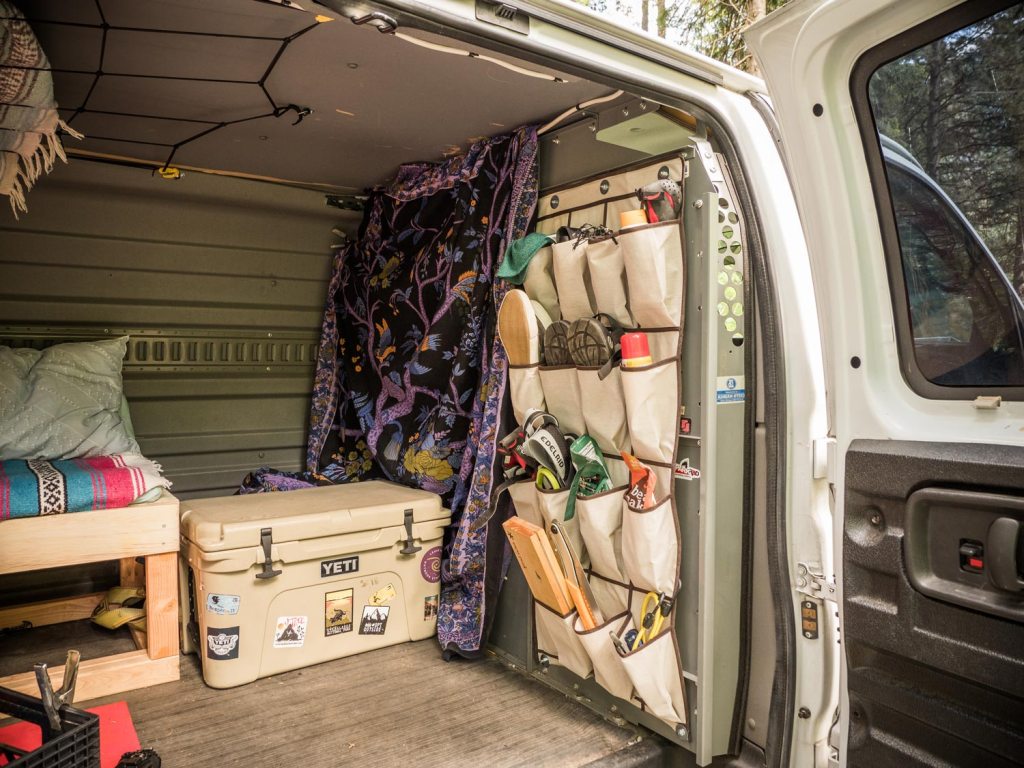
A door-hanging shoe rack is a great organizational tool for van life. Secured in place with screws or D-rings, the multitude of pockets can hold everything from shoes to fuel canisters to camping gear.
5. Oh snap
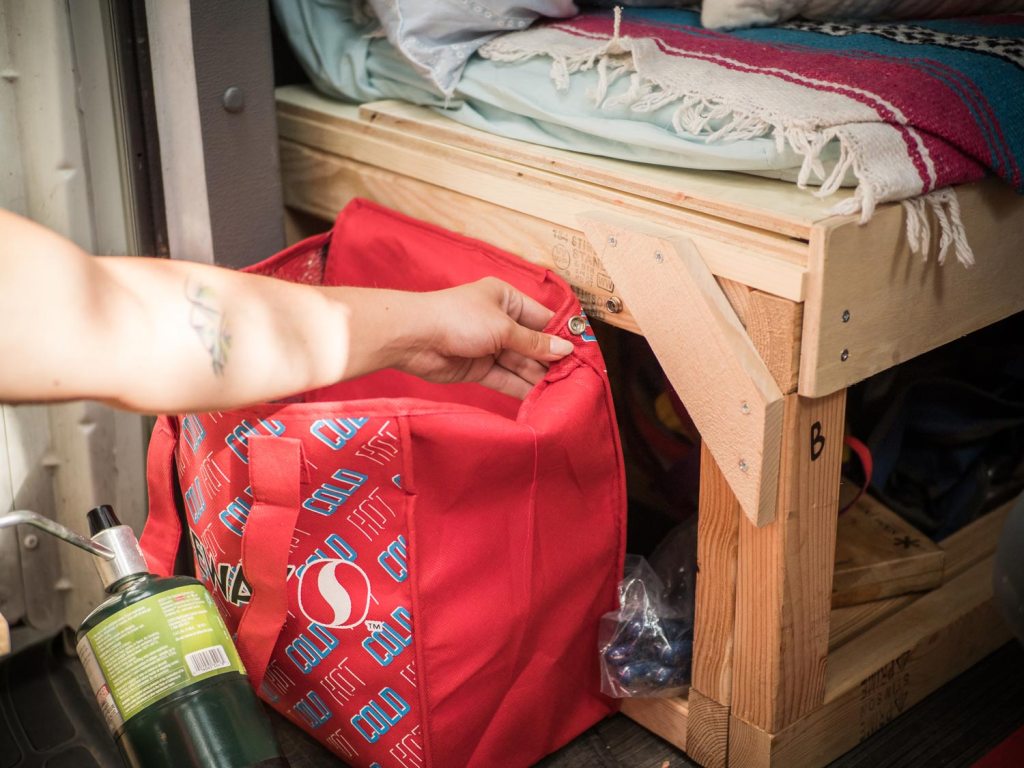
Reusable tote bags can make quick and easy compartments for miscellaneous items when snapped to a bed frame or vehicle wall with screw-in snaps, found at a hardware store.
6. Think inside the box
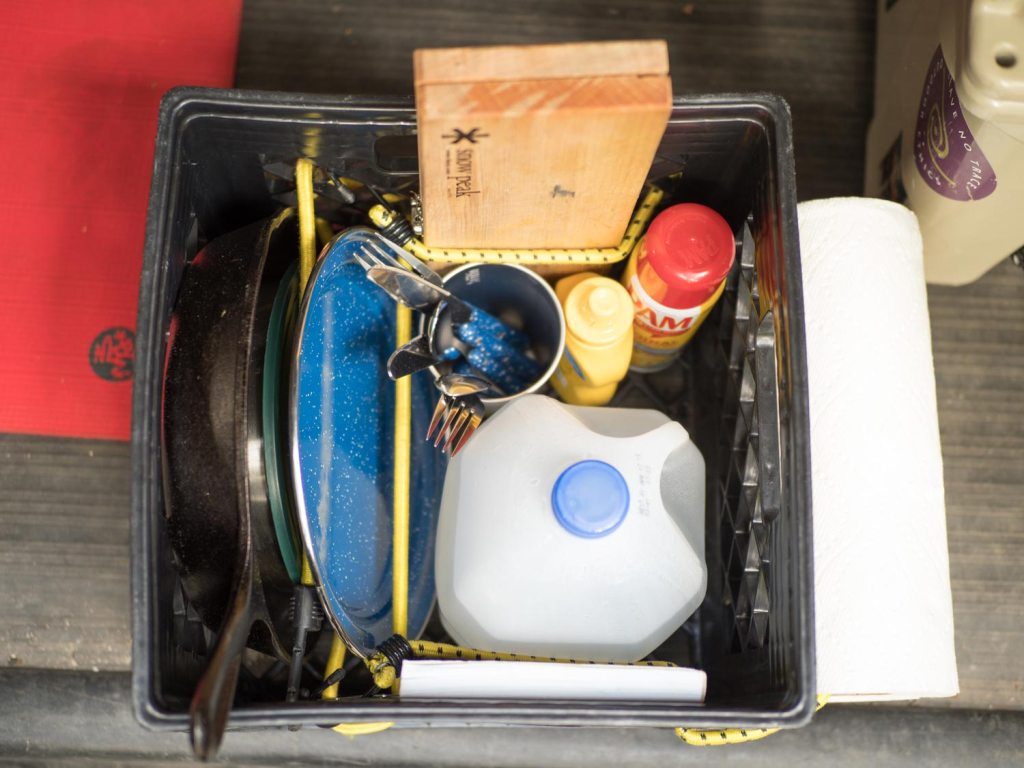
Milk crates or similar open-sided boxes can secure dishes and other rattle-prone items with the simple addition of bungees or elastic cord.

